Window deflectors are designed for a specific compromise: you can open the side window slightly to bring in air while keeping ordinary vertical rain from falling directly into the cabin. They do not turn an open window into a weatherproof opening. Diagonal rain, strong crosswinds, and water running from the roof can still reach the glass or interior.
The same accessory can also change the vehicle in less welcome ways. Depending on the design and fit, it may add wind noise, reduce part of the view near the A-pillar, leave dirt along the upper glass edge, or interfere with a power window’s automatic closing and pinch protection. Installation matters as much as the shape of the deflector, especially for in-channel models that must settle before normal window use.
- What Window Deflectors Actually Do in Rain
- In-Channel vs. Tape-On Deflectors: Which Fit Makes Sense?
- Installation Details That Decide Whether They Work
- Power Windows, Pinch Protection, and the First Test
- Real-World Rain Problems: Roof Runoff, Stops, and Turns
- The Trade-Offs: Visibility, Wind Noise, Dirt, and Drainage
- How to Judge a Deflector Before Buying
- Frequently asked questions
- What are people saying about WeatherTech side window deflectors?
- What are the best side window deflector brands?
- How should window deflectors be cleaned?
What Window Deflectors Actually Do in Rain
A window deflector forms a small shield along the upper edge of the side window. With the glass lowered slightly, the shield redirects some falling water away from the opening and lets air enter the cabin. The useful opening is usually small, because lowering the glass farther exposes more of the interior to wind and rain.
This arrangement works best in light or vertical rain. It provides basic protection while the vehicle is moving or parked, provided the rain is falling mostly from above and the window is only slightly open. The deflector cannot seal the gap against diagonal rain, strong side streams, or spray driven across the vehicle by wind.
Roof runoff creates a separate problem. Water can travel from the roof along the A-pillar and reach the window area even when the deflector is correctly installed. Braking or turning can change the water’s path, so a dry cabin during a stationary test does not prove that the opening will stay dry on the road.
The practical benefit is greatest for frequent ventilation, people who smoke, and vehicles carrying pets. Those uses involve keeping a small opening available for longer periods. A driver passing briefly through a heavy downpour gains less, because strong rain and crosswind can overwhelm the shield quickly.
In-Channel vs. Tape-On Deflectors: Which Fit Makes Sense?
In-channel models sit inside the window channel, where the glass normally travels. Their appearance is relatively integrated, but their fit depends on the exact width and shape of the seal and channel. The channel must be clean and dry before installation, since dirt, moisture, wax, or residue can affect seating and window movement.
| Design | Installation location | Preparation | Fit sensitivity | Main consideration |
|---|---|---|---|---|
| In-channel | Inside the window channel | Clean and dry the channel; seat the flange evenly | High, because the glass and seal share the channel | Integrated fit, with possible interaction with glass travel and automatic closing |
| Tape-on | Exterior window frame | Clean and prepare the exterior mounting surface according to the instructions | Dependent on frame shape, adhesive contact, and alignment | Does not occupy the channel in the same way, but requires accurate exterior positioning |
Tape-on models attach to the exterior around the window frame, usually with an adhesive mounting surface. Their procedure differs from an in-channel installation, so the cleaning method, positioning, and waiting period must come from the instructions for that product. Procedures and curing expectations cannot be transferred from one construction type to the other.
Vehicle-specific geometry matters around the mirror, A-pillar, roofline, and upper door frame. A universal deflector may leave an awkward gap, cross the mirror’s viewing area, or place water directly in the path of the glass. A product that technically fits the door can still be a poor choice if it changes the sightline or conflicts with the window channel.
For that reason, fitment for the exact vehicle is a stronger selection basis than a general claim about rain protection. Check the model year, body style, door configuration, mirror position, and installation type. A small difference in roof or pillar shape can change water drainage and wind noise substantially.
Installation Details That Decide Whether They Work
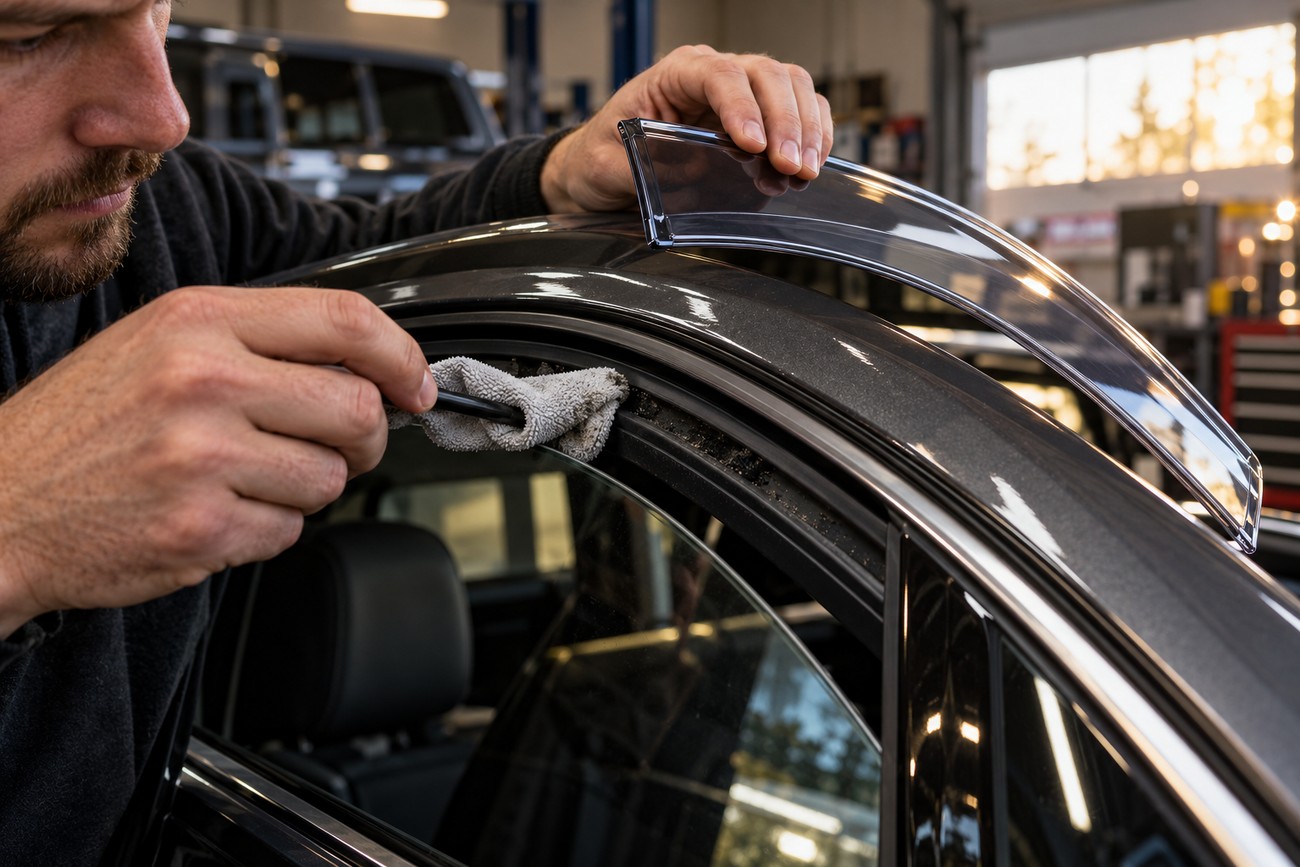
Begin with the manufacturer’s instructions for the exact model. For an in-channel deflector, clean and dry the entire window channel before fitting. A useful approach is to wrap a soft cloth or paper towel around a suitable narrow tool and work through the channel carefully, removing grit and residue without cutting or stretching the seal.
Seat the deflector’s flange evenly rather than forcing one corner into place first. A skewed flange can twist the deflector, press the seal unevenly, and interfere with the glass. Excessive pressure also increases the chance of damaging the rubber channel or leaving the accessory under tension.
Many in-channel models require the windows to remain closed for 12–72 hours after installation, depending on the manufacturer and specific product. This period allows the deflector and seal to settle into position. Product marketing may imply immediate use, but the manufacturer’s written instructions take priority if they require a 12–72-hour settling period.
After fitting, inspect the full length of the flange and check that the deflector follows the window frame without a visible twist. Move the glass only as permitted by the instructions during the settling period. If the window binds, reverses, or contacts the deflector, stop and correct the fit before continuing.
Power Windows, Pinch Protection, and the First Test
A power window can interpret a newly installed deflector as an obstruction. Automatic closing may reverse, stop early, or apply pressure to the accessory, while pinch protection may react differently from normal operation. This is a fit and safety issue rather than a minor inconvenience.
Some manufacturer instructions require the window to be closed manually during installation or call for a temporary approved workaround for pinch protection. Follow that specific procedure only as written. Do not permanently bypass a safety system, and do not improvise a reset sequence that the manufacturer does not describe.
Before normal driving, check the deflector’s alignment, the seal, and the complete glass path. The glass should move without scraping, catching, or forcing the deflector out of position. Check automatic operation only when the instructions allow it, then repeat the inspection after the settling period.
A problem that appears only at the top of the travel can be missed during a quick test. Watch the final closing movement, listen for unusual motor strain or contact, and confirm that the glass seals evenly. Any interference should be resolved before the vehicle is used with the window open in rain.
Real-World Rain Problems: Roof Runoff, Stops, and Turns

Rain testing should begin with a wet vehicle, especially a wet roof and A-pillar. Water may run down the A-pillar and enter the window area despite the deflector. This is why a vehicle that stays dry during a parked rain test can still drip into the cabin after it moves.
Driving changes the water path. Braking shifts water toward the front of the opening, while turning can move it sideways along the roof and glass. Strong crosswind or heavy rain can also drive water under the deflector, so the accessory does not guarantee a dry cabin when the window is open.
One common failure appears after driving: the deflector and upper door area hold water, and lowering the window releases drops into the cabin. Test this deliberately after the vehicle has been moving in wet conditions. Lower the glass gradually and observe where the stored water travels before using the accessory routinely.
A useful evaluation includes wet-road driving, braking, turning, and window lowering after the drive. Check the mirror and the top of the door panel for water tracks. Testing only while parked measures the shield’s position, while real driving reveals roof runoff, drainage, and water retained around the moving glass.
The Trade-Offs: Visibility, Wind Noise, Dirt, and Drainage
The deflector occupies part of the area near the A-pillar. Depending on its thickness, tint, and position, it can make the pillar area appear wider or reduce part of the side-zone view. Tall drivers may notice the change more strongly because their seating position can align the accessory with the mirror or near-side traffic area.
Check the view from your normal driving position before accepting the fit. Look through the corner near the mirror, scan for a vehicle approaching from the side, and confirm that the deflector does not cover a critical sightline. A visually minor obstruction while parked can become more distracting during lane changes or turns.
Aerodynamic results vary by vehicle and installation. Some setups reduce perceived turbulence around a slightly open window, while others create more wind noise, whistling, or vibration. Crooked alignment, a loose edge, or a gap near the A-pillar can make the sound worse even when the product itself is suitable.
Dirt is another practical cost. The upper glass edge and the seal channel can retain grime and become harder to clean. Water may also travel in a strip across the side glass and obstruct the mirror view, particularly when the roof and glass are already wet.
These effects are selection criteria rather than minor afterthoughts. If a deflector blocks the mirror area, produces persistent vibration, or leaves the window dirty where you need a clear view, its rain benefit may not justify the compromise. Cleaning access and sightlines should be checked before permanent use.
How to Judge a Deflector Before Buying

Start with the intended use. Frequent ventilation, smoking, or carrying pets can justify a well-fitted deflector because the small opening is useful over time. Brief driving through a heavy downpour places more demand on weather protection than this accessory is designed to provide.
Confirm the exact vehicle fit, body style, window shape, A-pillar geometry, and mirror position. Look for installation information that identifies whether the product is in-channel or tape-on, and check the required settling period. Clear instructions and replacement support are practical advantages if a part arrives damaged or the fit is incorrect.
Owner reviews are most useful when they concern the same vehicle and installation type. Sort comments into fit, water behavior, wind noise, visibility, and power-window issues rather than treating an overall rating as universal proof. Feedback about one vehicle shape cannot establish identical performance on another.
Reject a product if it requires forcing the window, sits crooked, blocks a critical sightline, or conflicts with the manufacturer’s installation instructions. A return or replacement option is especially valuable for accessories whose final noise and drainage behavior depend on precise body geometry. No brand can guarantee identical rain protection, noise levels, or visibility across every vehicle shape.
Frequently asked questions
Window deflectors perform differently depending on the vehicle, fit, installation type, and weather conditions. The most useful evaluations focus on those details rather than broad claims or overall ratings. The questions below address common concerns about product choice, user feedback, and maintenance.
What are people saying about WeatherTech side window deflectors?
Feedback should be read as vehicle- and installation-dependent user experience. Separate comments about the product’s design from reports tied to a specific vehicle, then sort them by fit, water behavior, noise, visibility, and power-window operation.
Several detailed reviews about the exact vehicle and body style are more useful than a broad average rating. Give extra weight to reports that describe the installation type, the settling procedure, and what happened during rain, braking, turning, and window lowering. A positive result on one vehicle does not prove identical performance on another.
What are the best side window deflector brands?
There is no single best brand for every vehicle. The stronger choice is the product with verified fit for the exact vehicle, clear installation instructions, stated curing or settling requirements, and suitable replacement support.
Compare reviews for the same vehicle rather than relying on a generic brand ranking. Check whether users mention forced glass movement, wind noise, blocked sightlines, water tracks, or automatic-window conflicts. Those details reveal compatibility more reliably than a universal claim about rain protection.
How should window deflectors be cleaned?
Clean both the visible deflector edge and the upper section of the glass with a non-abrasive method. Use a soft cloth and a cleaner suitable for the accessory and the vehicle’s glass or finish, avoiding tools that can scratch the deflector or stretch the seal.
Before operating the window, check for trapped grit in the channel and along the upper glass edge. Remove loose dirt carefully, then inspect the deflector for cracks, looseness, or a changed position. Abrasive debris can increase friction and make a previously acceptable fit interfere with window movement.