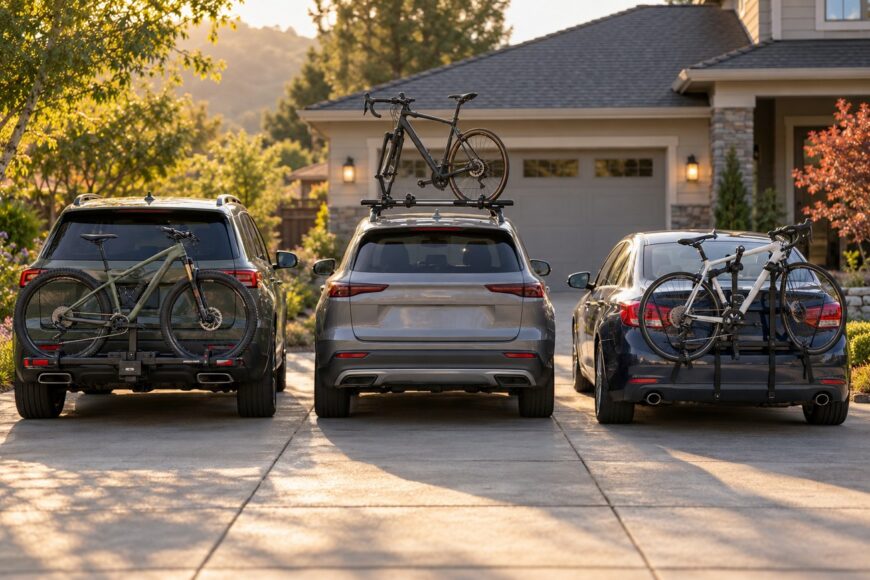
A bike rack can carry the stated number of bicycles and still be wrong for your vehicle, your bikes, or the places you drive. The deciding limits may come from the hitch, roof, trunk lid, frame shape, bicycle weight, or the clearance needed for a garage and parking structure. A four-bike rating on the rack does not override a lower vehicle limit.
Each mounting style trades one kind of effort for another. Hitch platforms usually make loading easier while adding rear overhang and weight; roof carriers preserve rear access while raising the lifting height and vehicle profile; trunk racks avoid permanent hardware while placing more responsibility on fit, straps, and painted body panels. Your regular route and storage routine matter as much as the number of bikes.
Read the vehicle manual, rack instructions, and local road rules together before buying. That check is especially important for e-bikes, carbon frames, step-through designs, fat tires, and vehicles with spoilers, parking sensors, or vertically opening tailgates.
- Hitch, roof, and trunk bike racks at a glance
- Hitch racks: easier loading, but mind the weight and rear overhang
- Roof racks: clear rear access, higher lifting and height risks
- Trunk racks: lower upfront commitment, more contact points
- Check vehicle limits and bike fit before you buy
- Load, drive, and maintain without expensive surprises
- Frequently asked questions
- What is the best trunk-mounted bike rack for my car?
- How should I store a bike rack between trips?
- What is the best trunk-mounted bike rack?
Hitch, roof, and trunk bike racks at a glance
The figures below are illustrative ranges, not universal ratings. The product manual, vehicle manual, hitch specifications, and local regulations take precedence.
| Mount type | Typical capacity | Vehicle prerequisites | Loading and access | Most easily missed drawback |
|---|---|---|---|---|
| Hitch | Commonly 2–4 bikes; cited combined bike-load range of 60–80 kg, subject to the rack and vehicle | Compatible receiver and sufficient vertical-load rating | Low to moderate lifting; some platforms tilt for tailgate access | Rear overhang, reduced departure clearance, and possible obstruction of lights, plate, camera, or sensors |
| Roof | Commonly 1–2 bikes per setup; cited per-bike limits of 17–25 kg | Compatible crossbars and roof-load approval | High lifting effort; rear cargo access remains clear | Added vehicle height, wind noise, and damage risk at low clearances |
| Trunk | Commonly 2–3 bikes; cited combined bike-load limits around 30–45 kg | Exact vehicle-and-rack fit, suitable strap anchors, and approved spoiler clearance | Moderate lifting; trunk access is often restricted | Paint abrasion, panel loading, and frame contact between closely packed bikes |
Hitch racks: easier loading, but mind the weight and rear overhang
Hitch racks are usually the easiest option for loading heavy bicycles because the bikes sit around waist height. Platform designs support the tires and generally keep bicycles separated, which reduces frame-to-frame contact. Hanging designs are lighter and can be compact, although they rely more heavily on frame geometry and may need adapters for step-through or unusual frames.
A common hitch-rack capacity is 2–4 bikes, with a cited combined bike-load range of 60–80 kg. Those figures describe the rack’s capability under its own conditions. Some vehicle manuals specify a 75–90 kg vertical-load limit, and that limit may include the rack itself as well as the bikes. A pair of heavy e-bikes can therefore exceed the vehicle’s allowance even when the rack appears suitable.
Typical e-bikes in this range weigh 23–30 kg each, so an e-bike-compatible label and a per-bike limit deserve separate checks. Battery removal may reduce lifting weight, but it does not automatically change the rack’s permitted load or make a non-approved rack suitable. Check how the rack contacts the tires, frame, and wheels before assuming that every bicycle can share one platform.
Receiver play is another source of concern. An anti-wobble device or integrated stabilizer can reduce movement, while a loose or poorly fitted receiver may let the rack sway and amplify contact between bikes. A tilt function is valuable when a tailgate must open, yet it does not eliminate the need to check the door’s path, the rack’s loaded clearance, and the manufacturer’s instructions.
Long platforms increase leverage behind the hitch. The load acts farther from the receiver, and the rear of a vehicle may dip more than expected, especially with four bikes or a heavy platform. A low rack can also scrape on steep driveways, ramps, or rough tracks, including when it is empty. Follow the vehicle, hitch, and rack instructions rather than relying on the rack’s advertised capacity alone.
Roof racks: clear rear access, higher lifting and height risks
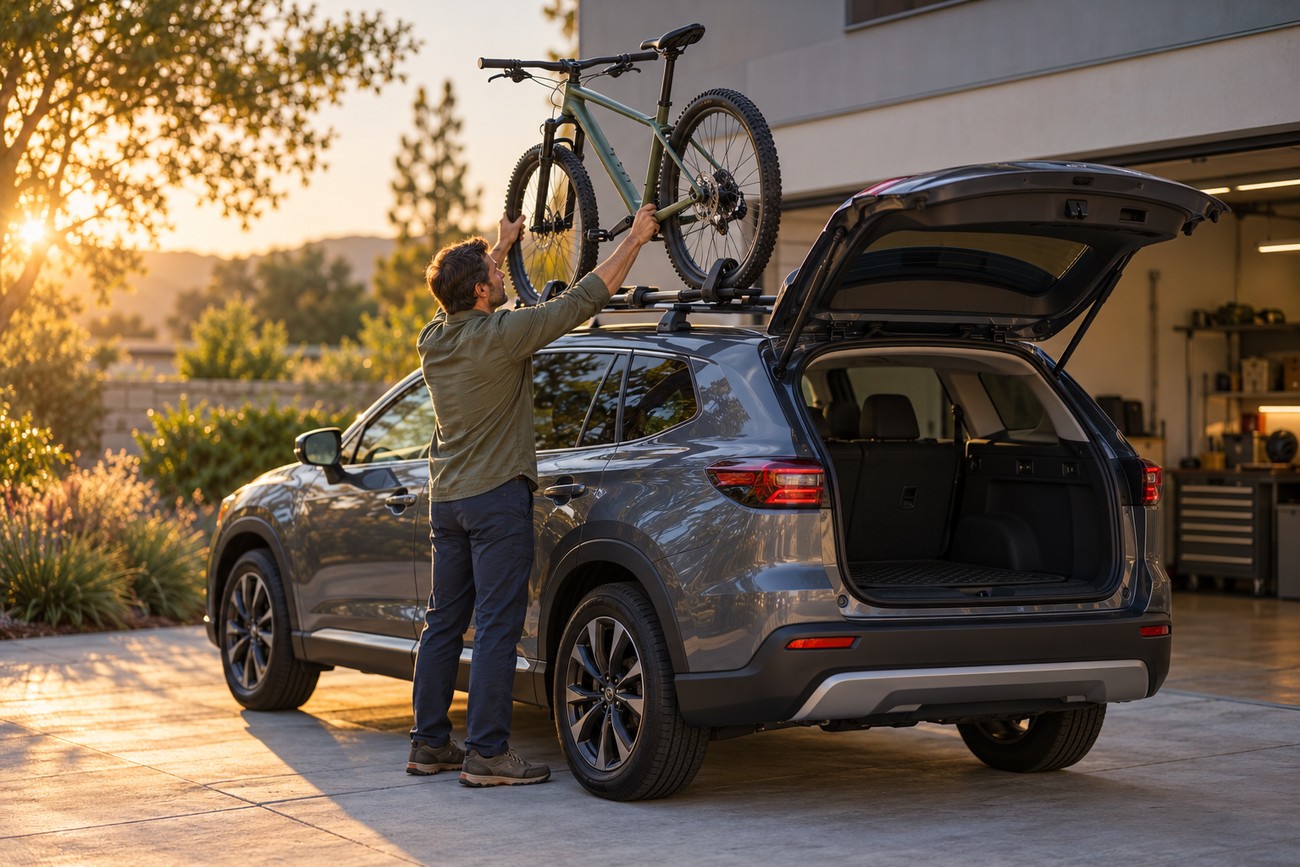
Roof mounting keeps the rear hatch, trunk, and trailer connection available. It can suit a light bicycle, a vehicle with suitable crossbars, and journeys where rear access matters. The physical work changes once the vehicle is tall: lifting a bike above shoulder height is awkward, and the risk increases if the bike is heavy or the ground beside the car is uneven.
Roof mounts commonly carry 1–2 bikes per setup, with cited per-bike limits of 17–25 kg. Illustrative vehicle roof-load limits are 50–75 kg, including crossbars, carriers, bikes, and other roof cargo. The vehicle’s roof rating controls the combination, so count the crossbars and carriers before adding bicycles, boxes, or other equipment.
Wheel-clamp carriers avoid removing the front wheel and can simplify loading, provided the tire width and wheel size fit the carrier. Axle-mounted designs may offer a firm connection, but the axle standard must match the bicycle: examples include QR, 12×100, and 15×110. A through-axle carrier that looks similar to the correct model can still be unusable if its interface is wrong.
Roof equipment can add wind noise even without a bicycle and can increase fuel use on longer drives. More importantly, a loaded roof-mounted bike can add roughly 30–40 cm to the vehicle height in the illustrative estimate above. Measure the actual height of your loaded vehicle, including the rack and bicycle, and place a physical reminder where you will see it before entering a garage or low parking area.
Rear access remains a major advantage, yet it does not compensate for an impractical lifting routine. If loading requires standing on a slippery sill or twisting a heavy e-bike overhead, the arrangement may be unsuitable for regular use. A rack that is easy to leave installed can become a costly mistake after one forgotten height restriction.
Trunk racks: lower upfront commitment, more contact points
Trunk-mounted racks appeal to occasional riders because they require no hitch receiver and may avoid buying crossbars. Some fold away when the trip is over and can work well for a vehicle listed in the rack maker’s fit guide. Their suitability depends on the exact hatch, trunk lid, spoiler, and strap locations, rather than on a general description such as “fits sedans and SUVs.”
Trunk mounts commonly carry 2–3 bikes, with cited combined bike-load limits around 30–45 kg. The rack’s own instructions determine where the upper, lower, and side straps must sit and which body edges may support them. Plastic spoilers, thin panel edges, unusual hatch shapes, and unsuitable anchor points can rule out a rack that appears to fit when viewed in a shop.
Padded contact points reduce direct rubbing, though padding is not a guarantee against damage. Dirt trapped between a pad and the paint can act like abrasive material, while strap tension can load a body-panel edge or leave marks on a bumper. Clean the contact surfaces before installation, protect vulnerable areas as allowed by the instructions, and inspect the paint and panel edges after the first trip.
Frame geometry can create another problem. A step-through, children’s, or unusually shaped frame may hang at an angle or sit too close to the vehicle, requiring an approved adapter. Even compatible bicycles can touch one another when the advertised maximum is loaded, especially at the handlebars, pedals, saddles, and brake cables. Space the bicycles deliberately and use the prescribed retention points rather than treating the capacity number as a guarantee of comfortable separation.
Trunk racks also limit access to the cargo area. Opening a hatch may be impossible while the rack is loaded, and some sedans require partial removal before the trunk can be used. Plan for that inconvenience if tools, luggage, or a child’s equipment must be reached during the journey.
Check vehicle limits and bike fit before you buy
Start with the vehicle, then evaluate the rack. Confirm whether the vehicle is approved for the mounting method, whether the hitch or crossbars are present and compatible, and which limits apply to the complete loaded assembly. A rack’s advertised capacity establishes what the rack may carry under specified conditions; it does not establish what every vehicle can carry.
For a hitch system, identify the vehicle’s vertical-load limit and determine how the instructions treat the carrier’s own weight. Some vehicle manuals specify a 75–90 kg vertical-load limit, but that is an example rather than a universal hitch rating. Add the carrier and the bicycles as required by the relevant instructions, then consider the distance from the receiver to the center of the load.
A four-bike platform can fail the vehicle check even when each bicycle fits the trays: the carrier’s own mass, the loaded bicycles, and the extra leverage from a long rearward extension must all remain within the applicable instructions.
Next, weigh each bicycle in the configuration used for transport. Typical e-bikes in this range weigh 23–30 kg, so verify both the per-bike limit and explicit e-bike compatibility. Removing a battery may help with handling, but only the rack and vehicle documentation determines whether the loaded arrangement is permitted.
Inspect every contact point before choosing the final design. Carbon tubes, step-through and children’s frames, and fat tires can require different supports or adapters. Marketing language about broad frame compatibility does not replace a diagram showing where the bicycle is held. Carbon frames deserve particular care around concentrated clamping forces; a wheel- or axle-based design may be preferable where the instructions allow it.
Make a short compatibility sheet before ordering:
- Vehicle model, model year, body style, and spoiler configuration.
- Hitch class or crossbar type, receiver size, and vehicle load limit.
- Rack weight, total bicycle weight, and per-bike limit.
- Frame shape, tire width, axle standard, and any battery-removal requirement.
- Tailgate, trunk, camera, sensor, plate, and rear-light clearance.
Load, drive, and maintain without expensive surprises
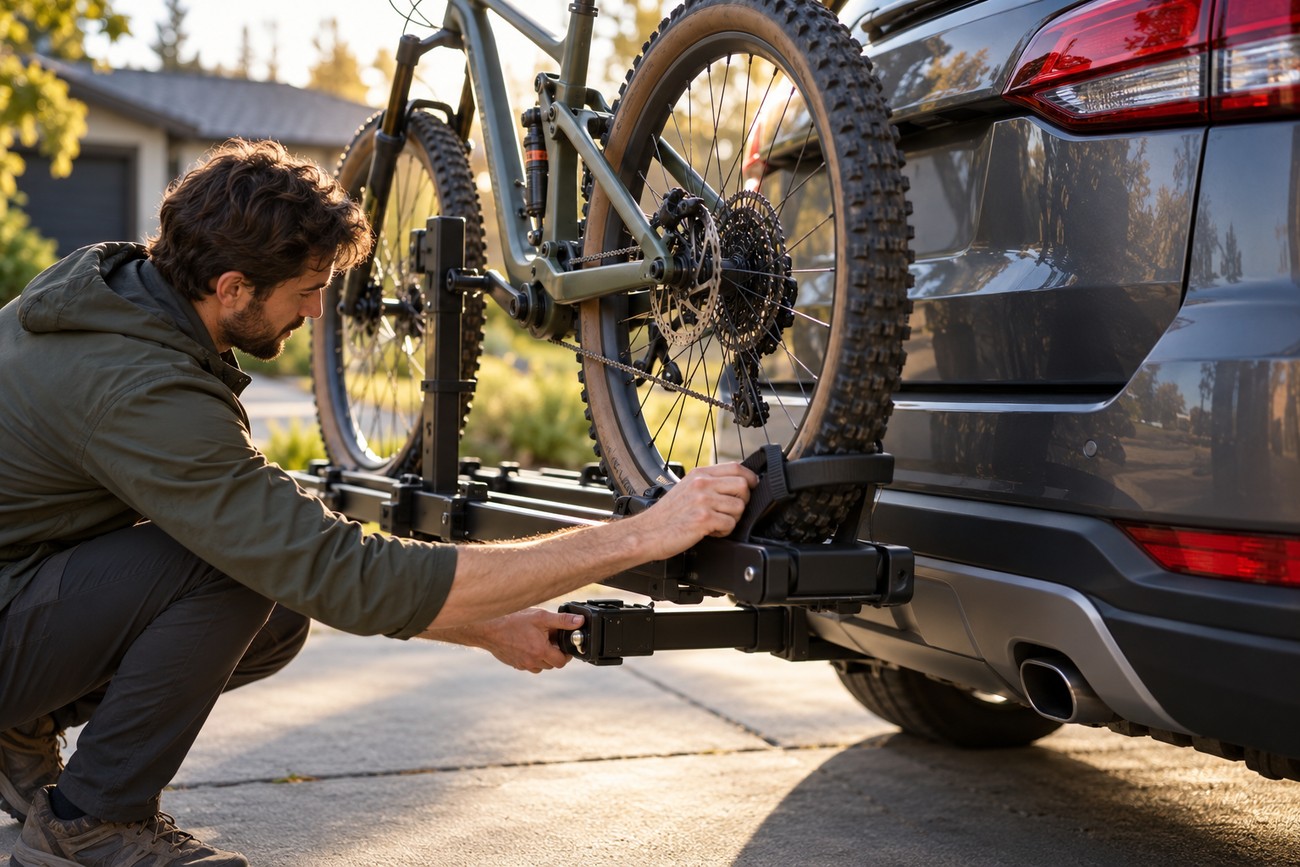
Installation should follow the rack manual in the order specified. Tighten straps, clamps, pins, and wheel retainers as directed, secure loose wheels or removable parts, and keep pedals and handlebars from contacting neighboring bicycles. After loading, test each bicycle with a firm hand movement and check that the rack itself is fully seated in the receiver or on the vehicle.
Walk around the vehicle before departure. Confirm that the driver’s sightlines remain clear, the rear camera and parking sensors behave as expected, and the rack does not cover a tailgate handle or exhaust outlet in a way the instructions prohibit. Hitch-mounted loads can reduce departure clearance and may confuse rear sensors or obscure the camera view, so use mirrors and direct observation instead of relying on electronic aids.
Plate and rear-light visibility is a legal issue governed by local rules. If a rack obscures the registration plate or lights, an approved relocation or repeat-light solution may be required; some setups use a lightboard. Rack certification does not grant an exemption from road rules, and requirements can vary by country or jurisdiction, particularly where the load extends far behind the vehicle.
Roof users should record the actual loaded height on a visible reminder inside the vehicle. A roof-mounted bike can add roughly 30–40 cm to vehicle height in the illustrative estimate above, though the measurement for your car and rack is the one that matters. Recheck the rack during a journey as required by its manual, especially after the first part of the drive and after rough roads.
Clean the rack and bicycles after exposure to road salt, spray, or retained moisture. Inspect receiver hardware, bolts, straps, pads, wheel trays, and the hitch area for looseness, corrosion, or trapped grit. On trunk racks, look for new paint marks or panel movement; on roof racks, check the crossbar attachments; on hitch racks, check the receiver pin and the underside for scrape damage. These small inspections can reveal a mounting problem before it becomes a lost bicycle or damaged vehicle.
Frequently asked questions
What is the best trunk-mounted bike rack for my car?
The best choice is the rack whose manufacturer lists your exact vehicle model, model year, and body style as compatible. Verify the approved bike count, total and per-bike limits, spoiler restrictions, strap positions, and whether your frame shapes require an adapter. A rack that fits the car may still be unsuitable for your bicycles.
Check the seller’s return policy before installation. Trunk racks can look plausible until the pads, straps, and hooks are placed on the actual vehicle. Keep the packaging and inspect the fit carefully before loading a bicycle, especially if the car has a plastic spoiler or an unusual hatch.
How should I store a bike rack between trips?
Remove dirt and salt, wash the contact pads and hardware as appropriate, and let every part dry before storage. Inspect straps for cuts, twists, and hardening, then store them without sharp bends or pressure that could deform them. Keep the rack supported so its arms, trays, and frame cannot be bent by another item falling onto it.
Store the rack in a dry place away from chemicals and direct weather exposure. Follow the rack instructions for lubrication, removable parts, and folding. Automated car washes require particular caution: remove the rack and follow the vehicle and rack manuals rather than assuming a folded carrier is acceptable.
What is the best trunk-mounted bike rack?
Choose the model with the clearest exact-vehicle fit listing, the correct load rating for your bicycles, and contact points that suit their frames. Then compare how securely it separates the bikes, how easily it can be installed without panel loading, and whether you can return it if the fit is wrong. The best rack is the one that remains stable on your specific vehicle without blocking required lights or the plate.