
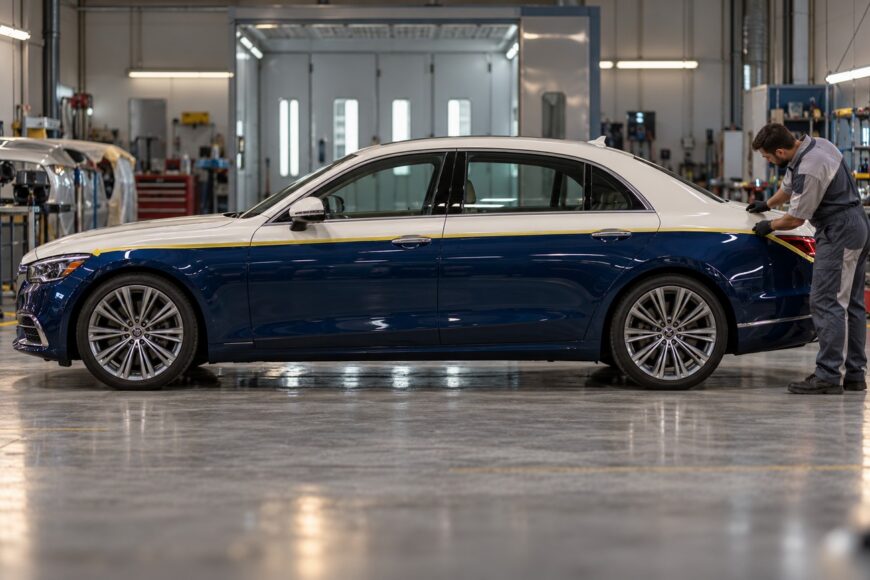
A two-tone line can look straight on a loose panel and still look wrong once the doors, hood, and trunk are closed. Panel gaps interrupt the line, arches change its apparent height, and a crease can make an equal measurement look uneven. The layout has to work on the assembled car, not only on the surface in front of the spray gun.
Masking brings two separate risks. Paint can seep beneath a poorly sealed edge, leaving a jagged color break; paint can also build against a well-sealed edge, leaving a raised ridge. Choosing tape matters, but the first decision is where the line should run and how it will look across the whole vehicle.
- Lay Out the Color Break on the Whole Car
- Layout Tape, Fine-Line Tape, and Masking Tape: Different Jobs
- Prepare the Surface and Test the Masking Plan
- Apply the Edge Tape Without Stretching the Line
- Spray the Second Color and Remove the Mask at the Right Stage
- Diagnose Bleed, Lifted Paint, and an Uneven Color Break
- Frequently Asked Questions
- What two-tone car color combinations work well together?
- How much does a two-tone paint job cost?
- What are some ideas for two-tone paint jobs?
- What are the rules for painting two-tone walls?
- What are some good two-tone car color combinations?
Lay Out the Color Break on the Whole Car
Start with a body feature you can follow consistently, such as a shoulder crease, or choose a deliberate graphic path that complements the car’s proportions. Neither approach requires the split to sit at the same measured height everywhere. A line that looks balanced over a wheel arch may need adjustment as it crosses a door.
Mark a provisional route with a flexible straightedge, laser, or layout tape. Step back and view the car from the front, rear, and sides before committing to the paint edge. Measuring from the floor can establish a reference, but equal measured height does not necessarily look level across different body panels.
Close the doors, hood, and trunk to check continuity on both sides. Watch where the line crosses gaps and stampings, and decide where it should end or continue into each opening. Reflections and perspective can disguise a small mismatch until the adjoining panels are seen together.
Use layout tape to move the proposed graphic without repeatedly applying the final edge tape. Once the route is approved, mark enough reference points to reproduce it accurately after preparation. Layout tape helps position a graphic; it is not automatically the tape that will seal the paint edge.
Layout Tape, Fine-Line Tape, and Masking Tape: Different Jobs
Choose tape by its task and the shape it must follow. Color or adhesive strength alone does not establish that a product will produce a clean two-tone edge.
| Tape type | Job and suitable geometry | Principal limitation |
|---|---|---|
| Layout tape | Positions and revises a proposed graphic. | Does not automatically provide the final paint-sealing edge. |
| Thin precision or fine-line tape | Defines a crisp edge on straight runs. | May resist tight contours; a low profile reduces, but cannot eliminate, a paint ridge. |
| Conformable fine-line or vinyl tape | Defines the edge around curves and contours. | Can lift or distort if stretched around a small radius. |
| Wider automotive masking tape | Extends protection away from the color break. | Should not replace the fine edge tape merely because it adheres well. |
Check the specifications for the exact product selected. Claims about adhesion, heat resistance, or clean removal for one automotive tape do not apply to every tape in the category.
Prepare the Surface and Test the Masking Plan
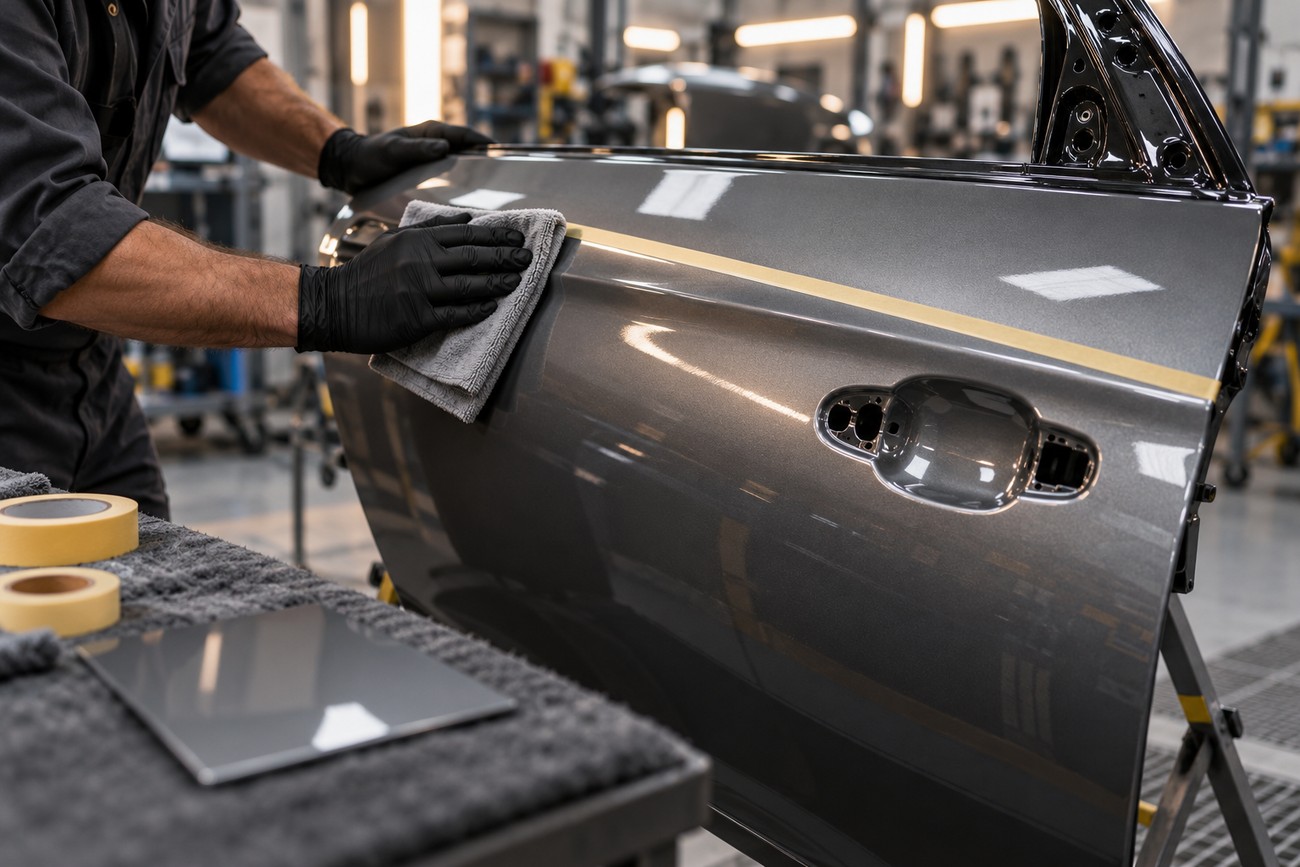
The masking surface needs to be clean, dry, and ready under the coating system’s instructions. Dust or silicone can interrupt edge contact; moisture and an underlying coat that is not ready for masking can complicate adhesion or removal. Tape cannot correct those conditions, however firmly it is pressed down.
Confirm that the chosen tape is compatible with the surface it will touch, especially if the first color is fresh. Manufacturers may promote clean removal and resistance to bleed, but results depend on substrate condition, coating compatibility, temperature, application pressure, and dwell time. A stronger adhesive is not automatically safer on a weak coating.
Test the proposed tape and sequence on a representative area before masking the car. Include a corner, stamping, recess, or door opening where the edge has to change direction. A short trial run can reveal whether the tape seats against the surface and releases without disturbing the coating.
Use the coating-system and tape instructions to decide when the surface is ready and how the mask should be removed. There is no useful universal wait time: a successful test on fully cured paint does not prove the same tape will behave identically on a fresh first color.
Apply the Edge Tape Without Stretching the Line
Follow the approved route with the final edge tape, keeping your reference points visible as long as practical. Thin precision tape is suited to straight lines; more conformable fine-line or vinyl tape is suited to curves and contours. Seat the edge with controlled, even pressure, paying particular attention to recesses and panel creases.
Work around tight curves in manageable runs rather than pulling the tape hard to make it reach. Tension can make a small radius appear smooth during application, then leave wrinkles, lift, or a shifted line when the tape relaxes. At joins, keep the paint-facing edge aligned and check that neither end has curled away.
A trial fit at the tightest contour is more revealing than a long straight test. Release the tape before judging the curve: a line that shifts or lifts without hand tension is unlikely to hold its intended shape through spraying.
Extend protection outward from the edge with wider automotive masking tape and suitable masking material. Let the fine-line tape define the color break; do not cover it in a way that changes or obscures that edge. Inspect the complete run at an angle, where a wrinkle or unsealed section is easier to spot.
Apply tape within the conditions specified for that product. One 3M automotive masking tape specifies an application range of 16–32 °C; this is not a category-wide rule. Excess heat can soften or stretch some tapes, so verify the actual product instructions rather than assuming an automotive label covers the booth conditions.
Spray the Second Color and Remove the Mask at the Right Stage
Plan the spray sequence around the edge as well as the panel. Heavy wet passes directed into the tape can encourage seepage where contact is imperfect and add material against the boundary. Use the coating system’s application instructions rather than trying to solve an uncertain edge with extra paint.
Protect adjacent panels and openings from overspray, including areas beyond the immediate color break. An uncovered gap can leave dry spray where it is awkward to remove later. Check that protective masking remains secure without pulling the edge tape out of position.
Low-profile edge tape can reduce the ridge, but second-color base and clear coats can still create a visible step. The number and placement of coats therefore matter even when the masked line is crisp. Inspect the exposed boundary before making clear-coat decisions; clear can cover a color break, but it will not make bleed or poor alignment disappear.
Determine tape-removal timing and method from the specific coating-system and tape instructions. Removing a mask at an unsuitable stage can damage the edge or disturb the underlying color, and no universal peel window applies. Support the tape as you remove it so that an unexpected lift is noticed promptly.
Heat limits also belong to individual products. 3M specifies up to 121 °C for a maximum of 30 minutes for one Performance Automotive Masking Tape; this is not a blanket rating for other tapes or longer heating. Clean-removal and no-bleed claims likewise remain conditional on the surface and process used.
Diagnose Bleed, Lifted Paint, and an Uneven Color Break
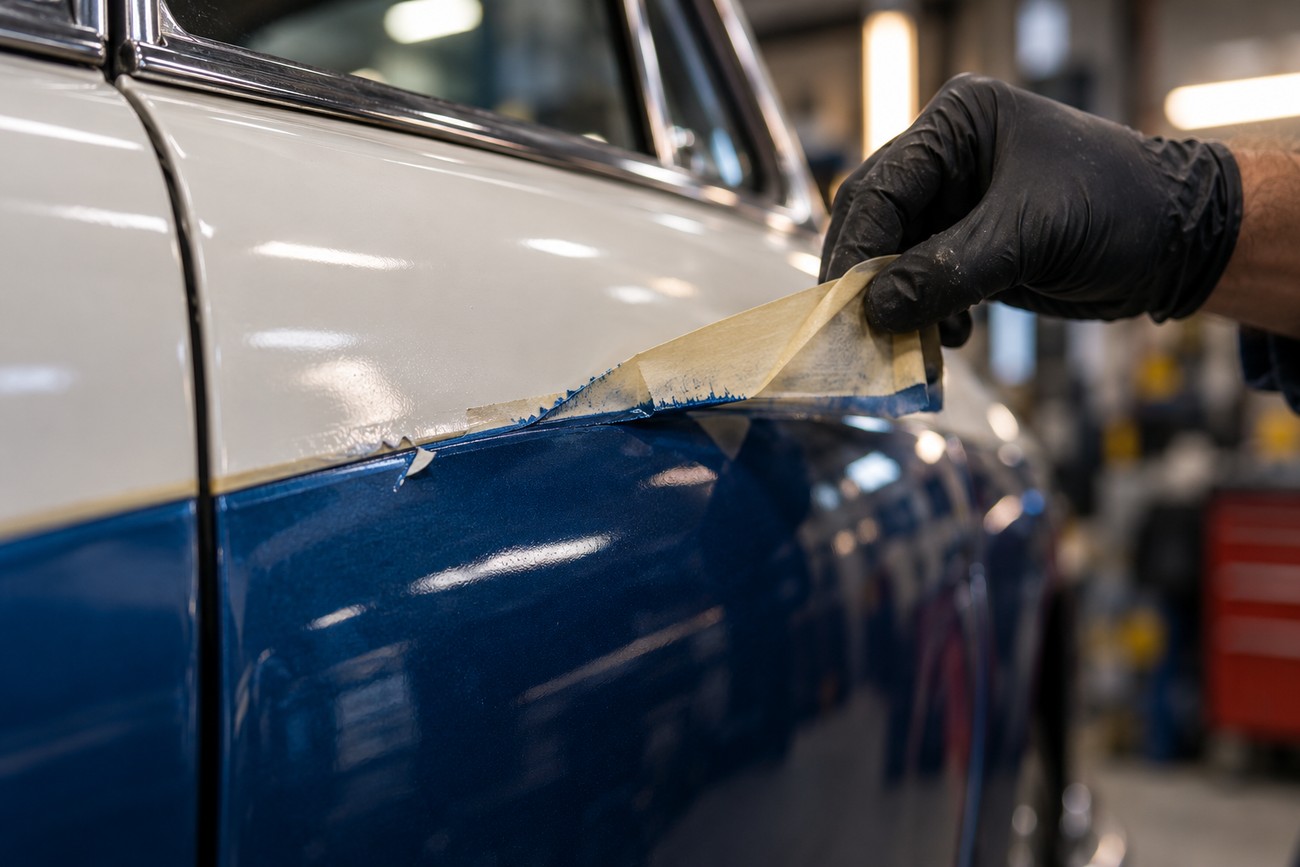
Seepage beneath a straight edge points you toward edge contact, surface condition, tape selection, and spray application. A jagged curve adds another possibility: tape stretched around the radius may have lifted or wrinkled after placement. The appearance narrows the investigation, but it does not identify a single cause on its own.
If paint lifts with the tape or adhesive remains behind, review the underlying coat’s readiness, the tape’s compatibility, pressure, and dwell time. High adhesion can hold a mask in place while increasing the risk to a fresh or weak coating during removal. Test findings are useful here; scraping or pulling at a damaged edge can enlarge the repair.
A prominent ridge can remain even when the tape performed as intended. Multiple layers of second-color base and clear can produce a step despite a low-profile tape, so a raised boundary is not proof of bleed. Decide whether finishing work is appropriate under the paint system before attempting to level it.
A line that seems to drift from panel to panel is usually a layout issue rather than a tape defect. Compare it with the assembled car, with movable panels closed, instead of relying only on distances measured from the floor. Minor defects may have a system-approved correction, while significant bleed, lifting, or misalignment may require refinishing.
Frequently Asked Questions
Design choices determine how much of the car must be prepared and painted. Settle the intended appearance and scope before asking a shop to price or execute the layout.
What two-tone car color combinations work well together?
Combinations work well when the contrast suits the shape of the vehicle and each color has a clear visual role. A lighter upper color can change how tall the body appears; a darker lower color can give the lower panels more visual weight. View samples on the car in different light, and judge the split alongside its creases, glass, and trim.
How much does a two-tone paint job cost?
There is no useful universal price: a shop quote depends on surface preparation, graphic complexity, panel coverage, and the finishing required. Specify whether the design continues into door, hood, or trunk openings, and whether existing paint needs repair. Those choices define substantially different jobs even when the exterior color break looks similar.
What are some ideas for two-tone paint jobs?
A roof and pillars in one color create a contained upper section. A lower-body color can follow a shoulder line, while a broad side graphic can emphasize the car’s length. For a quieter result, use a split tied to an existing body feature; a free-form graphic will draw more attention to its shape and symmetry.
What are the rules for painting two-tone walls?
Two-tone walls are a different painting task, so automotive tape specifications and coating instructions do not transfer to them. Establish a line that looks level in the room, account for corners and uneven surfaces, and choose masking products compatible with the wall finish. Follow the wall-paint manufacturer’s directions for recoating and tape removal.
What are some good two-tone car color combinations?
A light neutral paired with a dark neutral gives a distinct split without making both colors compete. A restrained body color with a contrasting roof is another option; two similarly muted colors produce a softer division. If the car already has clear-coated paint, have its condition and required refinishing preparation assessed before adding either design.







