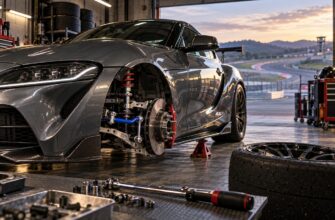
A rear diffuser can be installed with high expectations and produce no noticeable increase in speed or stability. In some cases, the first clear change is more noise underneath the car, reduced ground clearance, or repeated contact with curbs and speed bumps. That result is usually a system problem rather than proof that every diffuser is useless.
The visible panel at the rear bumper often represents the exit of an underbody airflow path. A genuine aerodynamic diffuser manages the way air leaves the underside of the vehicle; a decorative bumper add-on may never receive a controlled, energetic flow at all. The difference depends on the floor, inlet conditions, side leakage, ride height, and the geometry around the exit.
For that reason, the sensible choice is between a tested underbody component and a styling part whose aerodynamic effect is unproven. Neither should be treated as a universal acceleration device. A useful installation must match the car’s existing airflow, operating height, exhaust layout, and everyday road conditions.
- What a Rear Diffuser Actually Does
- Why the Underbody Matters More Than the Visible Panel
- Geometry, Expansion Angle, Ride Height, and Flow Stability
- Road Cars Versus Race Cars: What Changes in the Real World
- Choosing and Installing a Diffuser Without Creating New Problems
- The Failure Modes: Noise, Drag, and No Noticeable Gain
- How to Evaluate Results Before Trusting the Marketing
- Frequently Asked Questions
- What is a rear airflow diffuser, and how is it different from a bumper insert?
- How much does it cost to get a rear diffuser installed?
- What should be checked after a diffuser hits a curb or speed bump?
What a Rear Diffuser Actually Does
A rear diffuser is the expanding rear section of an underbody airflow path. Air passing beneath the vehicle is accelerated through the narrower, lower-pressure region under the floor, then the diffuser allows that flow to expand as it approaches the rear. Its job is to manage the exit rather than simply add a visible surface to the bumper.
Controlled expansion helps the underbody flow recover pressure before it returns to the free stream behind the car. The pressure recovery must happen gradually enough to keep the flow attached to the diffuser surface. If the expansion is abrupt, the air can separate, leaving a turbulent wake and reducing the aerodynamic benefit.
This process is sometimes described as the diffuser “sucking” the car to the road. That wording is misleading because the component is not an active suction fan. Its working principle is controlled flow expansion and pressure recovery; the low pressure under the car is created by the complete airflow path, including the floor and the conditions at its inlet.
The primary result is downforce and improved high-speed stability. A reduction in drag can sometimes support acceleration or top speed, but any speed benefit is indirect and depends on the complete vehicle balance. In one F1-oriented analysis, the underfloor and diffuser contribute about 35% of total downforce, but that figure is specific to that racing context and is not a universal value for production cars.
Why the Underbody Matters More Than the Visible Panel
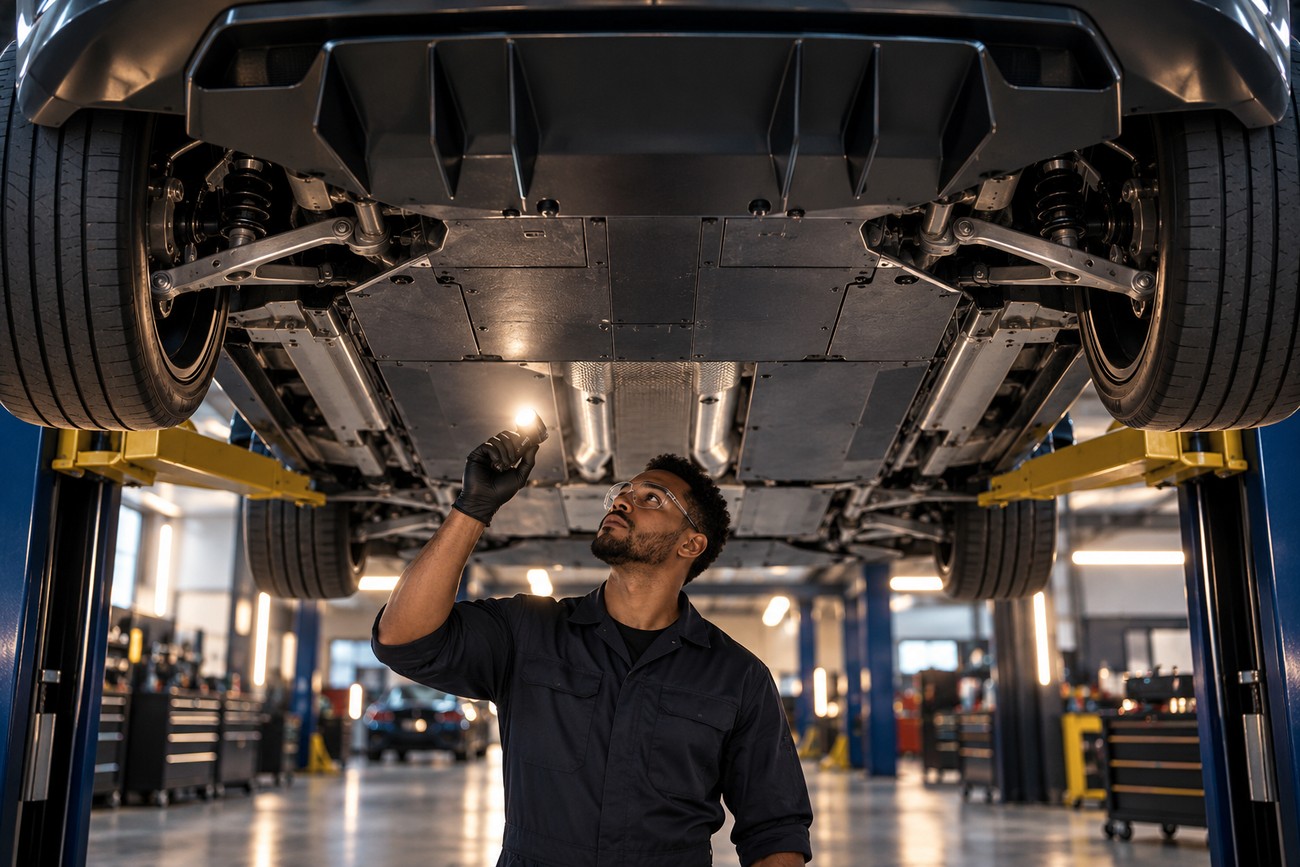
The diffuser is the rear termination of a larger system. It needs a reasonably clean supply of air from beneath the front and center of the vehicle, a floor that does not repeatedly disrupt the flow, and an exit that remains open. A bumper-mounted panel cannot create those conditions by itself.
A relatively flat or well-controlled underbody reduces unwanted changes in flow direction and pressure. Gaps at the sides allow high-pressure air from outside the car to leak into the low-pressure region, weakening the pressure distribution that supports downforce. Uneven surfaces, exposed suspension parts, dirt, and damage can have the same practical effect by adding turbulence before the air reaches the diffuser.
Strakes, or internal vertical fins, divide the diffuser into channels and limit lateral cross-flow. They can help keep the flow organized and reduce mixing between regions with different pressures. Their presence does not prove that a part is effective, however; their spacing, height, attachment to the floor, and relationship with the wheel wake all matter.
Rear-wheel wake is one of the less obvious problems. The tires generate a broad, energetic disturbance that can reach the diffuser edges and contaminate the exit flow. A part that looks symmetrical and well aligned while the car is stationary may perform poorly once the wheels, suspension movement, and road-generated turbulence are included.
Exhaust hardware, tow points, trailer hitches, mudguards, and poorly placed underbody brackets can also block or redirect the exit. A decorative insert attached to the bumper may sit behind these obstacles without guiding the air between them. In that situation, its main function is visual, regardless of how many fins or sharp edges the design includes.
Geometry, Expansion Angle, Ride Height, and Flow Stability
Diffuser geometry has to balance expansion with flow attachment. A smooth transition gives the air time to slow and recover pressure, while a sudden increase in area forces the flow to turn and expand too quickly. Once separation begins, the diffuser can lose much of its pressure-control function and produce a larger, less efficient wake.
A commonly cited practical reference range for sports-car diffuser angles is about 7°–12°. This is an engineering reference, not a universal specification for every vehicle. The suitable angle depends on the available length, floor height, inlet speed, surface quality, edge sealing, rear body shape, and the ride-height range the car actually experiences.
A steeper ramp is therefore not automatically more effective. An aggressive angle may work in a tightly controlled race-car package with a clean floor and predictable suspension movement, yet separate on a street vehicle with a rough underbody and changing clearance. Increasing the angle without improving the air supply often adds visual drama faster than it adds useful load.
Ride height changes the diffuser’s operating condition. Lowering the car can increase the speed and pressure difference under the floor, but the floor may then approach the road, strike bumps, or choke the inlet. Raising the car gives more clearance but can weaken the underbody pressure distribution. The best result is a stable operating window rather than a peak effect at one carefully chosen height.
Pitch and roll make that window narrower in motion. Under braking, the front lowers and the rear rises; under acceleration, the rear squats and the diffuser may move closer to the road. Cornering tilts the floor, while bumps create rapid changes in clearance. A diffuser that performs well in a static inspection can therefore behave differently during braking, acceleration, or a turn over uneven pavement.
A diffuser should be judged over its ride-height range, not at the single height seen on a workshop lift. A small loss of clearance during squat or roll can change the exit flow more than a visually elaborate fin arrangement.
Road contamination adds another variable. Dirt and ice alter the surface, while a damaged leading edge or loose fastener can introduce a local separation point. These details matter because underbody aerodynamics is sensitive to surface continuity; a small defect in a high-energy region can affect stability without being obvious from behind the car.
Road Cars Versus Race Cars: What Changes in the Real World

Race cars are developed around a controlled aerodynamic package. Their floors, suspension, ride heights, wheel openings, and bodywork are designed together, and the car is often operated within a narrower range of attitudes than a street vehicle. Modern racing regulations continue to make the underfloor and diffuser major areas of performance development because they can generate load without relying entirely on exposed external wings.
That does not make a diffuser irrelevant on a road car. It means the conditions for useful performance are harder to maintain. A street vehicle may have a stepped floor, exposed exhaust sections, flexible plastic shields, large suspension gaps, and substantial ride-height changes. If the inlet flow is already disorganized, the rear ramp has little authority over what reaches its trailing edge.
On a road car, the real effect may be small or difficult to measure when the underbody is not designed as a system. The driver may notice a change in high-speed confidence only on a fast, smooth road, while normal urban driving provides too little speed and too much disturbance for a clear impression. A diffuser does not automatically create a noticeable acceleration or top-speed gain.
The useful distinction is between potential and repeatable benefit. A street-car diffuser can improve stability when its airflow supply, ride height, and exit are controlled. It is not limited to race tracks, but its value depends on the same engineering conditions that make it work in competition. A well-integrated floor and a modest, stable effect are more credible than a dramatic panel attached to an uncontrolled underside.
The racing example also needs careful interpretation. The fact that one F1-oriented analysis attributes about 35% of total downforce to the underfloor and diffuser demonstrates the importance of the region in that car’s design. It does not mean a similar percentage will appear on a road vehicle, especially one with no flat floor or controlled side sealing.
Choosing and Installing a Diffuser Without Creating New Problems
Start by deciding what the part is intended to do. A styling panel can be a reasonable cosmetic modification, provided it is described honestly and mounted securely. An engineered underbody component needs a suitable floor, a defined inlet, controlled side edges, and enough space for the air to expand without being blocked by the exhaust, tow hardware, hitch, or rear suspension.
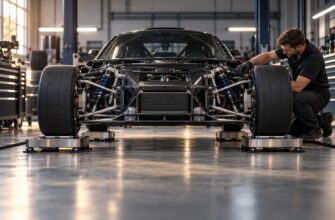
Inspect the vehicle before selecting the part. Check whether the existing undertrays form a continuous surface, where the lowest points sit, and whether the proposed diffuser will hang below them. Measure clearance to the ground, tires, exhaust components, heat shields, towing points, and service panels. The mounting plan should account for vibration and thermal movement rather than relying on thin trim clips or unsupported fasteners.
Alignment matters as much as the outline seen from behind. The diffuser should meet the underbody without a large step, exposed gap, or abrupt obstruction. Side edges need enough protection to survive road debris, but added lips or guards must not create new leaks or detach into the airflow. A low, rigid structure can improve the exit path in theory while becoming impractical on snow, steep driveways, curbs, and speed bumps.
Check the diffuser exit with the exhaust, tow hardware, and rear-wheel wake in the actual ride-height condition instead of judging alignment while the car is stationary on a lift.
Installation should finish with a practical inspection, not just a visual check. Confirm that all fasteners are locked, the panel cannot contact the tire through suspension travel, and hot exhaust parts have adequate clearance. Recheck the mounting after the first period of driving, especially if the part uses several brackets or attaches to flexible factory undertrays.
Everyday durability is part of aerodynamic performance. Road grit can wear the leading edge, ice can deform the ramp, and a small impact can change its angle without leaving an obvious crack. Loose mounts create vibration and noise, while a bent edge can disturb the exit flow. If a component cannot retain its shape and position in normal use, its theoretical design value is less important than its maintenance burden.
The Failure Modes: Noise, Drag, and No Noticeable Gain
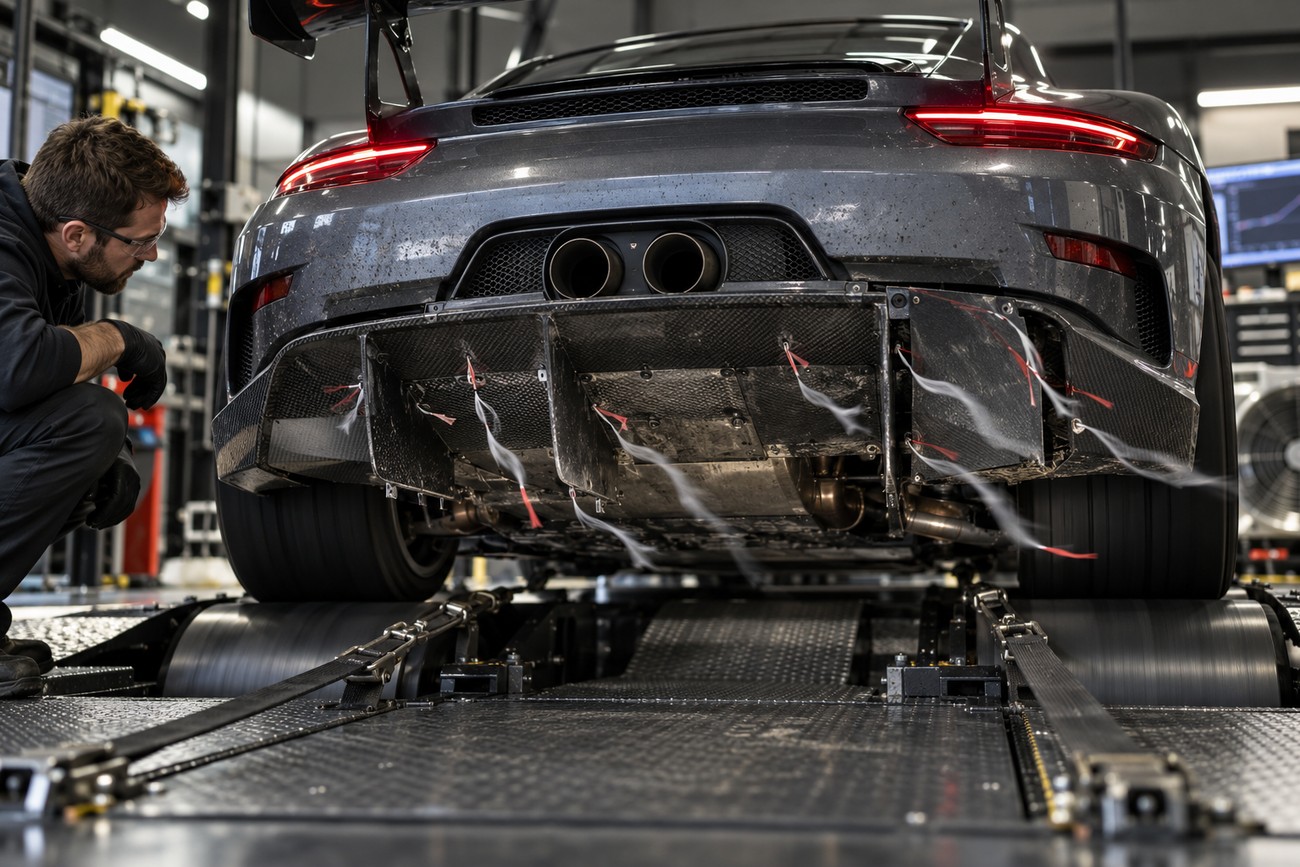
The most common complaint is no noticeable improvement in stability. The likely causes include a decorative part with no controlled inlet, a discontinuous floor, excessive side leakage, or a diffuser operating outside its useful ride-height range. The absence of a noticeable effect does not necessarily mean the part has created harm, but it does show that the visible panel is not enough evidence of aerodynamic function.
Whistling and turbulence usually indicate an airflow detail that deserves inspection. A narrow gap, loose edge, abrupt ramp, stake that ends in a poor location, or an obstruction at the exit can generate local vortices and pressure fluctuations. Wheel wake can add to the noise, particularly when the diffuser edges sit in the disturbed air behind the tires.
Additional drag is another possible outcome. Separated flow behind a steep ramp can enlarge the wake, while fins and exposed brackets can add resistance without producing useful pressure recovery. A badly sealed or blocked exit may also prevent the underbody flow from leaving cleanly. The car can then feel no more stable while consuming more aerodynamic energy at speed.
Reduced clearance is easier to identify and often more damaging in daily use. Contact with a speed bump can bend the ramp, loosen a mount, or push part of the diffuser into the exhaust area. A more aggressive design can also become more sensitive to ride-height changes, so the same part may behave acceptably on smooth pavement and poorly on rough roads.
Marketing figures require the same caution. One commercial tuning review claims 12–30% more rear downforce and 2–4% less drag, but those figures are a private test result rather than universal benchmarks. Without the vehicle, speed, ride height, floor configuration, measurement method, and comparison baseline, the numbers cannot predict the result of a different installation.
How to Evaluate Results Before Trusting the Marketing
Begin with a baseline before fitting the part. Record the existing underbody configuration, ride height, clearance at the lowest points, and any current noise or vibration. Photograph the mounting areas and note the position of the exhaust, tow hardware, rear wheels, and factory panels. This makes it easier to identify an installation change instead of attributing every later impression to the diffuser.
After installation, check fit and clearances at normal ride height and through the relevant suspension movement. Look for contact marks, gaps, loose brackets, and heat-related movement. Confirm that the ramp remains aligned with the floor and that the exit is not partly blocked. A static inspection cannot reproduce every road condition, but it can eliminate basic installation errors before testing begins.
Use the same road or track conditions for comparison. Keep the tire pressures, fuel load, weather, direction of travel, and vehicle setup as consistent as reasonably possible. Assess high-speed stability, steering corrections, crosswind sensitivity, and behavior during braking and cornering separately from acceleration. A driver’s impression is useful for identifying a change, but a single drive is weak evidence of its size or repeatability.
Drag and downforce need different evidence. A car that feels more planted may have gained stability without a measurable reduction in drag, while a small drag change may be impossible to feel from the driver’s seat. Coast-down testing, speed-versus-power data, pressure measurements, load cells, or other controlled methods can provide stronger evidence than appearance or a claimed percentage.
CFD is most useful when it represents the complete vehicle underside and the expected ride-height range. A simulation of the diffuser alone can miss wheel wake, exhaust interference, floor leakage, and suspension movement. Controlled testing becomes especially important when a seller claims engine, brake, or exhaust cooling, because rear-diffuser cooling benefits are vehicle-specific and should not be assumed without direct airflow or temperature measurements.
The final question is whether the result remains useful in normal operation. A part that produces a narrow peak under ideal conditions may be less valuable than a quieter, less aggressive design that remains stable over bumps, load changes, and everyday speeds. Evaluate the operating range, durability, and maintenance demands alongside any peak aerodynamic result.
Frequently Asked Questions
The answers below separate the physical function of a diffuser from its appearance and address the installation decisions that are easiest to overlook.
What is a rear airflow diffuser, and how is it different from a bumper insert?
A rear airflow diffuser is the expanding rear section of an underbody path that manages pressure recovery as air leaves beneath the car. It normally connects to, or works with, the floor and has a defined relationship with the vehicle’s ride height, side edges, and rear wake.
A bumper insert is a visible trim panel that may resemble that shape without receiving controlled underbody flow. It can improve the appearance of the rear bumper, but it does not automatically guide air or create meaningful downforce. The physical distinction is established by the airflow path and mounting relationship, not by the number of fins molded into the panel.
How much does it cost to get a rear diffuser installed?
There is no single useful installation price because the cost depends on more than the visible part. The main variables are access to the underside, removal of factory panels, preparation of the floor, custom brackets, fasteners, alignment, exhaust clearance, and the time required to protect or relocate nearby hardware.
Ask whether the quoted work includes a clearance check at normal ride height, suspension and tire clearance, heat clearance, edge protection, and a post-installation fastener inspection. A simple bumper insert may require basic mounting, while a genuine underbody system can involve floor preparation and alignment work. Comparing quotes only by panel price can hide the work needed to make the installation safe and stable.
What should be checked after a diffuser hits a curb or speed bump?
Inspect the ramp and its leading and trailing edges for cracks, deformation, scrape marks, and changes in angle. Then check every mount, bracket, floor panel, and side edge for looseness or pulled-through fasteners. Damage may be hidden above the visible panel, especially where the diffuser is attached to a flexible undertray.
Check exhaust clearance, heat shields, nearby suspension hardware, and tire clearance through normal suspension movement. A new whistle, vibration, rattling sound, altered high-speed stability, or contact mark is a reason to stop treating the part as cosmetic and inspect it promptly. Even if the diffuser still looks straight, a changed gap or loose edge can disturb the exit flow and reduce its intended performance.