
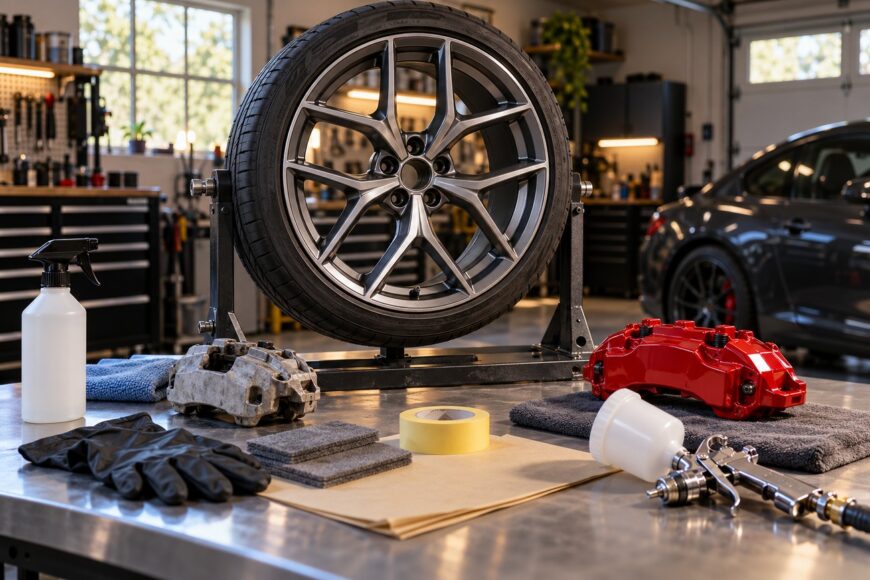
Painting wheels and calipers at home can provide an inexpensive visual refresh, provided you treat it as a coating job rather than a quick spray-paint project. The finish has to tolerate brake dust, heat, road salt, stone impacts, and cleaning chemicals, so the paint choice and surface preparation matter more than the color on the can.
The common failures are predictable: ordinary body acrylic on hot calipers, paint applied over contamination or corrosion, weak masking around brake and mounting surfaces, and thick coats that never cure properly. A wheel may feel dry after a few hours while remaining too soft for installation and normal driving.
Home painting can produce a respectable result, but it rarely matches the durability and uniformity of professional powder coating. Set expectations around a cosmetic finish that may last about 1–3 seasons under active use, then decide whether that trade-off suits the vehicle and the amount of preparation you are willing to do.
- Is Home Painting Right for Your Wheels and Calipers?
- Choose the Right Coating and Application Method
- Prepare the Metal Before Any Paint Touches It
- Mask the Brake-Critical and Fit-Critical Areas
- Apply Thin Coats and Allow the Finish to Cure
- Why DIY Finishes Fail After the First Drive or Winter
- Home Wheel and Caliper Paint vs Powder Coating
- Frequently asked questions
- How should I protect valve stems and TPMS components when painting a wheel?
- Why do freshly painted calipers look dirty so quickly?
- What should I do if paint has already reached a brake or wheel mating surface?
Is Home Painting Right for Your Wheels and Calipers?
Home aerosol or brush systems make sense when the wheels are structurally sound and the goal is to improve their appearance without sending them out for a full restoration. The result depends heavily on preparation, application conditions, and careful masking. A rushed job can look worse than the original finish once runs, dust, and uneven coverage become visible.
Powder coating is generally stronger and more uniform than a garage aerosol finish. It offers better resistance to impacts, chemicals, and road salt, although it requires more disassembly, specialist equipment, and downtime. Home paint remains useful for a controlled cosmetic refresh, especially when a complete professional refinish is disproportionate to the condition of the wheels.
Under active use, a DIY finish commonly lasts about 1–3 seasons, depending on the coating, preparation, climate, road conditions, and cleaning routine. Stone chips and winter salt eventually expose weak areas, while aggressive cleaners can dull or attack the surface. This service life is an expectation from the process, not a guarantee.
Bright caliper colors also change the maintenance burden. Red and yellow finishes show brake dust quickly, and a narrow wheel with limited clearance can make the caliper look dirty even after careful application. Bright paint can also draw attention to worn wheels, corrosion, and damaged hardware that a darker finish would leave less noticeable.
Choose the Right Coating and Application Method
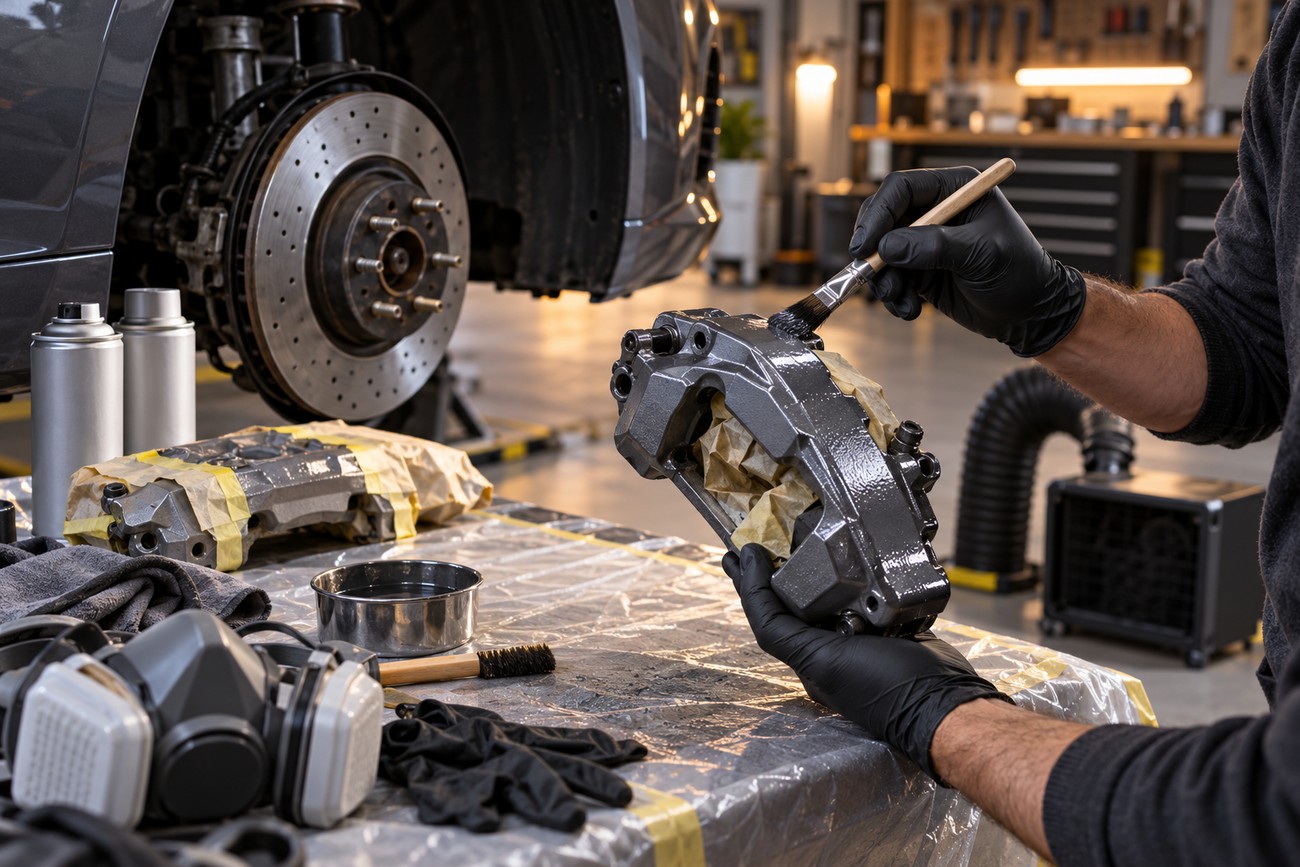
Use a coating made specifically for wheels or calipers, with the product system matched to the component and the manufacturer’s instructions. Specialty wheel and caliper coatings cited for this type of work are rated for approximately 200–600 °C. Their chemical resistance is also relevant because brake dust and wheel cleaners can be hard on ordinary paint.
Ordinary automotive body acrylic is not a suitable default for calipers. Brake components can expose the coating to temperatures and contamination that bodywork paint was never designed to handle, leading to fading, bubbling, or peeling. A high-temperature label alone does not confirm that a product is suitable for every surface, so check whether it is intended for calipers, wheels, or both.
Some products advertise ratings up to 800 °C, while practical reports describe noticeable degradation after active or hard use. Treat the headline temperature as a product claim rather than a prediction of real-world service life. Preparation, film thickness, heat cycles, road salt, and chemical cleaning often decide the result sooner than the printed maximum.
Aerosol application usually gives a more even finish on broad wheel surfaces when the can is kept at a consistent distance and the coats remain thin. Brush systems can reach awkward caliper areas with less overspray, though visible brush marks and uneven film thickness become more likely, especially with bright colors. For calipers, a product supplied as a coordinated primer and paint system is preferable to mixing unrelated materials.
Prepare the Metal Before Any Paint Touches It
Remove the wheel and clean away brake dust, road film, grease, and loose dirt before judging its condition. On calipers, the same process includes careful removal of accumulated brake dust, rust, and oily contamination. A surface can look clean while still carrying residues that prevent primer from bonding.
Strip loose or failed coating and remove corrosion mechanically with a suitable wire brush, abrasive pad, or Scotch-Brite. Smooth the remaining surface rather than sealing flaking edges under new paint. A practical minimum for abrasion is R240–R320 after dirt, corrosion, and failed coating have been removed.
Degrease the prepared metal with a suitable solvent or acetone where the product instructions allow it. Use clean cloths and avoid wiping contamination back across the part. Oils from hands, silicone products, tire dressing, and workshop dust can create fisheyes, peeling, or isolated soft spots.
Where compatible with the coating system, etch primer is useful on properly prepared bare metal because it improves adhesion. Follow the specified recoat window; applying the next layer too early or too late can weaken the system. Primer is not a substitute for removing rust, brake dust, or grease.
Calipers deserve extra attention because their shape traps contamination around casting details, spring clips, guide areas, and fasteners. You do not need to make every hidden surface cosmetically perfect, but every surface receiving paint must be stable, dry, abraded, and free of residue. If the caliper needs mechanical repair, seal replacement, or guide service, complete that work before refinishing.
Mask the Brake-Critical and Fit-Critical Areas
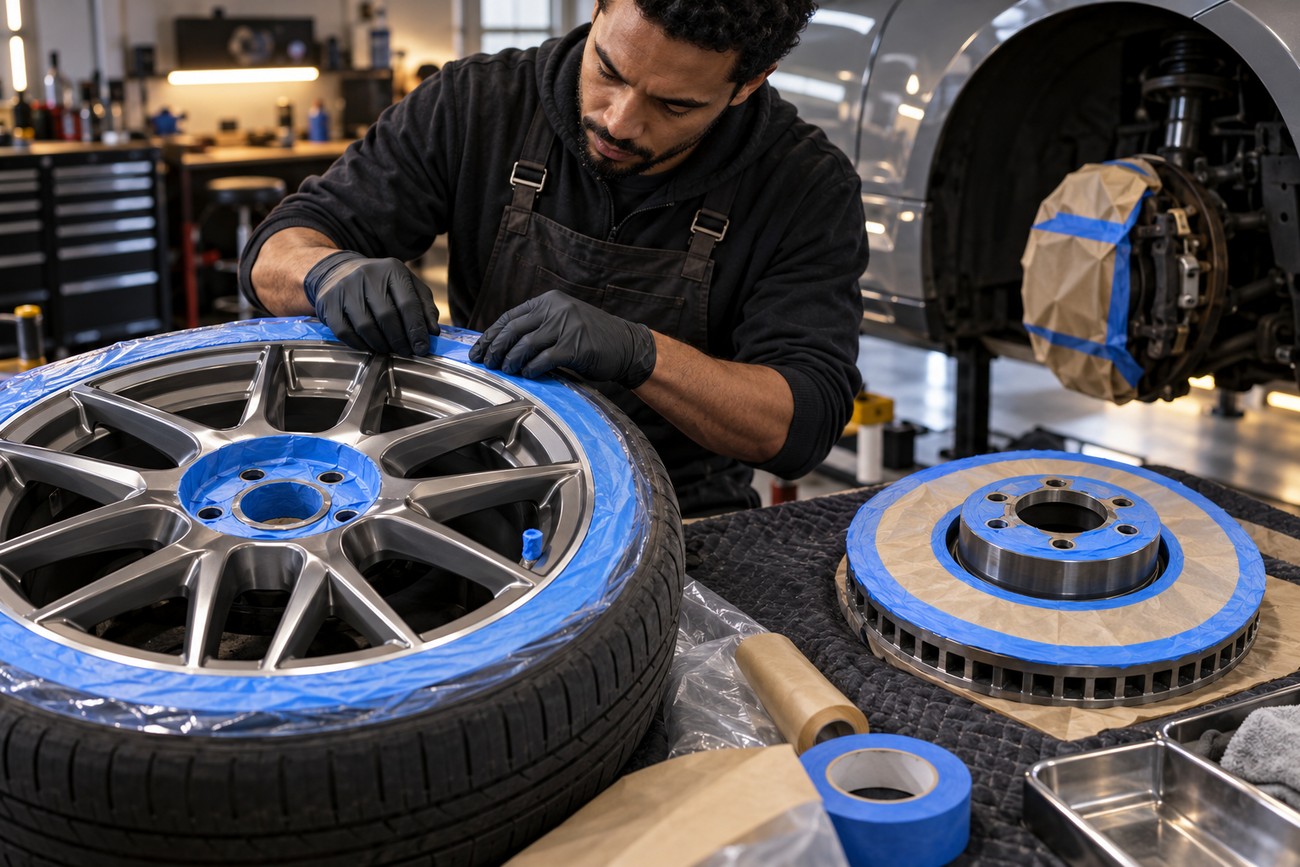
Masking protects braking performance as well as appearance. Keep paint away from the disc braking surface and the pad contact areas; overspray there can reduce friction and create a safety risk. Protect the wheel’s tire, valve hardware, and any areas that must remain clean for accurate fitment.
On wheels, leave the wheel-to-hub mating face, center bore as specified by the vehicle design, bolt holes, and bolt threads free of paint. Paint buildup on mating surfaces can affect seating and balance. The same applies to ventilation paths and other machined or functional surfaces that must maintain their original dimensions.
Caliper masking must include rubber boots, seals, flexible hoses, guide pins, sliding surfaces, pad abutments, and sensor-related parts. ABS wiring and sensor bodies should not receive casual overspray. Masking around these components takes longer than spraying around them, yet it prevents contamination that may later require disassembly.
Remove the wheel when painting a caliper. Painting through the spokes makes it difficult to reach the rear and underside evenly while increasing the chance of covering the disc, tire, or suspension components. If the tire remains mounted during wheel painting, meticulous masking can work, although removing the tire generally gives the cleanest access and edge.
Apply Thin Coats and Allow the Finish to Cure
Work in a clean, ventilated area with stable temperature and low dust. Bring aerosol cans to room temperature before use, and avoid spraying onto cold metal because poor atomization and slow drying can increase orange peel. Hang a wheel where practical so you can reach its surfaces without resting it on fresh paint.
Apply 2–3 thin coats rather than trying to cover the surface in one pass. Typical intervals between coats are 10–30 minutes, but the product instructions and actual temperature take priority. Thin layers reduce runs, trapped solvent, slow drying, and later cracking.
Start the spray pattern off the part and carry it across the wheel or caliper, releasing it after the fan has cleared the opposite edge. This prevents heavy buildup at the beginning and end of each pass.
Allow approximately 2–3 hours for the surface to become touch-dry, then leave the coating undisturbed until it develops mechanical strength. Full mechanical cure generally takes approximately 24–48 hours. Do not install the wheel or drive simply because the surface no longer feels tacky; early contact can imprint the finish, smear edges, or leave fastener marks.
A medium vehicle commonly requires approximately 1–2 cans or tins for caliper coverage, depending on the product and application. Keep a small amount available for later touch-ups, since color and gloss can vary between products and batches. Match the paint system rather than adding an unrelated clear coat unless the manufacturer approves that combination.
Why DIY Finishes Fail After the First Drive or Winter
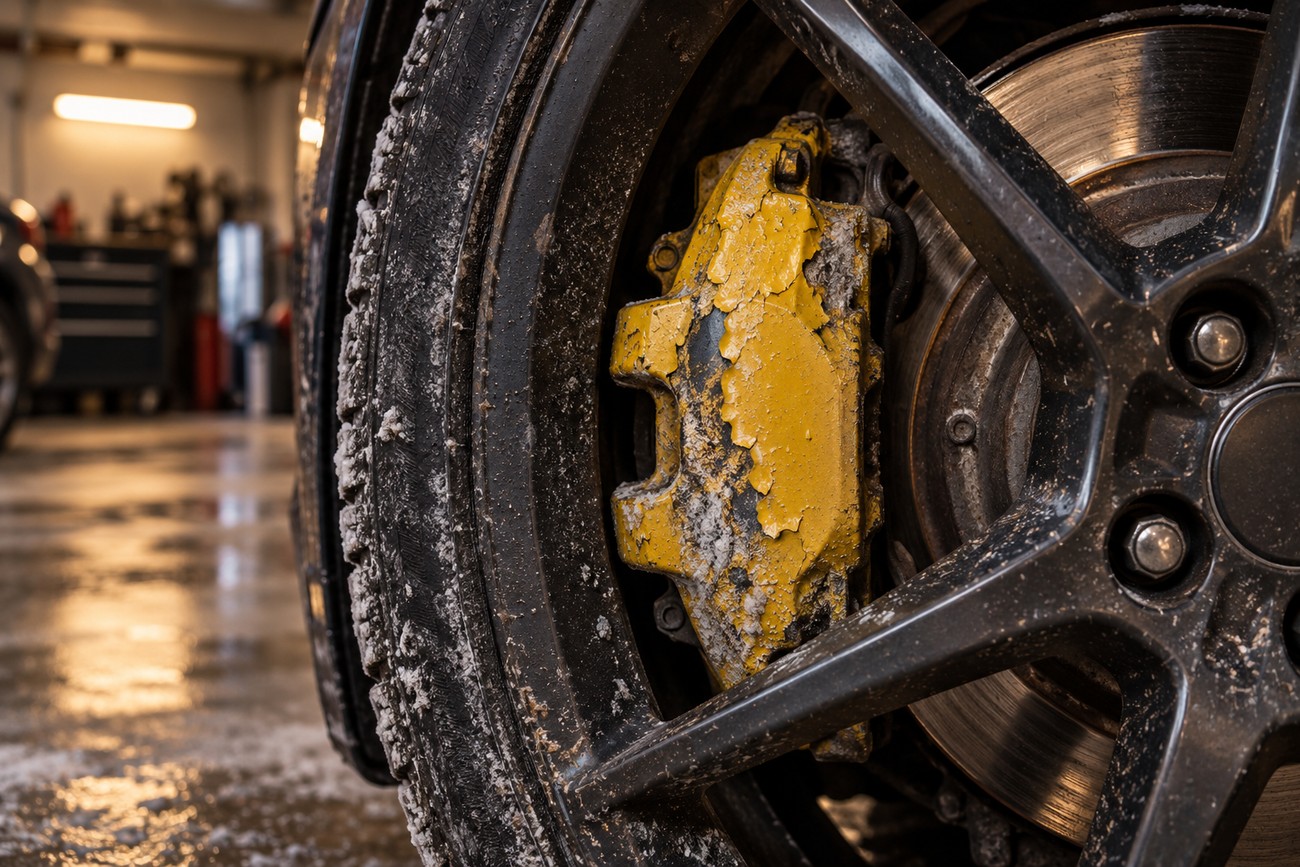
Caliper paint that bubbles, yellows, or loses gloss after active driving usually points to an unsuitable coating, excessive film thickness, or contamination beneath the finish. Ordinary body acrylic is especially vulnerable to brake heat. Inconsistent preparation can produce the same symptoms even when the product itself is appropriate.
Runs and orange peel often come from spraying too close, moving too slowly, working on cold metal, or trying to achieve full coverage in one heavy coat. Thick aerosol layers dry slowly and retain solvent, increasing the chance of later cracking. Dust in a garage can settle into the wet surface and make each additional coat highlight the defect.
Chips and winter cracking expose the limits of budget aerosol finishes. Stone impacts, road salt, brake dust, and aggressive cleaners attack the coating from different directions, while delayed cleaning allows abrasive contamination to remain on the surface. Manufacturers of wheel coatings commonly warn that harsh cleaners and neglected brake dust shorten coating life, including on fresh paint.
Brush-painted calipers can develop uneven marks that become more obvious after a season, particularly with red or yellow paint. Budget aerosol colors may also differ from the label, leaving a finish that looks less uniform across wheels or between calipers. Test the product on a hidden area or spare surface before committing to all four corners.
A poorly applied layer can complicate later professional refinishing. A repair shop may need to remove the entire home-applied coating before correcting corrosion, straightening a wheel, or applying powder coating. Spending more time on preparation now can reduce both visual defects and the cost of the next repair.
Home Wheel and Caliper Paint vs Powder Coating
Both methods can work, but they suit different expectations. Home paint favors access and lower project complexity, while powder coating favors durability, consistency, and a more complete restoration.
| Factor | Home aerosol or brush system | Professional powder coating |
|---|---|---|
| Preparation | Cleaning, corrosion removal, abrasion, degreasing, masking, and compatible primer are essential. | Usually involves thorough stripping and professional preparation, with greater access during disassembly. |
| Durability | Commonly about 1–3 seasons under active use, depending on conditions and preparation. | Generally more durable against impacts, chemicals, and salt than typical home painting. |
| Heat and chemical resistance | Depends on the specialty product and film thickness; ordinary body acrylic is unsuitable as a default for calipers. | Usually more consistent and resilient when correctly specified and cured. |
| Finish consistency | Can show runs, orange peel, brush marks, dust, and color variation. | Typically more uniform across the complete part. |
| Downtime and access | Accessible for a home project, although full removal and masking still take time. | Requires transport, disassembly, processing, and time away from the vehicle. |
| Repairability | Small chips can be touched up, although the repair may remain visible. | Repairs usually require specialist preparation and refinishing. |
| Cost positioning | Lower entry cost and suitable for a cosmetic refresh when the parts are sound. | Higher project commitment, justified when long-term finish quality and restoration matter. |
Frequently asked questions
Wheel and caliper painting requires attention to both appearance and function. The following answers address common protection, cleaning, and overspray concerns.
Careful masking and compatible cleaning products help preserve the finish after installation. Any paint on a braking or fit-critical surface should be removed before the vehicle returns to service.
How should I protect valve stems and TPMS components when painting a wheel?
Mask the valve stem, valve core area, seals, and TPMS sensor body so they receive no casual overspray. Paint can interfere with sealing surfaces, make future valve service difficult, and add material to a sensor or hardware that was designed to remain clean and correctly seated.
If the tire is removed, the valve and sensor are easier to protect or remove according to the wheel and sensor design. With the tire mounted, use tight masking around the valve hardware and inspect the finished wheel before inflation or installation.
Why do freshly painted calipers look dirty so quickly?
Bright caliper colors make brake dust more visible, especially where the wheel has narrow spokes or limited clearance. Dust also collects in casting recesses and around pad hardware, so a smooth glossy color can show contamination sooner than an older dark or unpainted surface.
Plan on gentle, regular cleaning with a product compatible with the coating. Avoid aggressive chemicals and do not choose a bright color solely for appearance if the vehicle sees heavy brake dust, winter salt, or frequent gravel-road use.
What should I do if paint has already reached a brake or wheel mating surface?
Do not rely on tightening the wheel or driving to remove the problem. Remove paint from the disc braking surface, pad contact area, wheel-to-hub mating face, bolt threads, and other fit-critical areas using a method that will not damage the machined surface.
Inspect the area for overspray on rubber components, guides, sensors, and ventilation paths. If paint has reached a working brake surface or you cannot restore a clean, even mating face, have the assembly checked before returning the vehicle to service.







