A subtle interior glow can make a cabin easier to use without changing its character. A rushed installation can produce the opposite result: glare in the glass, loose strips, rattling wires, or a flat battery after the car sits for a while.
Placement and power supply matter more than simply sticking an LED strip to trim. The LEDs must suit the vehicle’s operating-voltage range, the wiring needs proper protection, and every component must stay clear of airbags, pedals, seat mechanisms, heat, and moisture. Plan the circuit and cable route before removing interior panels.
- Choose LEDs and locations before removing trim
- Plan a switched power source and fuse
- Prepare trim and route wires clear of moving parts
- Mount footwell and dashboard lighting discreetly
- Connect the circuit and test it before reassembly
- Set nighttime brightness and check for battery drain
- Troubleshoot flicker, loose strips, and rattles
- Check local rules, inspection requirements, and insurance terms
- Frequently asked questions
- How can I remove an LED strip without damaging interior trim?
- How do I install ambient lighting in a car?
- How do I install LED lights in a car dashboard?
- How do I install RGB LED strip lights on a vehicle’s exterior?
- How do I install RGB LED strip lights in a car?
Choose LEDs and locations before removing trim
Choose automotive-rated strips or modules where possible. Cars commonly described as 12 V vehicles have a nominal 12 V electrical system, but the voltage in operation varies. LEDs and controllers must be rated for the vehicle’s operating-voltage range rather than merely labeled “12 V.” Check the product’s temperature range, current draw, connector quality, and mounting method.
Generic decorative kits may work in a dry cabin, yet their adhesive, controller, and wiring may not tolerate vehicle temperature changes. IP20–IP33 can suit a dry interior location, while areas near door sills, the trunk, or moisture require suitable protection such as IP65–IP67. An IP rating describes resistance to dust and water; it does not establish automotive electrical compatibility.
Footwells, the lower center console, and concealed dashboard edges are usually easier to control than exposed surfaces. Position the light source so the driver cannot see individual diodes directly or reflected in the windshield, side windows, or shiny trim. Excessive or directly visible interior light can create distracting reflections, particularly during night driving.
Plan a switched power source and fuse
A removable accessory-socket kit is simple to test and remove, but the socket circuit may have limited capacity and may remain live after the vehicle is locked. A permanent installation is usually cleaner when supplied from a suitable fuse-box circuit or lighting circuit that matches the intended behavior. Verify the kit’s current draw before choosing either method.
Check the source-circuit capacity, wire rating, fuse-tap compatibility, connector arrangement, and the way the vehicle monitors its circuits. Do not assume an existing socket or fuse-box circuit has spare capacity. Protect a new LED circuit with a correctly selected fuse near its source, and select the fuse only after verifying the wire, device, tap, and source-circuit capacity.
Ignition-switched power typically turns the lighting off with the vehicle, while a lighting-switched connection can make it operate with the exterior lights. An always-live supply can discharge the battery while the car is parked. Wireless RGB controllers can also draw standby current even when the LEDs appear to be off, so check how they shut down before installation.
Prepare trim and route wires clear of moving parts
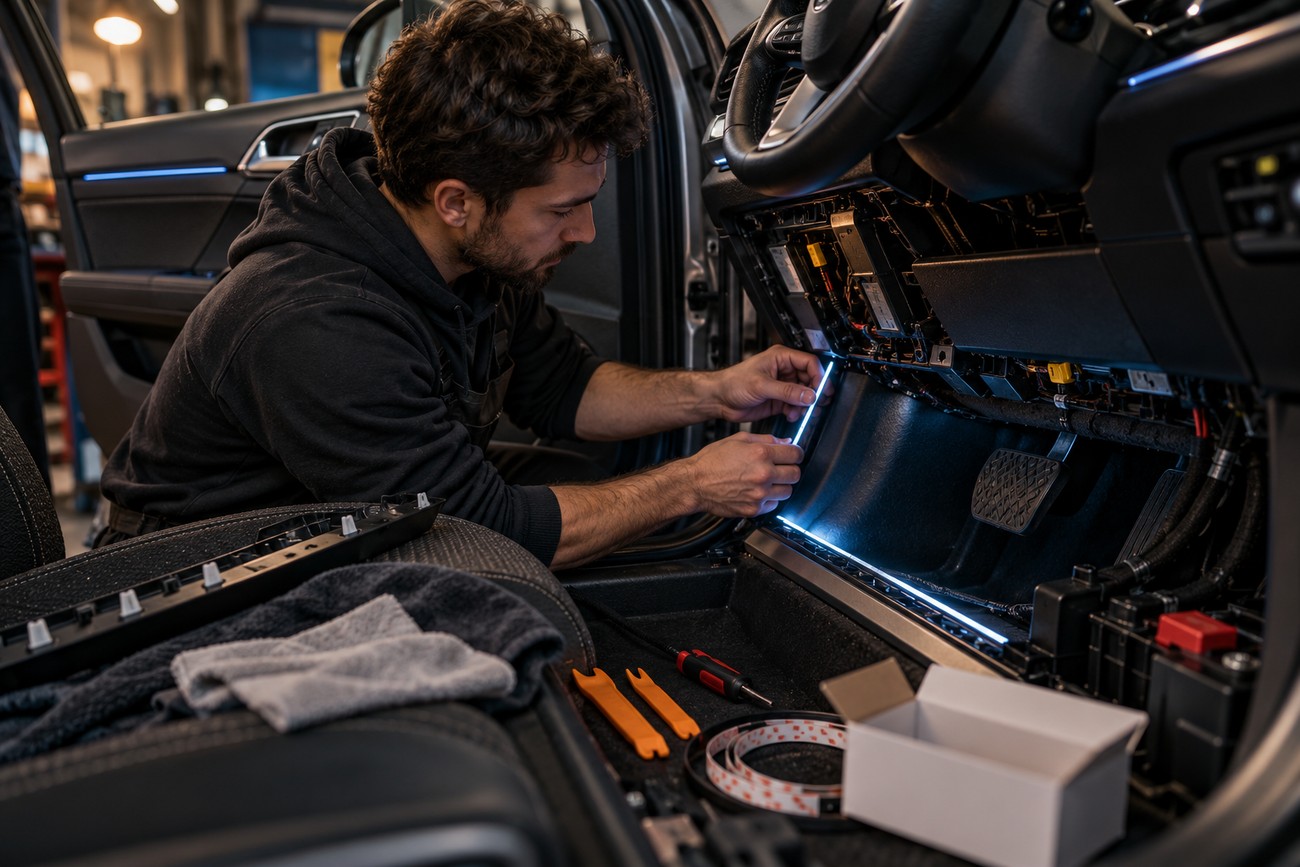
Read the vehicle service or owner documentation before starting. Follow its procedure for isolating power, identify airbag modules and wiring, and avoid disturbing yellow or otherwise marked safety-system components. Power isolation must follow vehicle-specific guidance because some vehicles require a waiting period or additional precautions.
Clean each mounting surface with a compatible cleaner and test the kit before final attachment. Adhesive strips may release from textured plastic or fabric, especially after temperature changes. For unreliable surfaces, use an appropriate mechanical mounting method or a purpose-made channel rather than relying on extra adhesive alone.
Check the full travel of each powered seat with wiring temporarily secured before closing the center console or sill trim; a cable that clears the seat at rest may be pinched at its end stop.
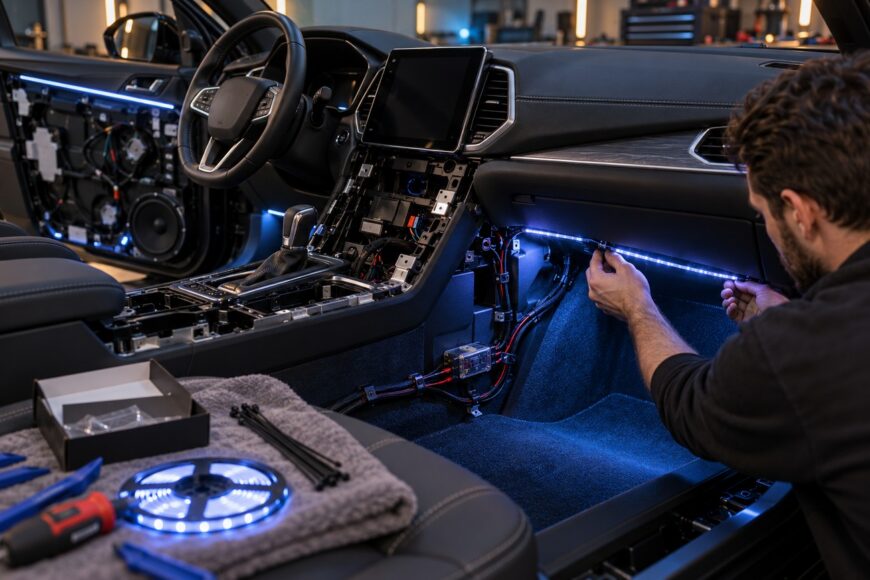
Route cables away from pedals, seat tracks, sharp edges, heaters, and other hot components. Protect pass-through points with suitable edging or grommets, secure the controller so it cannot strike the panel, and leave enough slack for normal seat adjustment without creating a loop that can catch on a mechanism.
Mount footwell and dashboard lighting discreetly
Begin with a dry fit. Sit in the driver’s position, close the doors, and check whether the LEDs or their reflections are visible. In the footwell, aim the light toward the floor or use a diffuser so the cabin receives a low, indirect glow rather than a row of exposed bright points.
Run the wires along existing protected routes where practical, securing them to fixed trim or harness supports without binding factory wiring. Keep every cable clear of pedals and the full range of seat movement. Once the route is proven, clean the surface again and attach the strip or module according to the product instructions.
Dashboard installation requires extra restraint. Keep LEDs, cables, and controllers clear of displays, vents, switches, instrument readings, windshield sightlines, and airbag deployment areas. A strip hidden behind a trim edge may look even while stationary but can produce distracting reflections at night when the windshield is wet.
RGB kits add a controller, additional connections, and sometimes Bluetooth or Wi-Fi standby consumption. Confirm that the controller is rated for the vehicle’s operating-voltage range and that its adhesive and enclosure suit the location. A diffuser, light guide, or indirect reflection often gives a more controlled result than exposed RGB diodes.
Connect the circuit and test it before reassembly
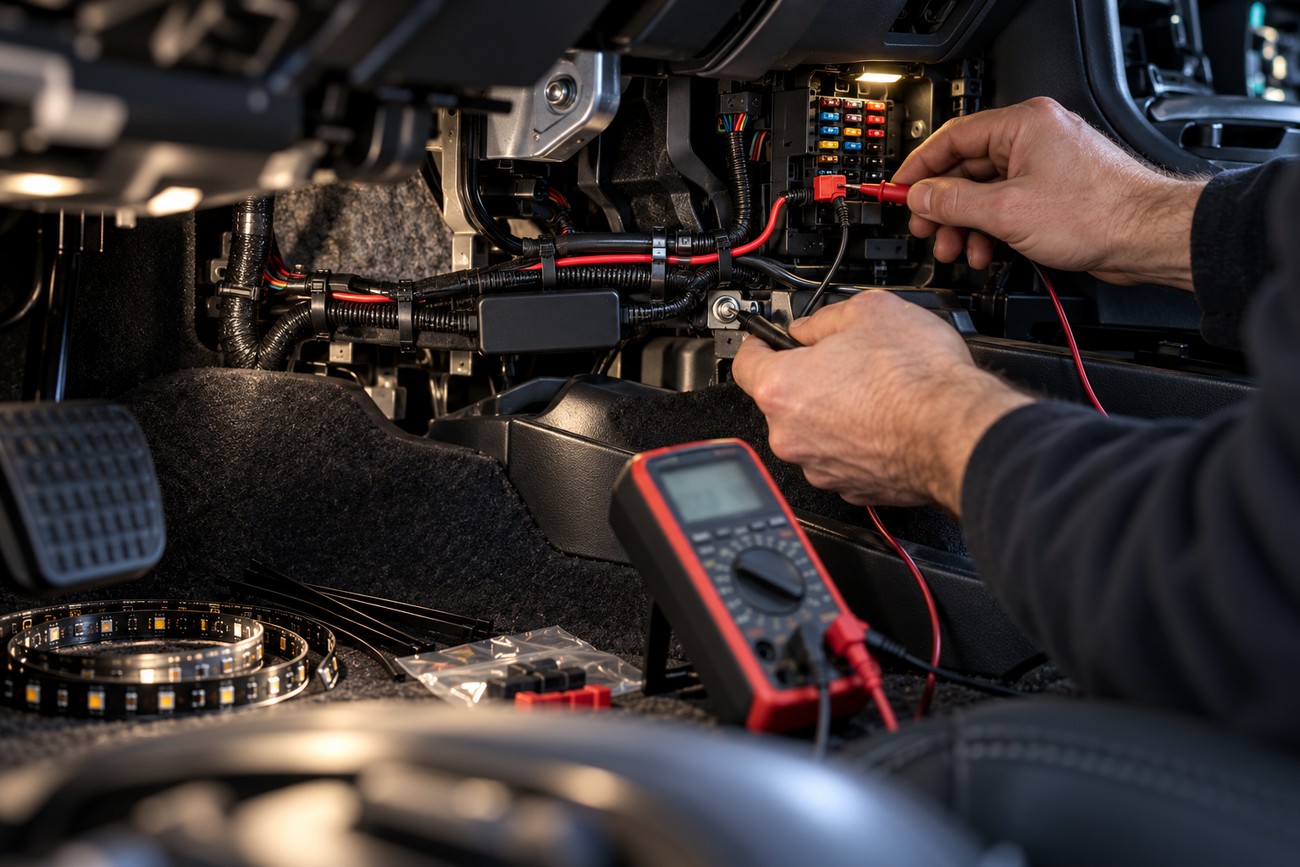
Make the positive connection through a vehicle-appropriate fused circuit. A fuse tap is suitable only when its type, position, orientation, and circuit behavior match the vehicle. Verify the ground at a clean, suitable body point or approved ground location; a random screw may have paint, poor contact, or a different electrical purpose.
Use insulated, mechanically secure joints and protect them from moisture and abrasion. Do not treat a nearby wire as a safe power source without identifying it and checking its capacity. Keep the correctly selected fuse close to the source so the new cable is protected from a short circuit.
Test the installation before replacing all trim. Confirm that the lights operate with the intended ignition or exterior-light condition, then observe them during engine start and while other vehicle accessories are operating. Move every seat through its full adjustment range, check the pedals, and listen for cable contact before closing the panels.
Stop if you cannot identify a suitable circuit, ground, or airbag-safe route. A qualified installer can verify the vehicle wiring and scan for faults where required. Follow vehicle-specific power-isolation guidance, and do not disturb airbag wiring or components.
Set nighttime brightness and check for battery drain
Adjust brightness with the vehicle stationary in a dark location. Check the driver’s view through the windshield and side windows, including the view when mirrors and screens are illuminated. Keep the light low and indirect so the cabin remains readable without creating reflections or competing with road information.
A soft footwell glow is usually easier to live with than conspicuous color effects. Color temperature and color choice are matters of interior design and vehicle rules, while safe placement keeps the light outside the driver’s direct sightline. Excessive or directly visible interior light can create distracting reflections, particularly during night driving.
Confirm how the circuit shuts down after locking the car. An always-live supply or a controller with standby draw can discharge the battery while the car is parked, even when the LEDs appear off. Check how the controller shuts down, and avoid leaving the system connected to an uncontrolled permanent supply.
Troubleshoot flicker, loose strips, and rattles
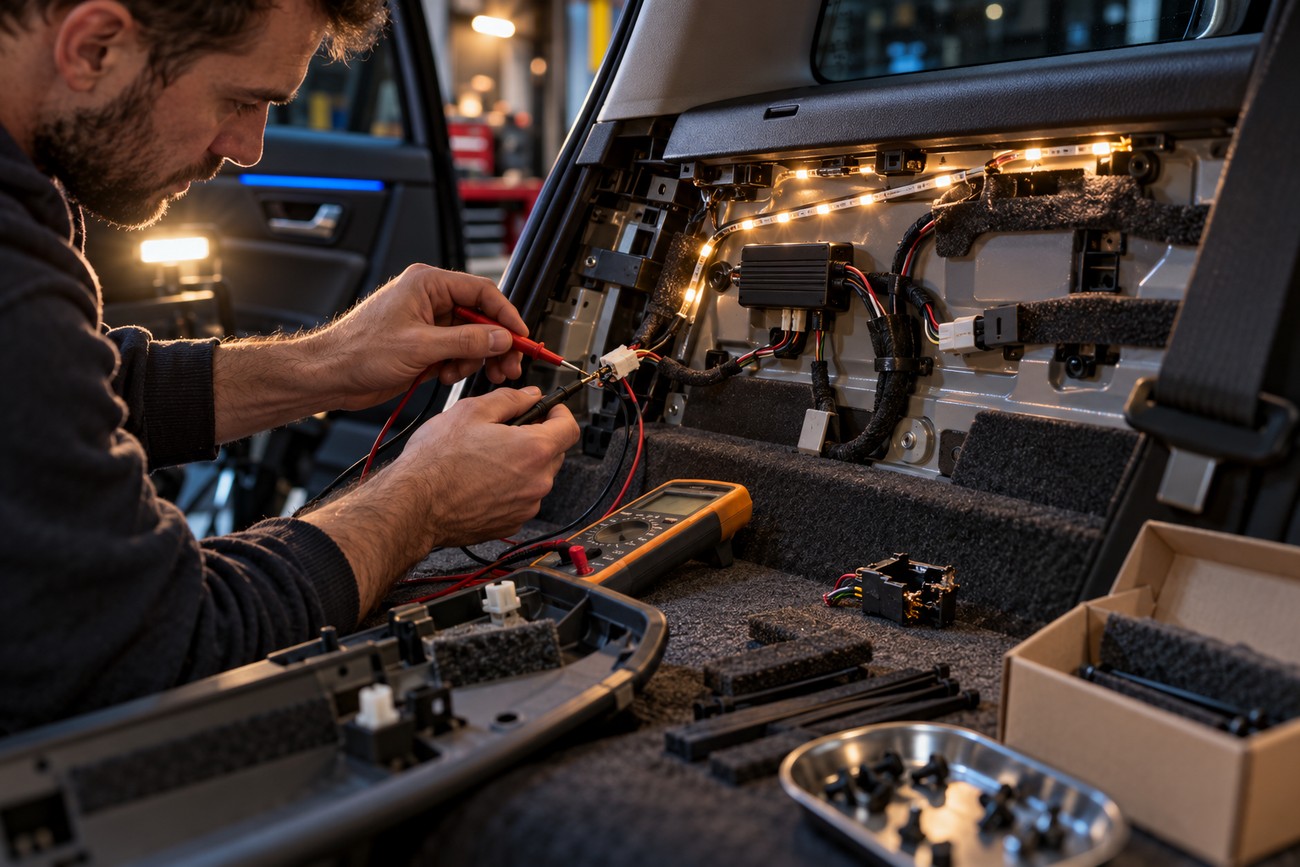
Flicker during engine start can involve the power source, a weak connection, controller behavior, or the kit’s voltage tolerance. Check the fuse, ground, connectors, and voltage range specified for the LEDs and controller. Do not replace the fuse with a larger one simply to stop it opening; that can leave the wiring inadequately protected.
Sections that dim or change color may point to a damaged strip, poor connector contact, an overloaded controller, or a supply issue. Isolate power before revising the wiring. Replace damaged parts and remake suspect joints rather than hiding a poor connection under trim.
A strip that detaches usually needs a surface and mounting review. Textured plastic, fabric, dust, and temperature changes can defeat the original adhesive. Clean the surface with a compatible product, test any new adhesive in an inconspicuous area, and use a suitable bracket, channel, or clip where the surface cannot provide reliable adhesion.
Rattles after reassembly commonly come from unsecured controllers, loose cable loops, displaced foam, or a damaged trim clip. Remove power before opening the panel, then secure each component to a fixed surface and check that the trim is seated correctly. Keep fasteners and cables away from moving mechanisms and sharp panel edges.
Check local rules, inspection requirements, and insurance terms
Aftermarket interior-lighting rules vary by jurisdiction, vehicle, and insurance policy. A discreet light source inside the cabin may be treated differently from lighting visible outside the vehicle, a system that resembles an emergency signal, or an installation that interferes with the driver’s view.
Bright colors and animated effects can attract attention or create reflections even when the LEDs are inside the car. Keep the system subdued while driving and check whether local inspection rules restrict color, visibility, switching behavior, or modifications to factory wiring.
Do not assume every RGB system is legal, and do not assume every uncertified kit is automatically prohibited. Approval, inspection, warranty, and insurance consequences depend on the specific installation and local requirements. Retain the product information, fuse details, wiring plan, and photographs, especially when the installation changes factory circuits.
Frequently asked questions
The answers below cover removing a strip and installing ambient, dashboard, and RGB lighting. The same placement and wiring precautions apply across these options. Choose components suited to the location and check the finished installation from the driver’s seat.
How can I remove an LED strip without damaging interior trim?
Follow the vehicle’s trim-removal guidance and soften the adhesive cautiously rather than pulling the strip sharply. Gentle warmth may help release adhesive, but avoid overheating plastic, fabric, wiring, or nearby electronics. Remove residue with a trim-compatible product tested first in an inconspicuous area.
How do I install ambient lighting in a car?
Place low-output LEDs where they illuminate surfaces indirectly, such as beneath footwell or console trim. Use a suitable fused power source, keep wiring clear of moving parts and airbags, and check that the lights turn off as intended when the car is parked.
How do I install LED lights in a car dashboard?
Fit a narrow strip or light guide behind a dashboard trim edge, away from vents, displays, instruments, and airbag deployment areas. Secure the wiring against rattles, then check from the driver’s seat at night for distracting windshield reflections.
How do I install RGB LED strip lights on a vehicle’s exterior?
For an outdoor vehicle location, choose a strip, controller, and connectors suited to moisture, temperature changes, and the vehicle’s operating-voltage range. Protect connections and wiring from water, abrasion, heat, and moving parts; use an appropriately fused circuit. An IP rating alone does not establish electrical compatibility. Check local rules for exterior lighting before use.
How do I install RGB LED strip lights in a car?
Hide the diodes from the driver’s direct view and secure the RGB controller in a dry location. Connect it through a properly protected circuit, then test every color, dimming mode, engine start, and shutdown behavior. Keep effects subdued while driving and check local rules.