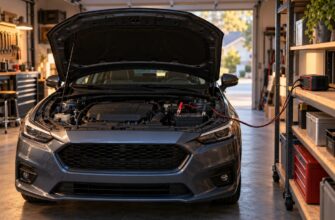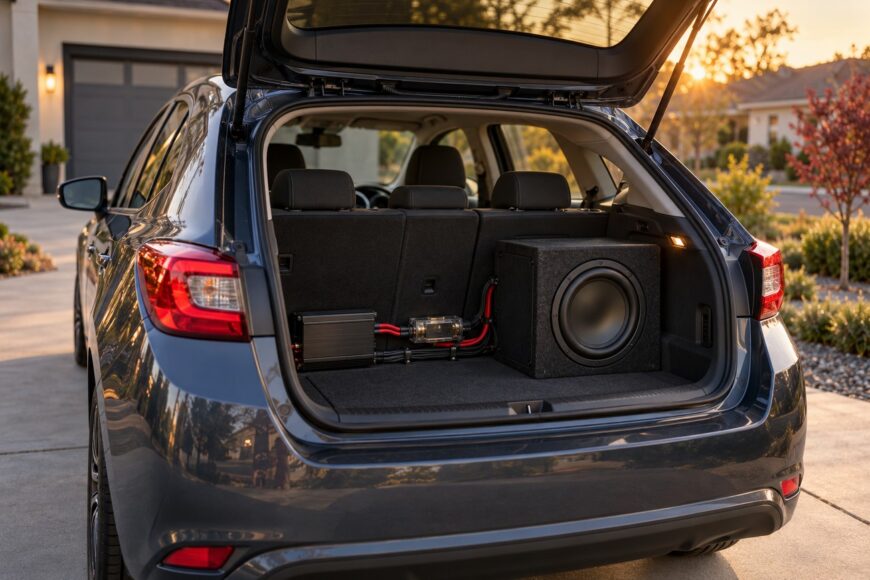
Installing a subwoofer in a small car is a space, electrical, and heat-management problem as much as an audio upgrade. The enclosure competes with cargo, the amplifier needs ventilation, and extra bass can expose rattles in the trim, license plate, or trunk lid. A compact car also gives you less margin for poor cable routing, weak grounds, and a tired battery.
The goal is controlled, clean bass from a secure, correctly fused installation. Buying the largest advertised wattage often produces a system that runs hot, stresses the vehicle’s electrical system, or overwhelms the cabin with vibration while delivering little useful improvement.
- Choose a Subwoofer Setup That Fits a Small Car
- Plan the Layout Before Removing Interior Trim
- Run Power, Fuse, and Ground Connections Safely
- Short-Run Power-Wire and Fuse Reference
- Connect to a Factory Stereo Without Guesswork
- Mount the Hardware and Finish the Installation
- Tune the Bass and Diagnose the Problems People Actually Hear
- Set Realistic Expectations for the Car’s Electrical System
- Frequently asked questions
- How easy is it to install a subwoofer in a small car?
- How much does it cost to install a subwoofer in a car?
Choose a Subwoofer Setup That Fits a Small Car
A powered subwoofer combines the driver and amplifier in one enclosure. That saves cargo space, reduces the number of components to mount, and generally simplifies wiring. Its trade-off is limited expansion: the smaller driver, built-in amplifier, and available thermal capacity restrict output and upgrade options.
A separate subwoofer and amplifier give you more control over the driver, enclosure design, impedance, and amplifier output. They can produce stronger or cleaner bass when matched correctly, but they consume more space and require more careful mounting, wiring, and cooling. In a small hatchback, the extra flexibility may be less valuable than preserving usable cargo room.
Compare RMS power rather than maximum wattage, then check the amplifier’s stable impedance range, the subwoofer’s sensitivity, and the enclosure design. Perceived loudness depends on RMS power, sensitivity, enclosure, cabin acoustics, impedance, and actual amplifier power. Maximum watts alone do not predict how loud or balanced the system will sound.
Placement deserves a real test in the vehicle. In a small cabin, moving the enclosure can change the perceived bass more than small differences between comparable models. A position that sounds full from the driver’s seat may sound weak from the passenger seat, so judge the setup where you normally listen.
Plan the Layout Before Removing Interior Trim
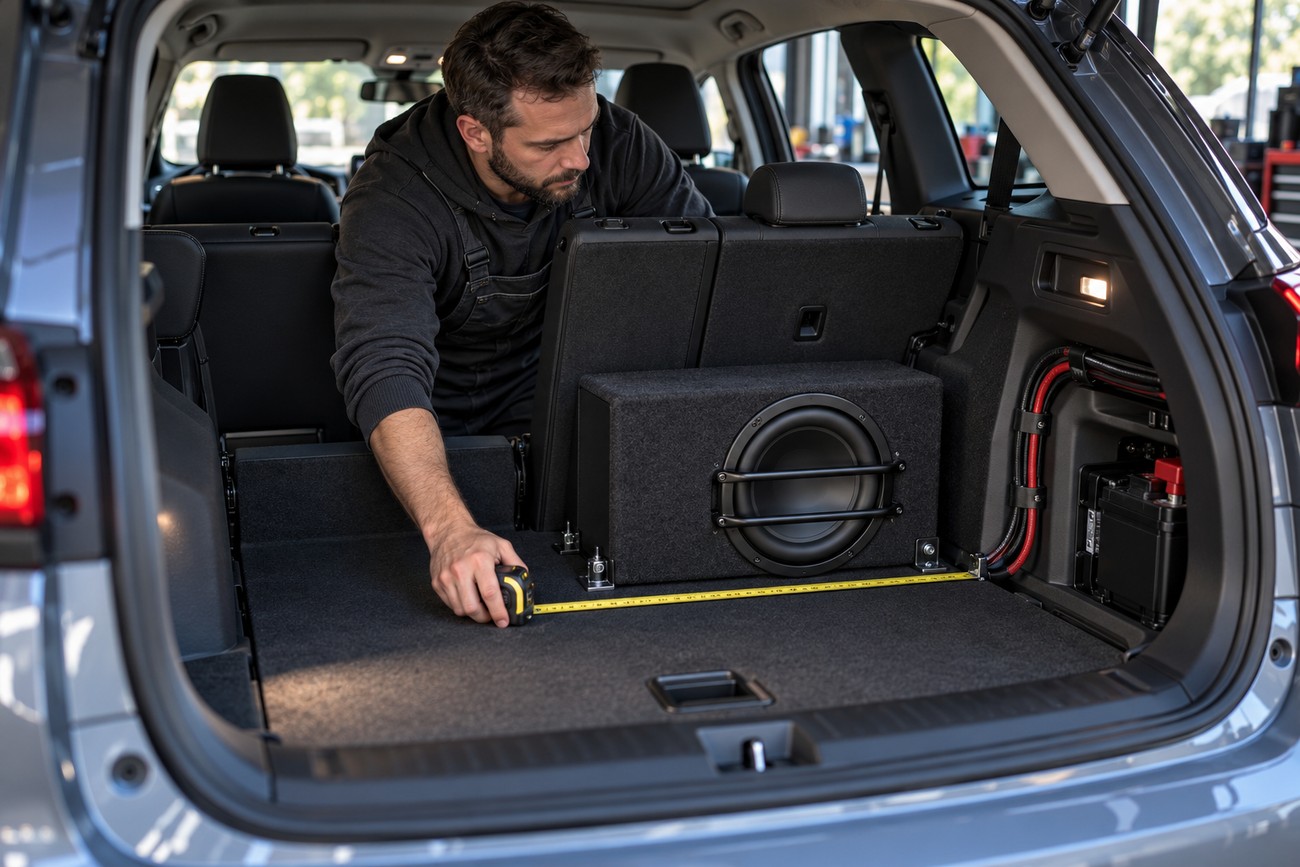
Measure the enclosure, amplifier, cable path, seat travel, and remaining cargo area before removing trim. Check access to the battery, firewall, ground point, and any panels that must be removed. Leave enough room to inspect connections later rather than burying every component under carpet.
The enclosure must be firmly restrained so it cannot move during sudden braking. A loose box can become a dangerous projectile, even if it feels heavy when the car is parked. Use suitable brackets or mounting hardware that does not damage fuel lines, wiring, or the vehicle structure.
An amplifier needs free space for cooling. A tightly enclosed under-seat location, or one pressed against carpet, a side panel, or a spare tire, can cause overheating and protective shutdown. Follow the equipment’s clearance requirements and keep ventilation paths open.
Installation includes interior disassembly, cable protection, tuning, and securing the enclosure, not only connecting wires. Plan how the seats, trim, spare tire, and cargo loading will work after the installation. A system that sounds good but prevents normal use of the car is poorly integrated.
Run Power, Fuse, and Ground Connections Safely
Place the main fuse near the battery. General guidance is approximately within 15 cm, while JBL specifies up to 46 cm for one powered-subwoofer installation; follow the specific documentation and local rules. The fuse protects the power cable from a short circuit, so it is required even when the system is not very powerful.
Pass the power cable through a factory firewall grommet or a separate rubber grommet. Never allow the cable to contact an unprotected sharp metal edge, because vibration can cut the insulation and create a fire hazard. Keep the cable away from brake and fuel lines, moving parts, hot surfaces, and places where trim can crush it.
Make the ground connection short and secure, using clean bare metal. Remove paint and corrosion at the contact point, use suitable hardware, and protect the finished connection from loosening. Long or painted bolt-on grounds can cause noise, voltage drop, and unstable operation.
Keep power and signal cables routed separately to reduce the chance of interference. This is cable protection and noise prevention, not a substitute for correct tuning. Cable separation cannot repair a poor ground, a loose connector, or an amplifier mounted directly to problematic metal.
Short-Run Power-Wire and Fuse Reference
These are Crutchfield-oriented references for short automotive runs, not universal prescriptions.
| Power cable | Fuse reference |
|---|---|
| 10 AWG | 25 A |
| 8 AWG | 60 A |
| 4 AWG | 100 A |
The correct choice can change with cable length, conductor material, temperature, allowable cable current, amplifier requirements, and manufacturer instructions. For the JBL GT-BassPro12, the documented requirement is minimum 12 AWG cable, a separate positive connection to the battery, and a 20 A fuse.
Connect to a Factory Stereo Without Guesswork
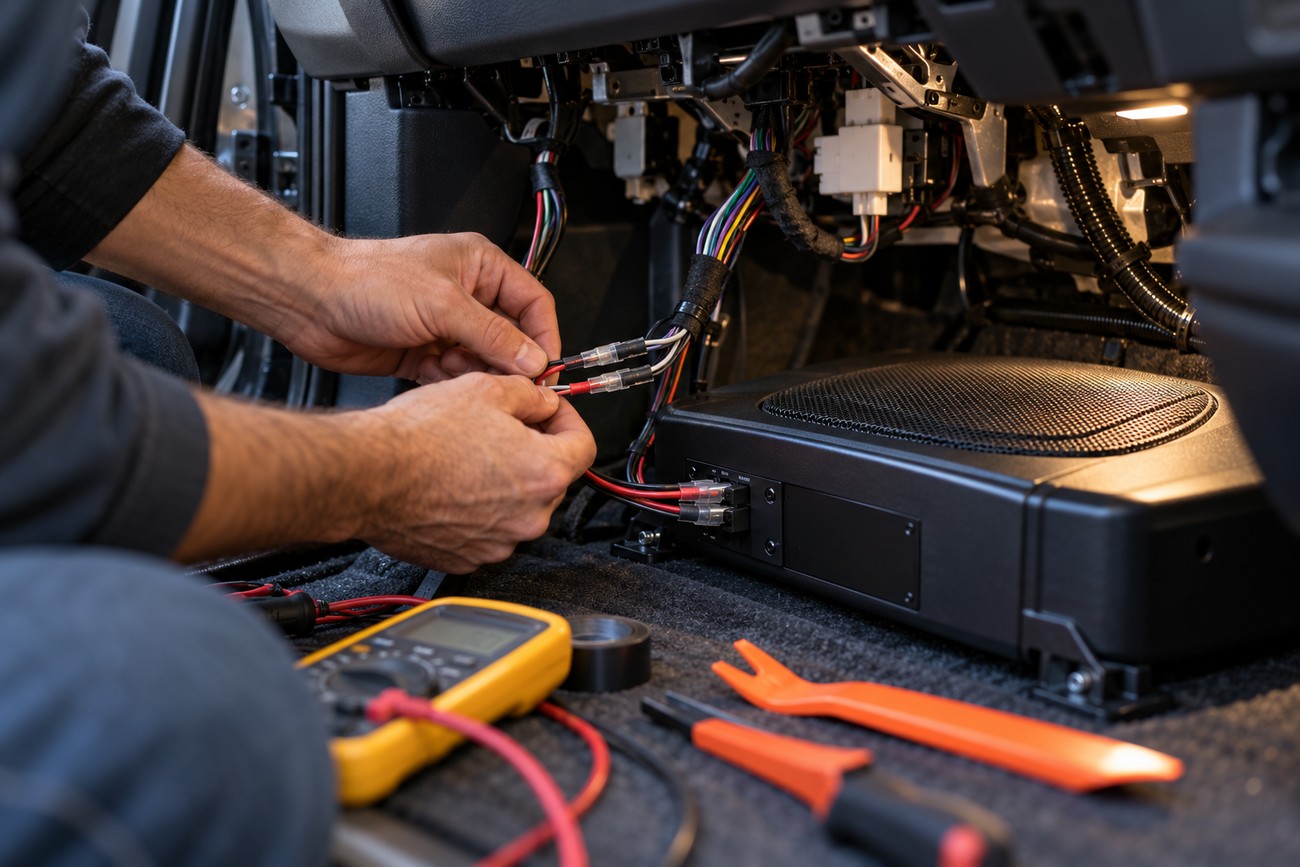
A factory stereo can feed an amplifier through a high-level input that accepts speaker-level signal. If the amplifier lacks that input, use a suitable line-output adapter. RCA outputs are not mandatory when the amplifier or powered subwoofer accepts the factory speaker signal directly.
Identify the correct left and right speaker wires before making connections, and use secure, insulated joints. Avoid cutting more factory wiring than necessary, especially in vehicles with integrated sound processing or unusual speaker loads. The equipment documentation should determine whether the input expects a full-range signal or a specific channel arrangement.
Route signal cables separately from the main power cable where practical to reduce interference risk. A low-frequency hum commonly points to poor grounding, signal-routing problems, or an amplifier mounted directly to metal. Separating cables may reduce pickup, but it cannot fix the underlying ground fault.
Connect the remote turn-on lead so the amplifier powers down with the vehicle. An incorrectly connected remote lead can leave the system active while parked and drain the battery. After installation, verify that the amplifier shuts off when the stereo and ignition are off.
Mount the Hardware and Finish the Installation
Protect every cable where it passes through panels, add strain relief near connectors, and check that no terminal can contact the chassis. Tighten connections without damaging terminals, then inspect the complete route before reinstalling trim. Keep service points accessible enough for future testing.
Mount the enclosure firmly so it cannot slide or lift during sudden braking. The best location depends on the vehicle, enclosure, and cargo needs, so test the position in the actual cabin before drilling or fastening. Small changes in orientation can alter the bass you hear from the driver’s seat.
Leave open space around the amplifier and its ventilation surfaces. Do not press it against carpet, a side panel, or a spare tire if that blocks cooling. Heat-related protection can appear to be a wiring fault because the system may work normally at moderate volume.
Reinstall the seats and trim, then check seat travel, hatch or trunk operation, spare-tire access, and normal cargo loading. Make sure no cable is pinched and that the enclosure cannot contact loose trim. Finish with a controlled listening test before using higher volume.
Tune the Bass and Diagnose the Problems People Actually Hear

Start with the gain low, play familiar music, and increase it gradually until the subwoofer blends with the main speakers. Set the low-pass filter so the subwoofer supports the system without making voices or upper-bass details obvious. The target is balance from the listening position, not maximum cone movement.
Check polarity and phase after the enclosure is secured. Incorrect polarity or phase can substantially weaken bass at the listening position, even when the subwoofer is producing sound. If bass is strong only at one volume, revisit gain, low-pass-filter settings, phase, and polarity before replacing equipment.
Polarity and phase are checked after the enclosure is secured because moving the box or changing its orientation can alter the result. Separate rattles and ground noise from genuine lack of subwoofer output before increasing gain.
A hum or whine usually calls for an inspection of the ground, signal route, and amplifier mounting. Amplifier shutdown at higher volume can result from overheating, voltage sag, excessively low impedance, or weak connections. Stop raising the gain until those possibilities have been checked.
Rattling trim, the license plate, and the trunk lid can mask useful bass and make the system seem poorly tuned. Locate the vibrating panel at moderate volume, then secure or damp it as appropriate. Vibration damping may add cost, mass, and installation time, so treat the source rather than covering the symptom with more power.
Set Realistic Expectations for the Car’s Electrical System
A subwoofer does not make a weak battery or alternator more capable. Loud operation increases electrical demand, and a battery or charging system that is already weak may show voltage sag, shutdowns, or slower recovery. The audio upgrade should expose a problem for diagnosis, not be used to compensate for it.
Listening at high volume with the engine off is especially demanding because the alternator is not supporting the load. Avoid extended sessions in that condition, particularly if the battery is older or the vehicle already cranks slowly. An incorrectly connected remote lead can also keep the amplifier awake while the car is parked.
Noticeable headlight flicker during bass hits indicates excessive electrical demand from the audio system. It is a warning sign, not a normal tuning target. Check the battery, charging voltage, cable connections, ground, fuse arrangement, and amplifier load before increasing gain or installing a larger system.
Use the specified fuse and cable rather than choosing parts by the advertised bass output. If the amplifier overheats, shuts down, or causes repeated voltage problems, reduce the load and troubleshoot the installation. A reliable system with moderate output is safer and more useful than a louder system that strains the vehicle.
Frequently asked questions
How easy is it to install a subwoofer in a small car?
The job is manageable for a careful DIY installer when the vehicle has accessible battery and firewall points, straightforward trim, and equipment with clear wiring instructions. It becomes more demanding when firewall access is difficult, factory wiring is complex, or you are not confident making a fused battery connection and a clean ground.
Choose professional installation if you cannot verify the cable route, safely install the fuse, or secure the enclosure against movement. The work also includes trim removal, cooling clearance, signal integration, and final tuning.
How much does it cost to install a subwoofer in a car?
There is no universal installation price. The total depends on the subwoofer or powered unit, amplifier, wiring kit, signal adapter, enclosure type, vehicle complexity, vibration damping, and whether the work is DIY or professional labor.
Ask for an itemized estimate that includes cable protection, fuse hardware, mounting, signal integration, and tuning rather than comparing labor alone.