

Metallic paint can stripe, cloud, or change appearance by angle even when the material itself is suitable for the job. The visible defect often comes from uneven pigment orientation, so a panel may look acceptable head-on and show bands as soon as the light moves across it.
The result depends on surface preparation, gun setup, spray distance, overlap, hand speed, viscosity, pressure, and drying. A controlled method keeps these variables stable from the first pass to the last instead of relying on a heavy coat to hide uneven coverage.
- Why Metallic Paint Stripes and Changes Appearance by Angle
- Prepare the Metal Before You Load the Sprayer
- Set Up the Paint, Sprayer, and Work Area for Consistency
- Spray the Metallic Coat Without Striping
- Diagnose Striping, Dry Spray, Spots, and Runs
- Frequently Asked Questions
- What size tip do you use to spray metallic paint?
- How long should metallic paint dry before clear coat?
- Why does metallic paint look different under LED light and daylight?
Why Metallic Paint Stripes and Changes Appearance by Angle
Metallic paint contains reflective particles that change the way light returns from the surface. Their orientation depends on how the spray fan reaches the panel, how quickly the gun travels, and how wet or dry each pass lands. Small changes in these conditions can produce bands that resemble a color mismatch even though the paint came from one batch.
Large, flat panels expose this problem more clearly than textured or heavily contoured parts. On a broad door, hood, or sheet-metal panel, each pass creates a long reflective path. Uneven overlap, a changing gun angle, or a brief pause inside the panel can therefore create a visible transition that becomes stronger under angled light.
Dry spray makes the effect worse because partially dried material does not settle into the same film as a properly wet pass. Excessive distance, changing hand speed, or an unstable spray pattern can leave a dry, hazy band beside a wetter area. Surface texture also matters: scratches, sanding marks, rust pits, and other micro-relief alter reflection and can make a spray defect appear larger.
Solid colors usually hide small differences in pigment orientation more effectively. Metallic paint is more sensitive to spray technique, so expensive material does not guarantee a stripe-free finish. Clear coat adds gloss and depth, yet it does not correct uneven metallic-pigment placement; under angled light, it may make the variation easier to see.
Prepare the Metal Before You Load the Sprayer
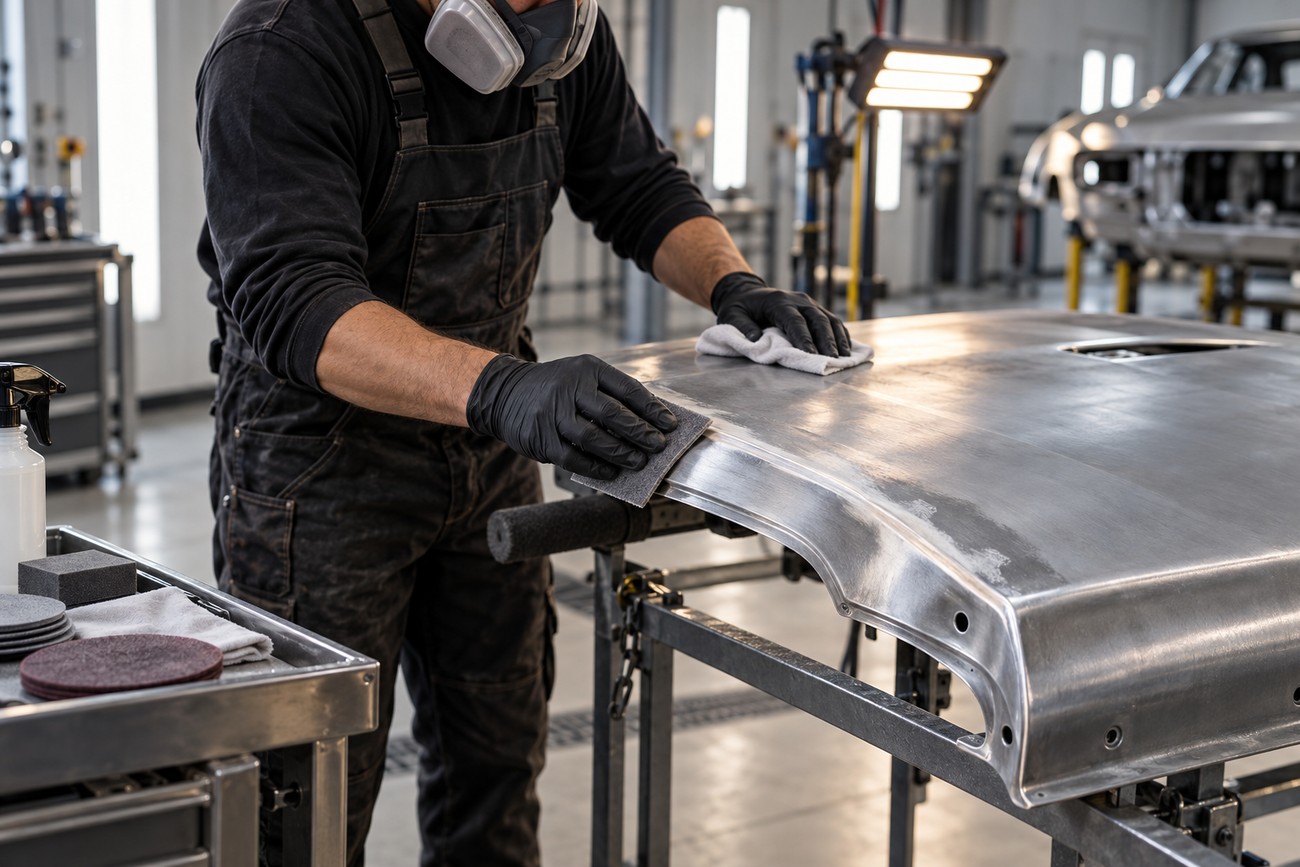
Begin with a surface that is mechanically sound, clean, and compatible with the coating system. Remove rust, loose coating, welding residue, dust, and old defects before mixing paint. Cleaning and degreasing improve adhesion and reduce the risk of peeling, while a consistent surface texture helps the metallic layer reflect light evenly.
Level sharp edges and repair runs, burrs, and welding spatter before spraying. GOST 9.402-80 specifies that the surface should not have burrs, welding spatter, runs, or sharp edges with a radius below 0.3 mm. These defects can remain visible through the paint, and the edge geometry can change how the spray deposits material.
After defect removal, use the surface preparation and abrasive grade specified for the primer and paint system. Remove sanding dust thoroughly, then decrease with a compatible product and a clean method that does not redistribute contamination. A panel that looks clean can still contain oil from handling, silicone residue, or fine dust that causes spots and adhesion problems.
Use a compatible primer wherever the system requires one, and allow it to dry and be prepared according to its technical instructions. The final primer surfacer should be uniform and properly keyed. Metallic paint will reproduce a rough or uneven foundation through changes in reflection, so spraying more material cannot reliably compensate for poor preparation.
GOST 9.402-2004 cites 4–10 minutes and 2–5 minutes for relevant preparation operations. For local work on painted or primed surfaces, it cites 30–60 seconds and 1–5 minutes for site preparation. Treat these as reference values for the applicable operations, not as a replacement for the coating manufacturer’s instructions, because products and process conditions differ.
Set Up the Paint, Sprayer, and Work Area for Consistency
Mix the paint thoroughly before spraying so the metallic pigment is distributed through the material. Keep the viscosity consistent throughout the job by following the product technical sheet and using the specified reducer or thinner. A change in viscosity can alter atomization, wetness, and pigment laydown even if your hand technique remains unchanged.
Clean the gun, confirm that the fan is even, and test the spray pattern on a test panel or masking paper. A practical starting geometry is a nozzle held perpendicular to the surface, 15–25 cm from the panel, with approximately 50% overlap between passes. The coating manufacturer’s technical sheet controls if it specifies different equipment or settings.
Maximum pressure is not a substitute for a stable fan. Excessive pressure can create a dry cloud, while insufficient or unstable atomization can produce coarse texture and uneven coverage. Adjust the equipment so the fan remains consistent across its width, then keep the distance, gun angle, and travel speed steady as you move across the panel.
Keep the air and substrate within a practical range of +10°C to +30°C, with humidity below approximately 70–80%, unless the product instructions specify otherwise. Cold, heat, or high humidity changes evaporation and drying, which can affect how the metallic pigment settles. Avoid spraying onto a panel that is much colder or warmer than the surrounding air.
Spray the Metallic Coat Without Striping
Plan the path before pulling the trigger. Hold the nozzle perpendicular to the panel and keep it 15–25 cm from the surface. Start the fan before entering the panel, move at a constant speed, and maintain approximately 50% overlap with the previous pass. The exact speed depends on the equipment and coating, so judge the result by the wetness and uniformity of the test fan rather than by a fixed hand count.
Carry the fan beyond the opposite edge before releasing the trigger. Avoid stopping in the middle of the panel, because the extra material deposited during a pause creates a visible transition. Work in a repeatable sequence so each pass follows the same direction, distance, overlap, and travel rhythm.
Apply 2–3 thin coats with intermediate drying rather than trying to achieve coverage in one heavy coat. The first coat establishes an even foundation, while later coats build coverage and help even the orientation of the metallic pigment. Light shades and some metallic systems may need the full coat sequence because one pass can look uneven even when the substrate is prepared correctly.
Use the coating manufacturer’s specified flash or recoat window between coats. There is no universal interval in the available guidance: spraying too early can disturb the pigment and move partially settled material, while waiting too long can reduce intercoat adhesion. The working thickness for spraying over primed or painted surfaces is referenced by GOST 9.402-2004 as 0.08–0.2 mm, which helps keep the process away from excessive buildup.
Inspect the panel after the coating has settled, using the same lighting and viewing angles you will use for final evaluation. If the metallic pattern is uneven, adding a wet localized patch usually creates another optical transition. Allow the coating to reach the appropriate correction stage, then follow the system instructions for sanding, recoating, or continuing with clear coat.
Diagnose Striping, Dry Spray, Spots, and Runs
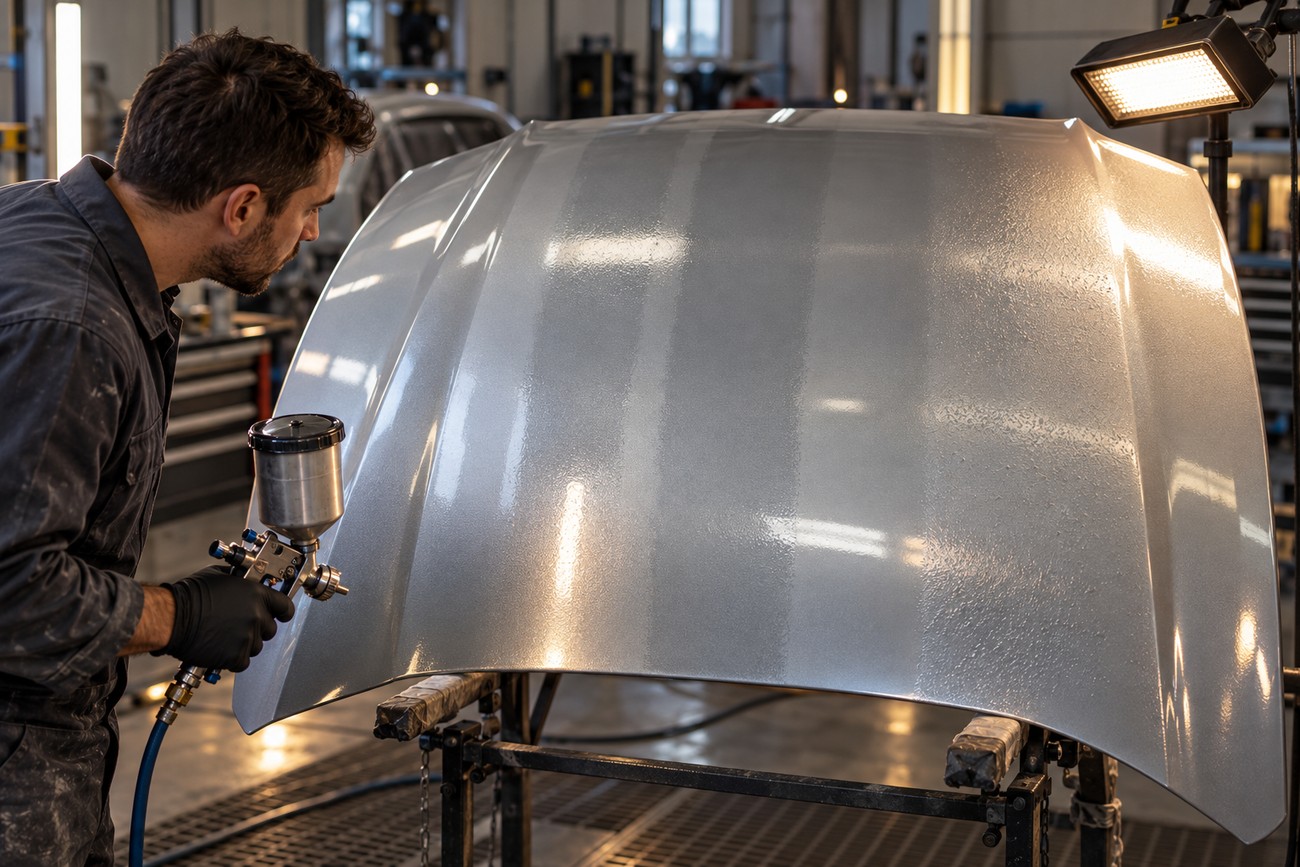
Striping usually follows a pattern: the bands run in the direction of the passes, or a clear transition appears where the gun slowed or stopped. Check for changing distance, a tilted nozzle, inconsistent overlap, unstable viscosity, pressure changes, and interruptions inside the panel. Correct the variable that changed rather than adding material randomly to the visible stripe.
Dry spray and orange peel can indicate that the fan is not depositing a suitably uniform film. Excessive distance, a dry pass, unsuitable atomization, or poor environmental conditions can leave a rough or hazy surface. Verify the product setup, test the fan again, and maintain the specified geometry before returning to the panel.
Spots can come from dust, rust, oil, poor degreasing, or an uneven substrate. These defects may remain localized while the rest of the panel looks acceptable, which makes them easy to misdiagnose as pigment variation. Stop if contamination or rust is visible, allow the coating to dry as required, correct the surface, and prepare it again before recoating.
Runs indicate excessive material in one area, often from a slow pass, excessive overlap, a close gun position, or an attempt to obtain coverage in one coat. Heavy coats increase the risk of runs, uneven sheen, and visible metallic variation. High-quality paint cannot compensate for unstable viscosity, pressure, distance, overlap, or hand speed, and painting over rust may preserve the underlying adhesion problem even if the surface initially appears covered.
Frequently Asked Questions
The correct setup depends on the coating system, equipment, panel shape, and working conditions. Use these answers as process guidance, then confirm the final settings against the product technical sheet and a test panel.
What size tip do you use to spray metallic paint?
There is no safe universal tip size for metallic paint. The suitable tip depends on the specific product technical sheet, the sprayer, the reducer or thinner, and the fan required for the panel.
Verify the setup on a test panel before painting the part. The fan should be even, with no heavy edges, dry center, or unstable atomization. A tip that works for one metallic system can produce a different result with another material, so an invented universal size is less reliable than the manufacturer’s specification and a controlled test.
How long should metallic paint dry before clear coat?
Use the coating manufacturer’s specified recoat or clear-coat window; a fixed universal time cannot be supplied for every metallic system. The correct point depends on the product, film thickness, temperature, humidity, and airflow.
The surface should be sufficiently flashed for the next layer without being disturbed by the clear coat. Spraying too early can move or mark the metallic pigment, while waiting beyond the specified window can affect intercoat adhesion. Follow the technical instructions and avoid judging readiness by surface appearance alone.
Why does metallic paint look different under LED light and daylight?
LED light and daylight differ in direction, intensity, and spectral content, so they can reveal different aspects of metallic pigment orientation. A panel may look uniform head-on under diffuse light and show bands when a directional source reflects across it.
Inspect the finish under more than one light source and from multiple viewing angles. Move the light or the panel if possible, then compare the surface straight on and obliquely. This separates a lighting effect from a real stripe and helps reveal uneven orientation before clear coat or final assembly.







