
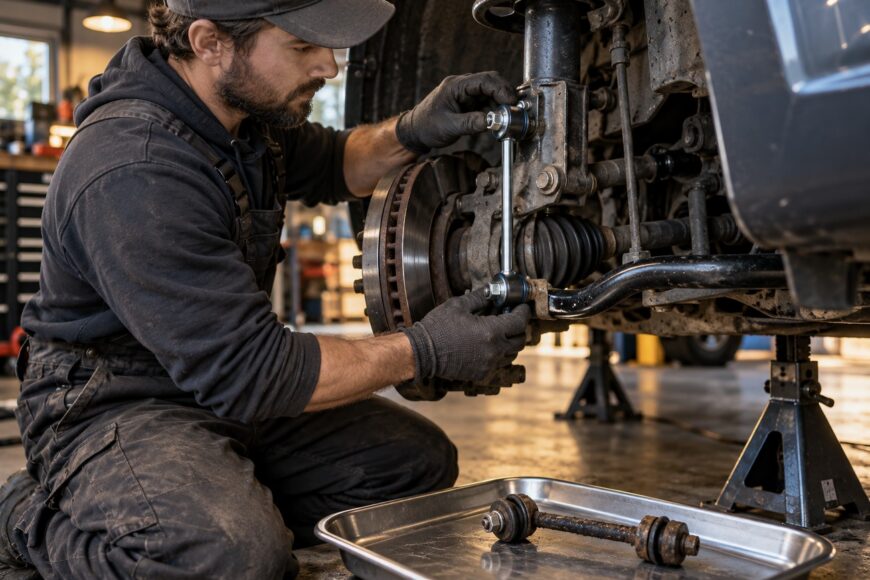
Replacing a noisy front sway bar link is frustrating when the clunk is still there afterward. The sound may come from the link, but nearby steering and suspension parts can sound much the same. Checking for play before ordering parts gives the repair a better chance of solving the problem.
The job also depends on how the suspension is supported. A twisted sway bar can hold the mounting holes out of alignment, while seized nuts can turn a straightforward removal into a careful cutting job. Before fitting a new link, confirm its shape and clearance, then use the torque and suspension-positioning instructions for your vehicle.
- Diagnose the clunk before replacing the links
- Choose matching links, hardware, and tools
- Support the car and unload the sway bar
- Remove seized front sway bar links without damage
- Fit the new links and torque them correctly
- Check your work before and after a test drive
- If the new links do not cure the noise
- Frequently asked questions
- What is the average cost to replace a front sway bar link?
- How do I find the right front sway bar link procedure for my Ford?
- What happens when front sway bar links go bad?
- What is the average cost to replace a sway bar link?
- How to replace front sway bar links on a Ford?
Diagnose the clunk before replacing the links
Play in a worn sway bar link joint can cause a front-end clunk over small bumps, particularly when one front wheel rises before the other. You may also notice less precise handling as the joint loosens. The sound alone does not identify the failed component, so locate the movement before treating the link as the cause.
Park on level ground, secure the vehicle, and inspect the links in the position that gives safe access. If you need to work beneath the car, support it at approved points on stands; never rely on a jack. Look for a split or displaced joint boot, escaped grease, corrosion around the joint, or a stud that moves independently of its housing. A torn boot suggests contamination, although an intact boot does not prove the joint is sound.
Check each accessible joint for perceptible play while watching the stud and housing, rather than judging by movement of the suspension as a whole. Compare the two sides and note where movement or a knock originates. The sway bar may be loaded when the front suspension sits at unequal heights, which can make a faulty joint harder to assess and can put force on the link you are handling.
Sway bar bushings, ball joints, tie rods, and strut mounts can produce similar noises. Bushings may let the bar shift in its mounts; steering and suspension joints need their own checks using the vehicle’s service procedure. A worn link commonly affects noise and handling feel, but a loose component or one that contacts a moving part calls for prompt inspection before further driving.
Choose matching links, hardware, and tools
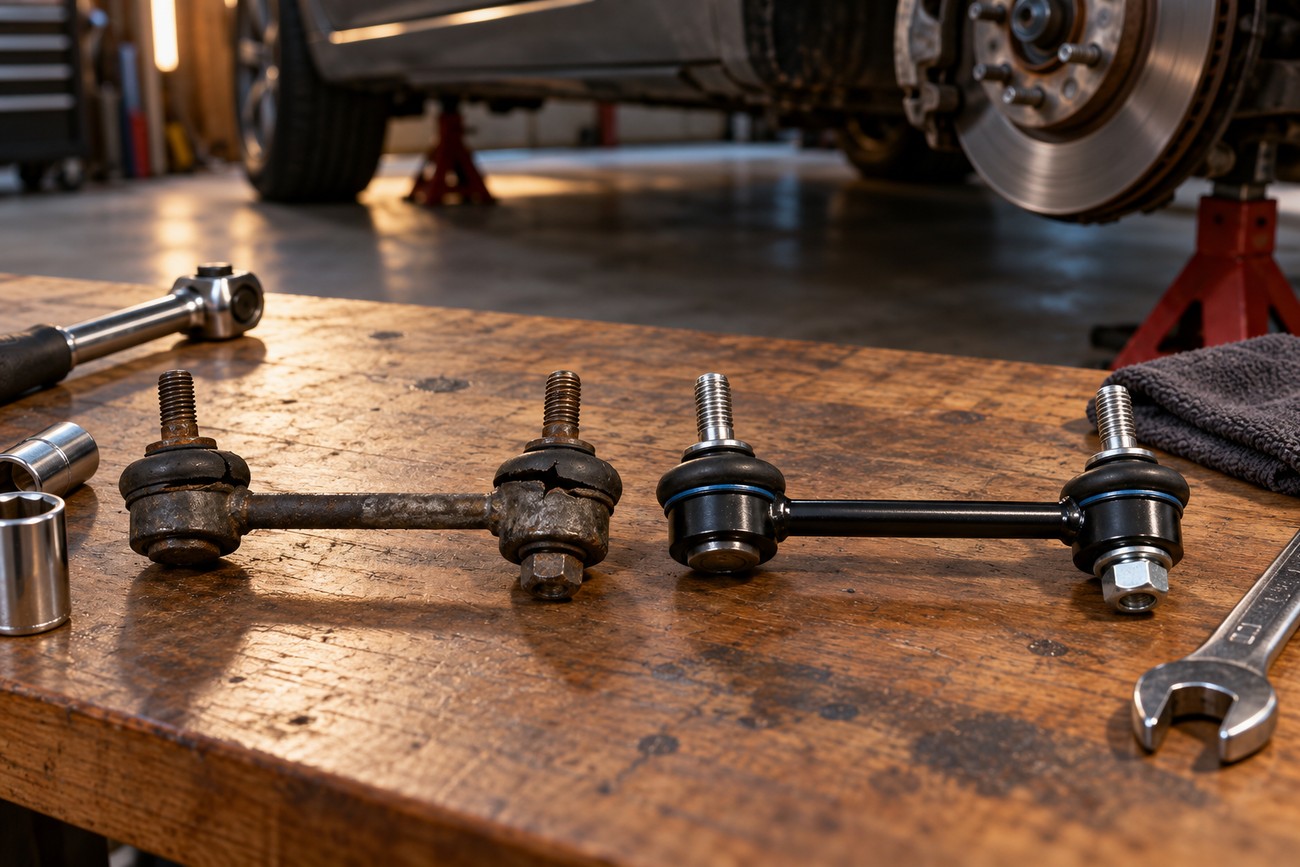
Confirm the model, year, and suspension configuration before buying links; versions of the same vehicle can use different parts. Match link length, end orientation, mounting style, and clearance to the specific vehicle configuration. Once the old link is accessible, compare it with the replacement side by side, including the angle of the ends and the way each stud passes through its mount.
Joint sealing, thread quality, and supplied hardware matter as much as a product label. An advertised “heavy-duty” link is no proof that it fits or suits the suspension: a different end angle or body shape can put it close to a strut, hose, wheel, or liner. Check the actual part against the order before dismantling the car, and inspect new boots for damage.
Prepare wheel chocks, a suitable jack and stands, the correct sockets or wrenches, a torque wrench, and the hex or Torx tool needed to hold the link studs. A wire brush and penetrating oil help with exposed, corroded threads. Check access before you start: a deep socket may reach one nut, while the other may require a slimmer wrench to leave room for the stud-holding tool.
Read the vehicle and replacement-part instructions for fastener requirements. Some manufacturers permit reuse of self-locking nuts; others require new ones, so do not assume either rule applies universally. Have the specified nuts ready before removing the old links, and check whether washers or other hardware must be transferred or replaced. Replacing both links on the axle is commonly recommended, but follow the applicable service guidance.
Support the car and unload the sway bar
Park on firm, level ground, apply the parking brake, and chock the rear wheels. If a front wheel must come off, loosen its fasteners slightly while the tire is still on the ground. Lift only at approved points, place stands where the vehicle manufacturer permits, and settle the car securely on them before reaching beneath it. Leave enough working space to keep your hands clear if the bar moves.
Unequal front suspension heights can twist the sway bar and load the link. Raising both front sides to comparable heights usually reduces that twist and makes the mounting points easier to align. Do not assume the link is free of load merely because its wheel is off the ground; watch for movement as you loosen the fasteners.
If the mounting holes sit apart after the old link is removed, treat that gap as a suspension-positioning issue. Adjust the supported suspension as the service procedure permits rather than drawing the new link into place with its nut.
Some procedures require positioning the suspension near normal ride height for installation or final tightening. Where specified, use a jack under the approved control-arm support point to raise the arm carefully while the vehicle remains securely supported on stands. Keep the jack stable, avoid lifting the vehicle off its stands, and follow the model-specific sequence. If you cannot support the car and position the arm safely at the same time, leave that operation to a properly equipped workshop.
Remove seized front sway bar links without damage
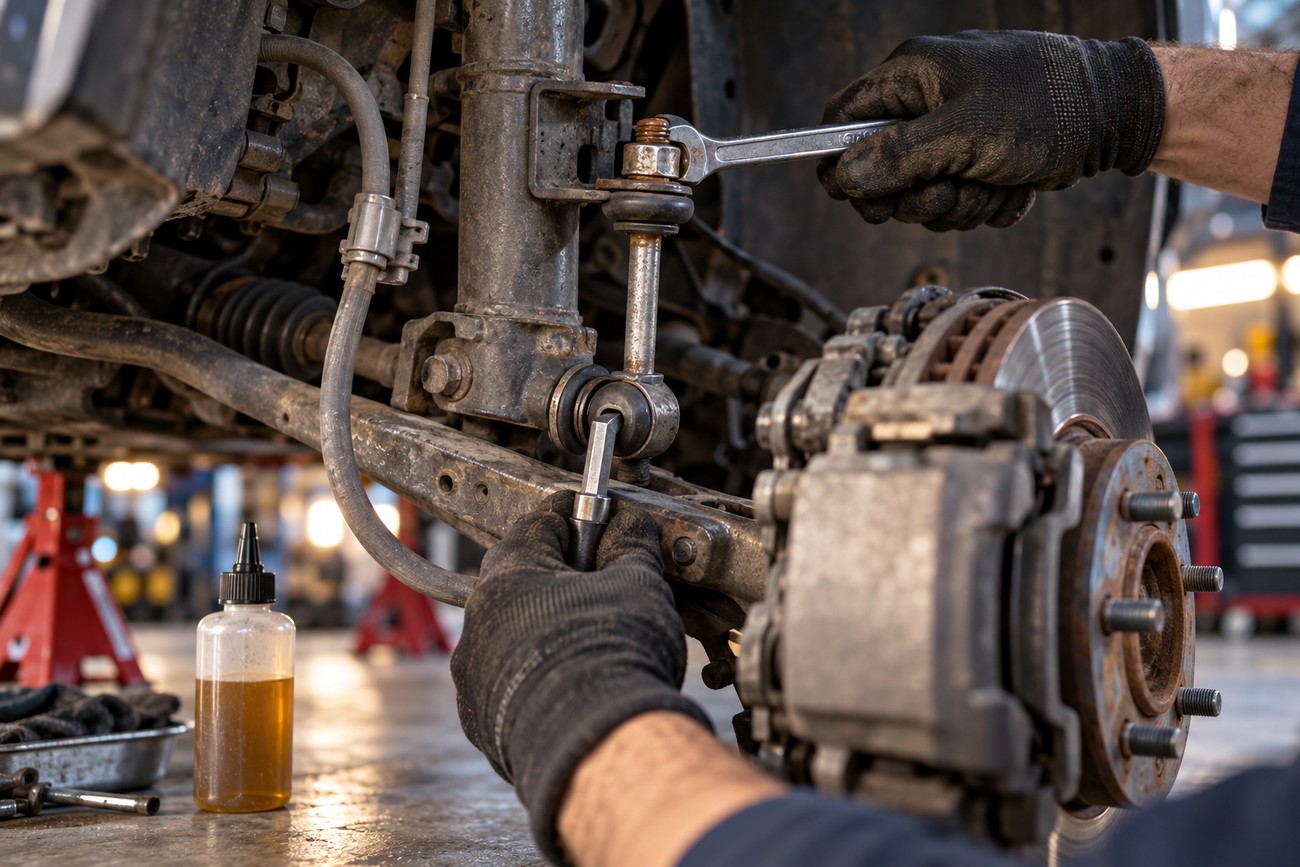
Inspect both ends of the link before turning a nut. Identify the socket or wrench size, the stud’s holding feature, and anything close enough to be damaged if a tool slips. Clean exposed threads with a wire brush, apply penetrating oil, and allow it time to work. Recheck the suspension support before applying substantial force.
Hold the stud using its designed hex or Torx feature while loosening the nut. On some links, the feature is in the end of the stud; on others, a wrench fits flats behind the mounting surface. Keep the holding tool seated as you turn the nut, and watch the bar and link for movement. If a stud spins with the nut, continued turning can damage its threads without releasing the fastener.
A seized nut may need another application of penetrating oil or an appropriate extraction method. Do not clamp pliers onto a joint shaft to stop it spinning: the jaws can damage the boot or shaft. An impact tool that simply spins the stud can cause similar damage. If the removal method calls for heat or cutting, account for nearby rubber, wiring, brake hoses, and fluid lines before proceeding.
Cutting an old link can be the last resort when the holding feature or nut has failed, but it requires controlled access and suitable protection for surrounding parts. Stop if you cannot keep a cutting tool clear of the strut, hose, boot, or wiring. Once the link is free, examine the mounting holes and contact surfaces for damage or corrosion that might prevent the new hardware from seating properly.
Fit the new links and torque them correctly
Before installing a replacement, compare it once more with the removed link. Check the overall length, end orientation, mounting style, and the direction each stud must enter its mount. An incorrect link can appear close enough to install yet leave inadequate clearance as the wheels steer or the suspension moves. Resolve a mismatch with the correct part; do not bend a bracket or force the studs into place.
Position the link according to the vehicle procedure and start both fasteners by hand. The studs should pass through their mounts without using the nuts to pull widely separated holes together. If the sway bar is holding a hole out of position, reassess the support and suspension height before continuing. Use the supplied or specified nuts and washers in the prescribed arrangement, keeping each joint boot clear of the mounting surfaces.
Hold each stud with its designed hex or Torx feature while tightening. Use the exact vehicle or part torque specification; no single torque value applies to all front sway bar links. Follow any instruction to position the suspension near normal ride height for final tightening. If the holding feature cannot be used with your torque-wrench setup, obtain a suitable tool or use the manufacturer’s approved method rather than estimating by feel.
Keep the fastener threads in the condition assumed by the applicable instructions. Adding anti-seize or other lubricant without authorization can change the clamping force produced by a specified torque. Overtightening is no remedy for a clunk and may damage hardware or the joint. After tightening, check that the boots remain intact and the link has clearance in its installed position.
Check your work before and after a test drive
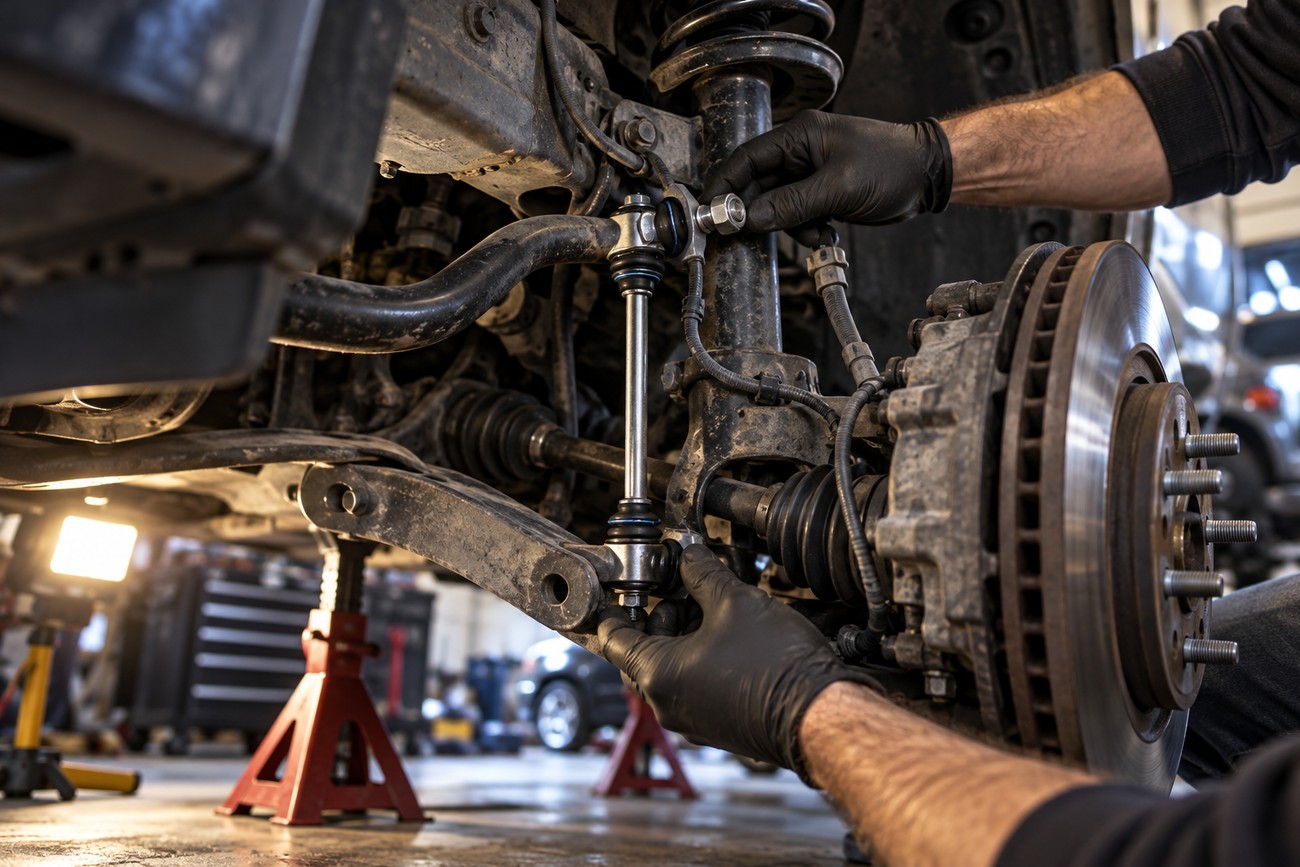
With the car still securely supported, inspect both link ends. Confirm that the fasteners are seated, the boots have not been pinched, and neither link touches a brake hose, sensor wire, strut, or other nearby part. Where you can do so safely, turn the steering through its range and check for contact. A fitment problem found here should be corrected before the car is driven.
Refit any removed wheels and tighten their fasteners in the vehicle’s specified sequence and to its wheel-fastener torque. Remove the stands, lower the car fully, and make a final visual check that tools and loose hardware are clear. Take a cautious drive over a familiar, low-speed route, listening for the original clunk and any new sound while noting whether steering and suspension behavior feel normal.
If a knock returns, check link fit, clearance, and fasteners against their specified torque. Do not tighten beyond that specification in an attempt to silence it. Recheck link fasteners after driving only when the applicable vehicle or part instructions call for it; there is no universal mileage interval for extra tightening. Any rubbing, unexpected resistance, or obvious looseness warrants stopping and inspecting the car before driving farther.
If the new links do not cure the noise
Start with the work you just completed. Verify that the installed links match the vehicle, sit in the intended orientation, clear surrounding components, and have secure hardware. A link that is too long or has differently angled ends may create a new contact noise, particularly during steering or suspension travel. Do not dismiss a fresh scrape as the old clunk changing character.
Next, inspect the sway bar bushings and mounts. A worn bushing can let the bar shift and knock even when both links are sound; a loose mount can do the same. Check for visible movement or damaged rubber using the vehicle’s inspection procedure. This order helps separate a problem at the bar from a problem at a steering or suspension joint.
Then examine the nearby ball joints, tie rods, and strut mounts, which can produce similar noises over small bumps. Identify where play occurs rather than replacing another part based on sound alone. A new link does not become defective simply because the original noise remains; the first diagnosis may have missed a second worn component or a different source entirely.
Stop driving and seek qualified help if any component is loose, contacts a moving part, or cannot be assessed safely on stands. Replacing a sway bar link alone does not ordinarily change alignment adjustments, so an alignment is not an automatic cure for a remaining clunk. If steering behavior has changed or other suspension work was performed, have those symptoms evaluated on their own merits.
Frequently asked questions
These answers cover decisions that vary by vehicle or repair shop. For parts, fasteners, and tightening instructions, the information for your exact vehicle and replacement link takes priority over a general guide.
What is the average cost to replace a front sway bar link?
There is no useful single average for every vehicle. Part quality, access to seized fasteners, local labor rates, and whether the quote covers one or both front links all affect the total. Ask whether replacement nuts, wheel removal, and an inspection of nearby sway bar components are included, so you can compare quotes on the same basis.
How do I find the right front sway bar link procedure for my Ford?
Use service information matched to your Ford’s model, year, drivetrain, and suspension configuration. “Ford” does not describe one link design or one torque specification. Confirm the vehicle details before ordering parts, then match the procedure’s support points, suspension-positioning requirements, hardware rules, and torque values to that configuration.
What happens when front sway bar links go bad?
Wear can create play in a link joint, causing a clunk over small bumps and making the car feel less settled during direction changes. The effect is commonly noise and reduced handling precision rather than an immediate loss of control. Because other faults can sound alike, inspect the link and nearby joints; arrange prompt inspection if anything is loose or interferes with a moving part.
What is the average cost to replace a sway bar link?
A quote for a single sway bar link is not necessarily comparable with one for a pair or for both axles. The vehicle, chosen part, workshop rates, and difficulty removing old hardware determine the charge. Ask the workshop to identify which link or links it will replace and whether seized-fastener work would change the estimate.
How to replace front sway bar links on a Ford?
First identify the exact Ford configuration and obtain its matching service procedure and replacement links. The general job involves safely supporting the front of the vehicle, controlling sway bar load, removing the old links, and tightening the correct hardware to the specified torque. Ford-specific details can change the support arrangement and final-tightening position, so use those instructions before loosening a fastener.







