
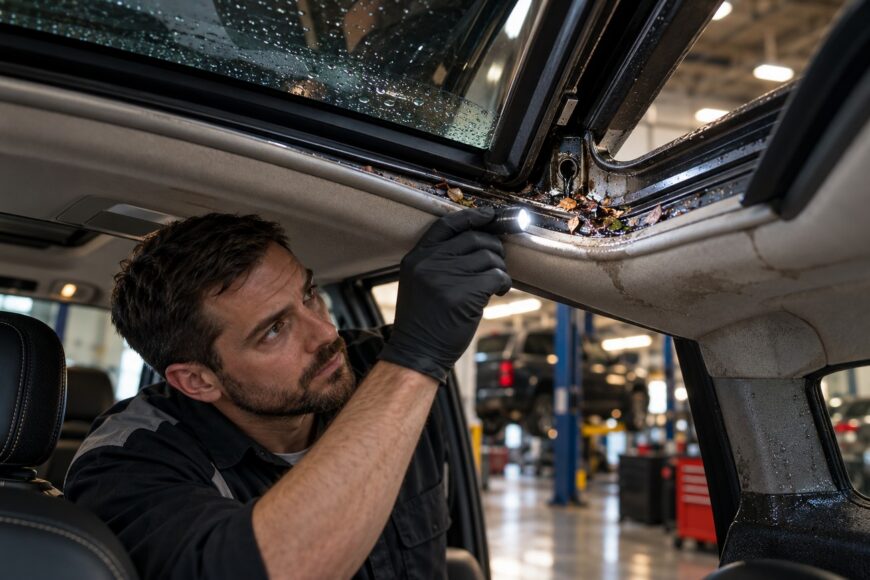
Water on the headliner, a pillar, or the carpet is frustrating, especially when the sunroof glass and seal look perfectly normal. The visible leak may appear far from its source because water can travel through the roof structure and trim before entering the cabin.
A sunroof is designed to collect some water in a channel and direct it through drains. The fault may be a blocked, disconnected, kinked, or poorly routed drain rather than a failed seal. Identify the source before inserting anything into the tube or applying compressed air.
- Start by Identifying the Actual Leak
- Clean and Test Each Sunroof Drain Safely
- When Cleaning Does Not Fix the Leak
- Dry the Interior and Prevent Repeat Damage
- Frequently asked questions
- How much does it cost to fix a sunroof drain?
- What is the best sealant for a leaking sunroof?
- Why is my sunroof leaking water when it rains?
- How often should I clean my sunroof drains?
Start by Identifying the Actual Leak
Open the sunroof and inspect the glass, its perimeter seal, and the water-collection channel. A small amount of water in the channel is normal. Most designs use up to four drains, commonly positioned at the corners of the channel, although the exact layout depends on the vehicle model.
Look for leaves, mud, and sediment around each drain opening. Check whether the glass sits evenly in the roof opening and whether one corner appears higher or lower than the others. Shifted glass can allow water past the intended sealing surfaces, while damaged weatherstripping can leak even when the drains are clear.
Inspect the headliner, roof trim, pillars, and carpet for the highest wet point. Water appearing near a pillar after rain may come from a drain connection behind the trim rather than from the glass above it. A carpet that feels damp after the headliner dries indicates that water may have moved into the padding or underfloor insulation.
Keep the possible causes separate during diagnosis: a clogged drain, a disconnected or kinked hose, misaligned glass, damaged weatherstripping, or a leaking sunroof frame. Cleaning the seal alone will not correct a hose fault, and clearing a drain will not correct poor glass alignment.
Clean and Test Each Sunroof Drain Safely
Park the vehicle on level ground and remove loose debris from the entire water-collection channel. Use a soft brush or cloth around the drain openings, taking care not to push dirt into the tubes. Identify each accessible drain separately so that a rising water level can be linked to a specific channel.
Use a thin nylon trimmer line or flexible nylon cord as a gentle cleaning tool. Feed it into the opening with minimal pressure and move it back and forth. Rigid metal wire, drills, and forceful probing can puncture the tube, damage a connector, or push the blockage farther down the route.
A short, forceful air pulse from the top can detach an otherwise intact hose inside a pillar. That turns a simple blockage into a trim and upholstery removal job, so gentle mechanical cleaning and slow flushing are safer first choices.
After light probing, pour a small amount of water slowly into that drain and watch the lower outlet. A successful test means water exits outside the vehicle without the level rising in the channel. A strong stream is unnecessary because the tube may have a small diameter and several bends.
Repeat the process for every accessible drain. Compressed-air guidance is disputed: one checklist cites a 30 PSI limit, while practitioners warn that even a forceful impulse can detach the hose. If air is used at all, avoid treating that figure as a guarantee of safety, and check the lower end first whenever possible.
When Cleaning Does Not Fix the Leak

Water disappearing from the upper opening does not prove that the hose remains connected or that the lower outlet is clear. The hose may be detached below the headliner, kinked behind trim, or routed incorrectly after previous work. A lower outlet can also remain blocked by road dirt even after nylon line passes through from above.
Locate the exit before using pressure. Front drains commonly lead toward the front fender area. Rear drains may run toward pillars, sills, or rear wheel arches, but the actual routing depends on the vehicle, so avoid pulling trim or removing wheel-arch liners based on a generic diagram.
Inspect the lower outlet for mud, insects, and accumulated road debris. Clear the opening carefully, then repeat the slow water test from above. If water reaches the lower hose but fails to exit, the blockage may be at the outlet or in a bend rather than at the roof opening.
A disconnected hose may require partial lowering of the headliner to inspect the connection. Depending on the vehicle design, the rubber connector may be refitted and secured with a suitable clamp. This is a model-dependent repair; forcing the hose into place without checking its route can create another kink or pull it off the fitting again.
Dry the Interior and Prevent Repeat Damage
Drying the headliner does not confirm that the cabin is dry. Lift the edge of the carpet where practical and check the padding, insulation, wiring, and electrical connectors. Water can remain trapped under the carpet after visible roof trim has dried.
Persistent moisture may produce odors, corrosion at connectors, and recurring electrical problems. If the carpet or insulation is saturated, ventilation alone may be insufficient. Dry the affected materials thoroughly and inspect nearby wiring before reinstalling trim.
After the drain repair, perform a rain-style test over the glass and frame with a slow, controlled flow of water. Test the glass perimeter as well as each drain. Free-flowing drains do not rule out misaligned glass, damaged weatherstripping, or leakage through the sunroof frame.
Inspect the drains after leaf fall and whenever symptoms return, particularly if the vehicle is parked under trees or exposed to heavy debris. Some service recommendations suggest monthly cleaning, but no universal interval is confirmed for every vehicle. Condition-based inspection is safer than applying the same schedule to every model.
Frequently asked questions
How much does it cost to fix a sunroof drain?
Cost depends on the fault and the access required. A simple blockage may involve cleaning and testing, while a blocked lower outlet may require access near a fender, sill, or wheel arch. A disconnected hose can require partial headliner removal, and moisture damage may add carpet, insulation, connector, or wiring work.
A repair estimate should identify whether the drain is blocked, detached, kinked, or intact with a separate glass or frame leak. This diagnosis prevents paying for seal replacement when the actual fault is a drain connection.
What is the best sealant for a leaking sunroof?
Sealant is appropriate only when inspection confirms a compatible sealing or frame joint problem. It cannot replace a blocked, torn, kinked, or disconnected drain tube, and applying silicone around the glass may hide the source while leaving water inside the roof structure.
First, confirm that each drain carries water outside the vehicle and that the glass is correctly aligned. Use a vehicle-compatible repair material only after the failed joint or seal has been identified.
Why is my sunroof leaking water when it rains?
Water appearing after parked rain often points to channel overflow, a blocked outlet, or a disconnected hose. Symptoms that occur mainly during heavy rain can reflect the drain system reaching its limited flow capacity, while water entering during driving may also involve wind-driven water, glass alignment, or a frame leak.
Track where the water first appears and test each drain separately. A clear upper opening does not exclude a blocked lower outlet or a hose that has come loose behind the trim.
How often should I clean my sunroof drains?
Inspect the drains after leaf fall, after parking under trees, and whenever water appears on the headliner, pillars, or carpet. Vehicles exposed to dust and road debris may need attention more often than vehicles kept in a clean, covered environment.
Some recommendations use a monthly interval, but no universal schedule applies to every model. Condition-based checks, followed by a slow water test through every accessible drain, provide a more reliable maintenance routine.







