
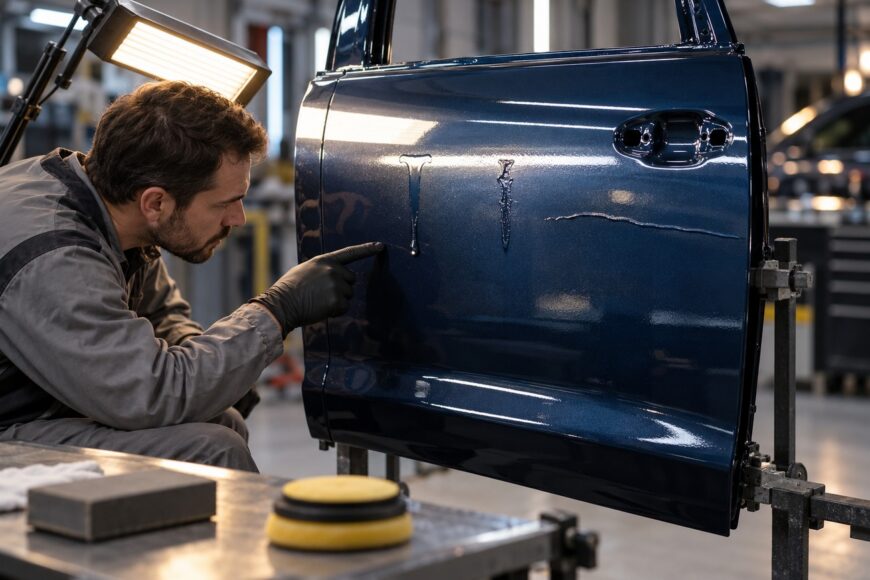
The common mistake is to wipe a fresh paint run with a cloth or solvent. The material is still mobile, so wiping can spread the defect, lift the surrounding film, or leave a larger damaged area than the original sag. Leave the run alone until the coating is fully dry.
A small sag can also become a major repair through premature sanding or polishing. The thickened area may feel dry on the surface while remaining soft underneath, and aggressive sanding can remove the surrounding clear coat, color coat, or primer. The practical choice is to let the thick area dry fully, level it gradually without cutting through the surrounding film, and then decide whether polishing, recoating, or a broader restart is required.
- First, diagnose the run before touching it
- Why paint runs and sags happen after spraying
- How to repair a cured paint run without creating a low spot
- When a spot repair is not enough
- Prevent the next run by correcting the spray process
- Frequently asked questions
- How long should a paint run dry before sanding?
- What if sanding the run exposes the basecoat or primer?
- How do you fix paint runs after spraying?
- How do you fix a botched spray paint job?
First, diagnose the run before touching it
Start by examining the defect under changing light. A wet run usually has a glossy, rounded appearance and may continue to move slowly on a vertical surface. A cured sag has a firm raised edge or elongated ridge. Edge build-up is concentrated along a corner or panel boundary, while a broad area of heavy texture or multiple runs points to a spray-process problem rather than one isolated defect.
Do not wipe fresh material in an attempt to make the repair easier. A thickened run takes noticeably longer to dry than a normal film thickness, so the surface can be misleading. Tactile checking is useful, but it should be combined with the product’s technical data and a careful look at the thickest part of the defect.
Identify which layer contains the defect before planning the repair. Clear-coat runs are often suitable for controlled leveling and polishing when enough clear remains. A run in the color coat or primer may require compatible recoating, especially if sanding changes the coverage or exposes the substrate. Powder coating requires a separate assessment because the defect may be linked to both application thickness and the curing process.
Finish standards also matter. A run may be unacceptable for a high-appearance coating class even when a small isolated defect could be allowed in a lower class. If the panel is being produced to a specified appearance class, inspect it against that requirement rather than assuming every visible defect has the same consequence.
Why paint runs and sags happen after spraying
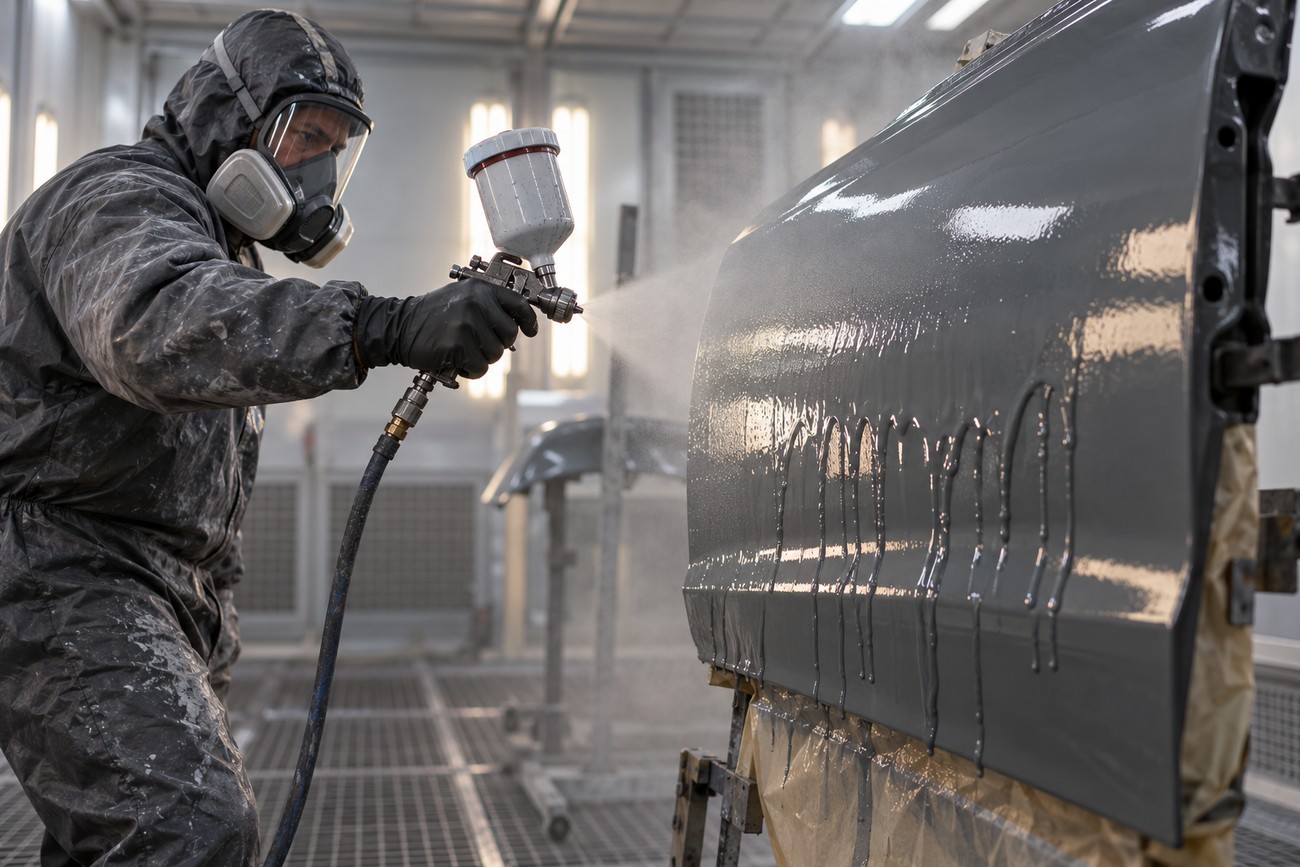
For liquid coatings, the main causes are low viscosity, excessive film thickness, and incorrect spray distance. A material that is too thin stays fluid longer, while a heavy pass places more wet film on the surface than it can hold. Both conditions allow gravity to pull the coating downward before it has developed enough structure to remain in place.
Spray distance affects how much material reaches the panel and how wet it arrives. General guidance is about 200–400 mm from the surface, while common automotive practice uses about 20–25 cm with a conventional spray gun. Holding the gun too close can concentrate the wet film and increase the risk of a sag; holding it too far can produce dry spray, poor flow, or uneven coverage.
Gun orientation and movement matter just as much. A tilted gun changes the distribution of the fan, and slowing down at an edge or reversing direction over one area creates local film-thickness differences. Poor overlap, excessive trigger time, and trying to make the surface glossy in one pass can all create a heavy section that later runs.
Pressure and nozzle figures are starting points, not universal settings. For clear coat, a 1.3–1.4 mm nozzle and approximately 2–2.5 bar are common starting points, subject to the material manufacturer’s instructions. Viscosity, material temperature, humidity, nozzle condition, gun type, panel orientation, and intercoat flash time work together, so copying a setting from a video may produce a different result with another product.
Insufficient flash time leaves the previous coat too wet when the next one is applied. Temperature and humidity change evaporation and flow, while a vertical or sharply angled part gives gravity more opportunity to expose an application error. In powder systems, runs can also result from an overly thick layer or excessive curing temperature, so the oven cycle and film build must be checked alongside application technique.
How to repair a cured paint run without creating a low spot
Wait until the thickest part of the run is ready for sanding. Follow the product’s technical data, and do not rely solely on a dry surface feel. Before starting, inspect the area under changing light, confirm that the surface is firm, and use a thickness gauge when available. An indicator spray can help reveal the high and low areas and show whether your sanding is spreading evenly into the surrounding film.
Begin with controlled sanding rather than trying to erase the ridge in one aggressive pass. A practical fine-abrasive range is P1500–P3000, with P2000 or finer as a cautious starting approach. Use a small, firm support where appropriate, keep the motion controlled, and check the surface often so the high spot is reduced gradually instead of turning into a depression.
The objective is a level surface, not maximum local material removal. Once the ridge is brought into the same plane as the surrounding coating, refine the sanding marks outward so there is no sharp transition. A thickness gauge can help protect the remaining clear coat, especially on edges, body lines, and areas that have already received previous repairs.
After leveling, choose the finish according to the layer and the remaining film. A clear-coat repair with sufficient material may be refined and polished. If sanding has changed the color coat, exposed a lower layer, or left inadequate coating for polishing, follow the compatible recoat process instead. Polishing removes fine sanding marks; it cannot replace missing paint or clear coat.
When a spot repair is not enough
Stop treating the defect as a polishing job if sanding exposes the basecoat or primer. The correct response is to assess the damaged area, feather only as much as needed, and use a compatible recoat system. Continuing to polish an exposed layer can enlarge the visible repair and leave the surface without the protection or coverage provided by the missing coating.
A removed run can leave a depression or a visible step when the high spot is cut away faster than the surrounding film is blended. This is especially easy to create on a narrow edge or body line, where the available coating thickness is already limited. The repair then needs broader refinement, and it may require local repainting or panel-level work rather than additional polishing.
A matte patch after sanding usually means the sanding marks have not been fully refined or the polishing stage is incomplete. Inspect the area from several directions and under different light sources. A repair that looks acceptable under diffuse light can still show a dull halo, edge, or shallow depression under a sharp reflection.
Local repair is also unsuitable when the defect reveals a wider process failure, such as multiple runs, poor adhesion, incorrect color coverage, or an unsuitable powder-curing cycle. In those cases, repairing one visible sag may leave defects around it. Confirm the coating system and the required finish standard before deciding whether to continue locally or restart a larger section.
Prevent the next run by correcting the spray process
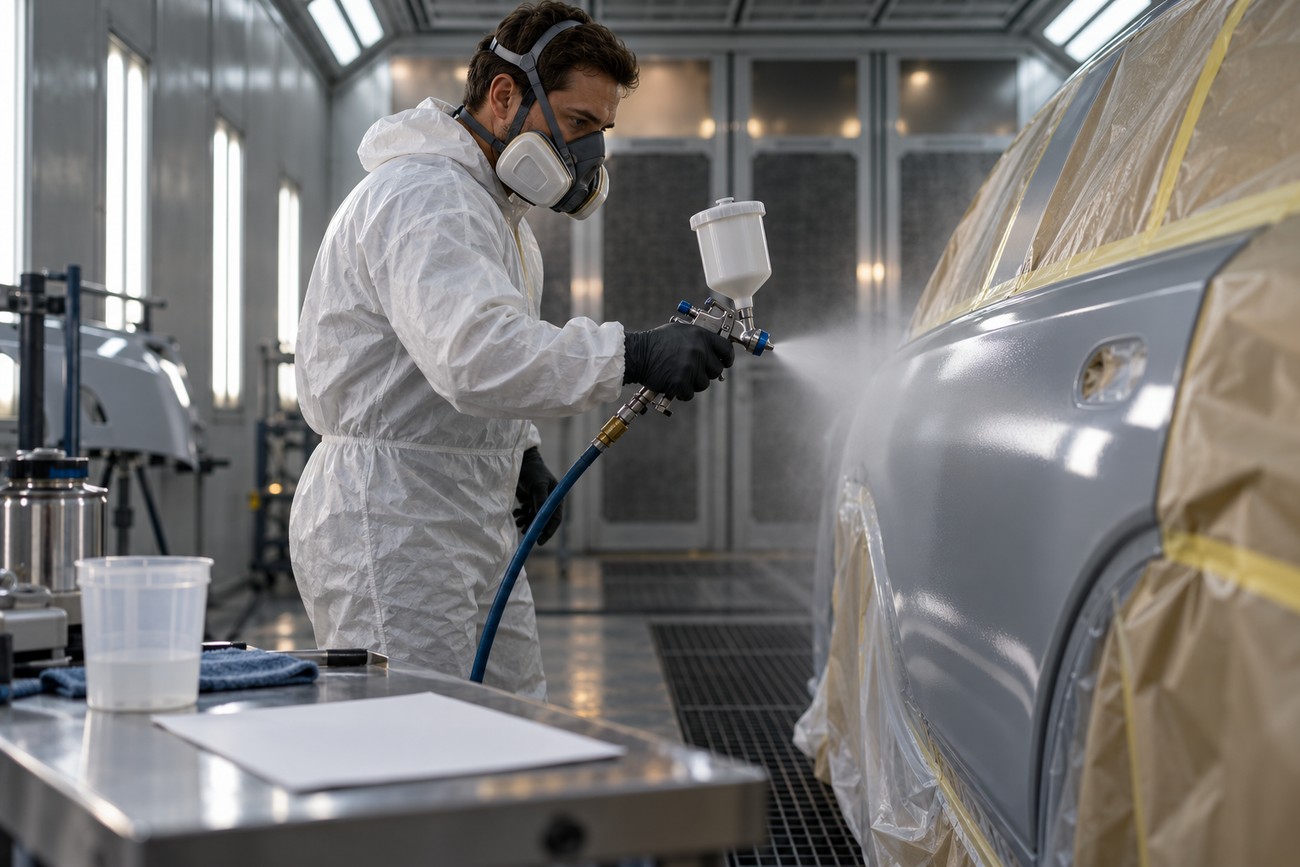
Start with the material, not the gun. Check the manufacturer’s technical data for viscosity, reduction, application temperature, nozzle range, pressure, and flash time. Excessive reduction can lower viscosity and encourage runs, while insufficient reduction can impair atomization and tempt you to apply a wetter, heavier pass to achieve flow.
Keep the spray distance consistent: about 200–400 mm generally, or about 20–25 cm in common automotive practice. Hold the gun square to the surface, move at a steady speed, and maintain controlled overlap. Lighter passes with adequate flash time are safer than one heavy coat applied to force gloss or coverage.
Watch the parts of the panel that collect material first. Edges, corners, lower sections of vertical panels, and areas where you slow down during a change of direction are common accumulation points. Plan the stroke pattern before triggering the gun, and release the trigger at the correct point so the fan does not dwell at the end of each pass.
Temperature, humidity, material temperature, nozzle size, pressure, distance, and pause time interact. Videos often show the gun movement while omitting those variables, which explains why copying a technique can still produce a run. The manufacturer’s technical data takes priority over generic setup figures, and a test panel or hidden area is a safer place to confirm the wetness and flow before coating the finished surface.
Frequently asked questions
How long should a paint run dry before sanding?
There is no reliable universal hour count. Follow the product’s technical data and allow the thickest part of the run to dry longer than the surrounding film. A surface that feels dry may still be soft underneath because the run contains substantially more material than a normal film.
Check the defect by touch without pressing hard, inspect it under changing light, and confirm that sanding does not load the abrasive with soft coating. When the product allows it, an indicator spray and a thickness gauge provide additional control. The thickest section, rather than the surrounding panel, determines when sanding is safe.
What if sanding the run exposes the basecoat or primer?
Stop polishing once the basecoat or primer is exposed. Feather the damaged area only as required, remove loose or poorly supported material, and follow the compatible recoat process for that coating system. A visible breakthrough means the repair now involves missing coating, so polishing alone cannot restore the original film.
Recheck color coverage, adhesion requirements, flash times, and clear-coat or topcoat compatibility before proceeding. If the exposed area is broad or the surrounding film is thin, a wider panel repair may give a more consistent result than trying to keep the repair extremely small.
How do you fix paint runs after spraying?
Leave the run untouched until the thickest area is fully dry, then level it gradually with a fine abrasive, commonly within P1500–P3000. P2000 or finer is a cautious starting approach. Inspect under changing light and blend the surrounding sanding marks before polishing or recoating according to the layer involved.
A run in clear coat may be polished after controlled leveling if enough clear remains. If sanding reaches the color coat, primer, or substrate, stop polishing and use the compatible recoat process instead.
How do you fix a botched spray paint job?
First, separate isolated runs from a wider application failure. A few cured runs may be leveled and refinished, while widespread sags, dry spray, poor coverage, adhesion problems, or incorrect curing conditions may require a broader repair or a restart.
Document which layer is affected, check film thickness where possible, and correct the material and spray settings before recoating. This prevents the same viscosity, distance, flash-time, or film-build problem from being buried under another layer.







