
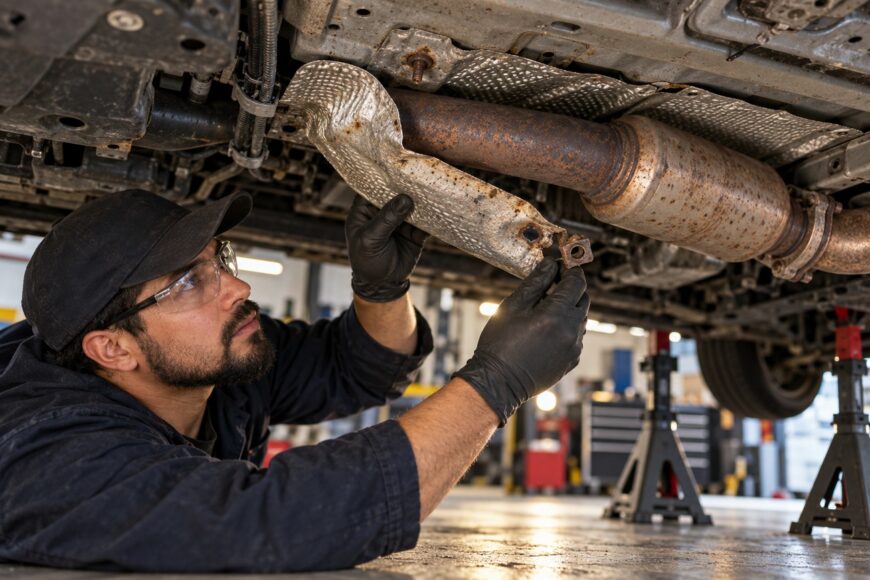
A metallic rattle under the vehicle can sound like a failing engine or transmission, especially when it appears during acceleration or at a particular engine speed. A loose exhaust heat shield is often less serious, but the same sound can come from internal muffler or catalytic-converter damage, worn exhaust hangers, or a pipe touching the body.
The durable repair is to restore the shield’s mounting and designed clearance rather than removing the shield or repeatedly tightening a failing fastener. Work only when the vehicle and exhaust are completely cold. Exhaust components can remain hot enough to cause severe burns long after driving.
- What a rattling heat shield is telling you
- Separate a heat shield rattle from other exhaust noises
- Inspect the shield safely before choosing a repair
- Choose a repair that matches the damage
- Select heat-resistant hardware without creating a new hazard
- Why quick fixes fail
- Verify the repair and know when to replace the shield
- Frequently asked questions
- How much does it cost to repair a rattling heat shield?
- How long should a heat shield repair last?
- My heat shield is rattling. How can I fix it?
- How do you secure a loose exhaust heat shield?
What a rattling heat shield is telling you
A heat shield reduces radiant heat transfer from the exhaust to the floor, wiring, fuel components, and plastic parts. It is usually fitted with a deliberate gap around the exhaust, so it does not need to be clamped tightly against the pipe. Removing it may silence the noise while removing a protective barrier from nearby components.
The common mounting failures are corroded mounting holes, a detached welded nut, a loose bolt, or a failed spacer. Road salt, moisture, and exhaust heat can weaken the thin sheet metal around a fastener until the bolt no longer holds the shield firmly. Tightening the same bolt then applies load to metal that may already be tearing away.
A shield can remain apparently fastened and still rattle. A spacer may float, a welded nut may have separated from the shield, or two layers of sheet metal may vibrate against each other. The sound may disappear at idle and return during a cold start or at a specific engine-speed range because exhaust vibration changes with load and resonance.
Do not assume every metallic noise comes from the shield. Internal damage in a muffler or catalytic converter, worn exhaust hangers, and exhaust-to-body contact can produce similar symptoms. Diagnosis should identify the source before you choose a repair method.
Separate a heat shield rattle from other exhaust noises
Use only cold-vehicle checks. Carefully moving the cold exhaust can help show whether a pipe is contacting the body, but do not force components or place your hands near a hot system.
| Likely source | Useful observation | Cold-vehicle check | Next action |
|---|---|---|---|
| Loose heat shield | Thin metallic buzzing or rattling from a specific shield area, often at certain engine speeds. | Press or tap the shield gently and inspect loose fasteners, enlarged holes, spacers, and detached weld nuts. | Restore the mounting point while preserving the designed gap. |
| Internal muffler or catalytic-converter damage | Rattle seems to come from inside a canister and may continue when the outer shield is secure. | Tap the component lightly and compare the sound with the shield. Avoid striking hard enough to damage it. | Arrange further exhaust inspection or replacement. Repairing the shield will not remove internal deterioration. |
| Worn exhaust hangers | The exhaust sits low, moves excessively, or shifts when the cold system is gently supported. | Inspect rubber hangers and observe movement without pulling the system against nearby parts. | Replace damaged hangers and check the system’s position. |
| Exhaust touching the body | The noise changes when the cold exhaust is moved slightly or when the vehicle’s position changes. | Look for shiny contact marks, crushed insulation, or a pipe close to the floor or body. | Correct the pipe position, hanger, or clearance before securing the shield. |
A shield rattle usually responds to gentle pressure on the shield itself, while an internal rattle follows the muffler or catalytic-converter housing. These observations are clues rather than proof, particularly when several parts are corroded.
If the noise remains after the shield is firmly mounted and clear of surrounding components, stop adding fasteners. Recheck the muffler, catalytic converter, hangers, and pipe position instead.
Inspect the shield safely before choosing a repair
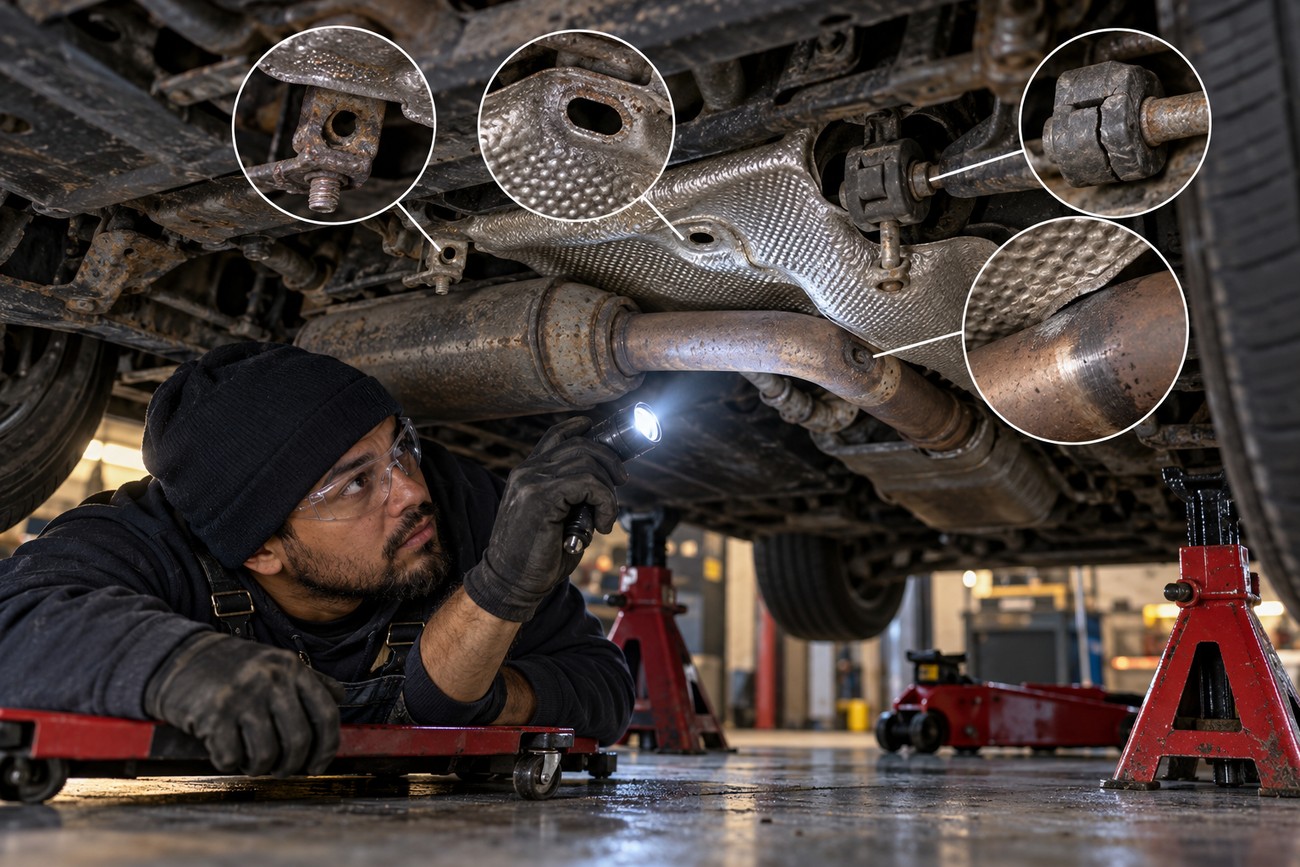
Let the vehicle and exhaust become completely cold before inspection, movement, or removal. Do not rely on a short waiting period after driving; heat can remain in the exhaust and nearby metal. If access underneath is required, use a level surface, a suitable jack, and properly rated jack stands, and never work beneath a vehicle supported only by a jack.
Begin with a visual inspection of every mounting point. Look for missing bolts, loose nuts, detached welded nuts, cracked or missing spacers, and holes that have become oval or enlarged. Check whether the shield is touching the exhaust, floor, wiring, fuel components, plastic parts, or exhaust hangers.
Corrosion around a hole determines whether a washer can help. If sound sheet metal remains around the opening, a large, rigid washer may spread the load across the surviving metal. If rust has removed much of the supporting area, the washer only transfers force to a larger section of weakened metal and will eventually pull through.
Remove the shield only if it can be done safely and without damaging important nearby components. Once removed, tap it lightly in several places. A rattle between layers indicates internal separation or layer-to-layer vibration, which may remain even after an external fastener is repaired.
Do not flatten the shield against the exhaust to stop movement. Factory spacers and clearances may be intentional, and forcing the sheet into contact can create a new rattle or transfer heat where it does not belong. The aim is to remove free movement while retaining the shield’s designed position.
Choose a repair that matches the damage
Sound metal with a loose or missing fastener is the simplest case. Clean the mounting area, replace damaged hardware with a suitable fastener, and tighten it enough to stop movement without crushing or distorting the shield. If the shield uses a spacer, retain it or replace it with a correctly sized part rather than clamping the sheet directly against the exhaust.
An enlarged hole may be repairable with a large, sufficiently rigid washer when enough sound sheet metal remains. The washer must cover the damaged area and distribute the load over the surviving metal. A thin washer can flex, vibrate, or cut into weakened sheet metal, so the washer’s stiffness and outer diameter matter.
Test the metal around the hole and the spacer’s movement before adding a washer. A washer placed over a broad corroded zone often relocates the failure instead of restoring the mounting point.
A failed spacer can allow the shield to rattle even when the bolt is tight. Replace or recreate the spacer only when its position, material, and clearance are understood. A repair bracket may be needed where a welded nut has detached or the original mounting tab has broken.
Broad corrosion, torn mounting areas, or a shield that rattles between its own layers usually justify a repair metal bracket or shield replacement. A repair metal bracket is generally more durable than applying sealant over rust, although the correct solution depends on access and the vehicle’s construction.
Adhesive or epoxy may be suitable as a temporary or construction-dependent measure, but it is not a universal structural repair for a hot, vibrating exhaust shield. It can complicate later removal and hide continuing corrosion. If the metal cannot carry the load, adding adhesive does not restore the missing structure.
Select heat-resistant hardware without creating a new hazard
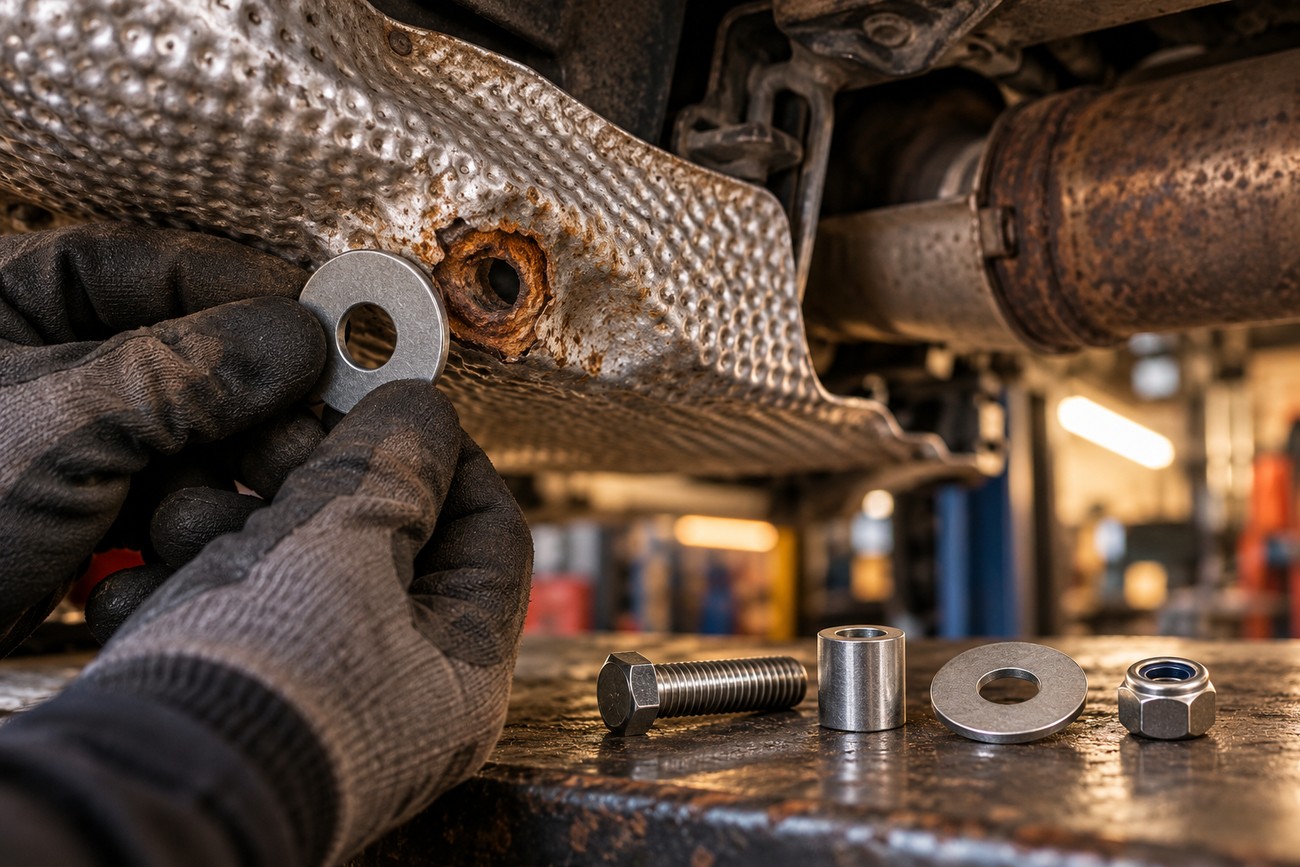
Choose hardware for the actual location, temperature, vibration, and corrosion environment. Ordinary household screws, plastic ties, and sealant with an unknown temperature limit are unreliable choices in a hot exhaust zone. A part described as heat-resistant may have a rating that applies only to a short exposure or laboratory condition.
The washer should be wide enough to distribute the load and rigid enough to remain stable under vibration. It must not cut into the weakened sheet metal, spin independently, or bridge a gap in a way that distorts the shield. A spacer must preserve the designed separation from the exhaust rather than being replaced by a random stack of washers.
Fastener length is a safety issue. No fastener, washer, tie, or bracket should contact rotating parts, close the designed gap to the exhaust, or damage nearby wiring, bodywork, or other components. Check the back side of the mounting point before tightening, because a long screw can reach a pipe, fuel component, or wiring that is hidden from above.
Temperature claims for stainless steel are not interchangeable. Some specialized stainless-steel ties are advertised at up to 982 °C continuous service, but that rating does not validate ordinary household hardware. Published automotive-use figures commonly range from 427–649 °C, while some tables list 800–900 °C; there is no universal rating for every grade, thickness, load, and operating condition.
Why quick fixes fail
Retightening a bolt through rotten metal does not restore the mounting hole. The bolt may feel tight while the sheet continues to crack around it, allowing the rattle to return after vibration and heat cycles. The same applies to a detached weld nut or a spacer that is still floating.
Removing the shield eliminates the noise by removing the vibrating part, but it also removes the barrier that reduces radiant heat transfer to the floor, wiring, fuel components, and plastic parts. The absence of an immediate problem does not prove that the surrounding components are safe without it.
Plastic ties, ordinary sealant, and unverified adhesive can soften, burn, detach, or make later service more difficult in the exhaust’s hot zone. Even a product labeled “high temperature” may not be rated for the continuous temperature, vibration, and exposure at that particular mounting point.
A repair that is quiet at idle may still be defective. Cold-start vibration, engine movement, or a particular engine-speed range can bring the noise back. Test the repair under those conditions rather than treating a silent idle as final proof.
Verify the repair and know when to replace the shield
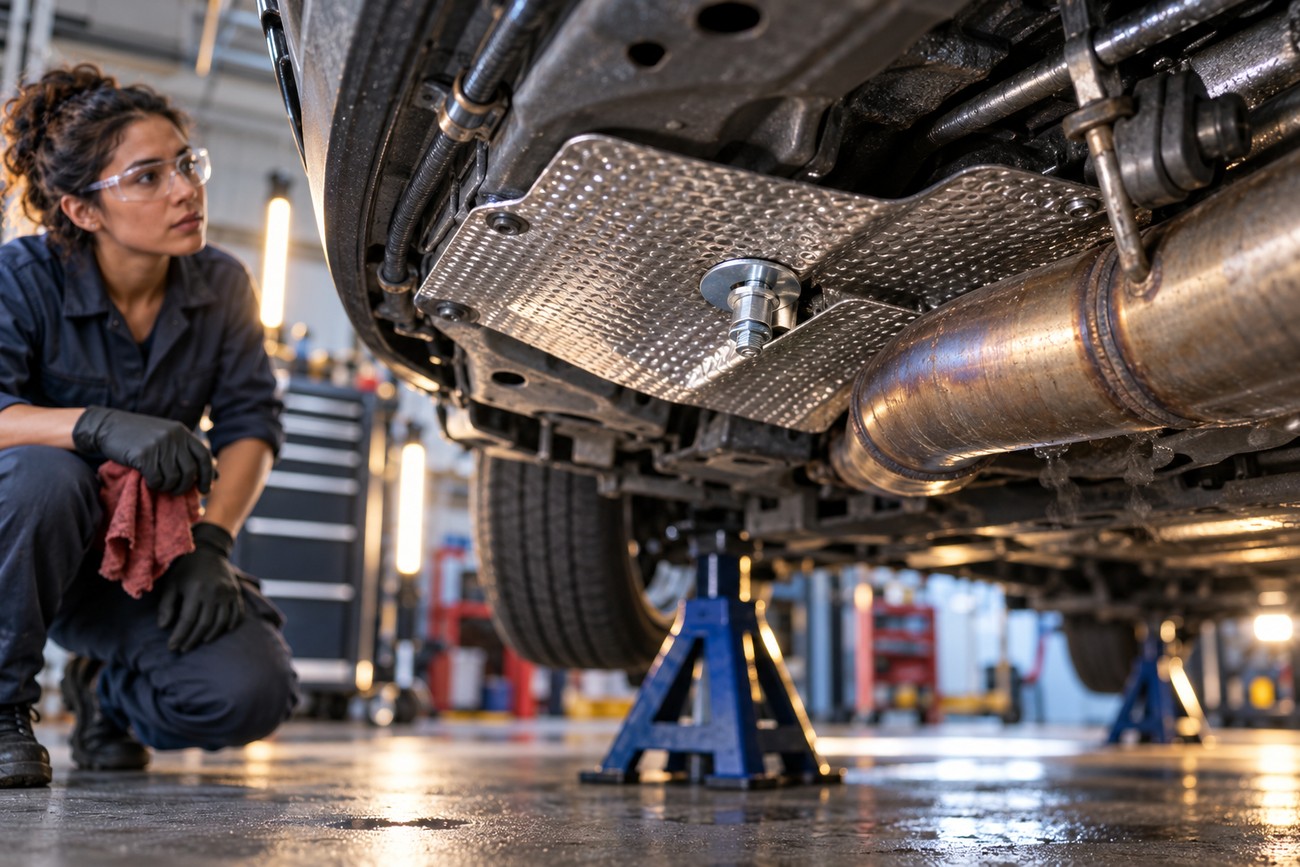
After installation, confirm that the fastener is secure without crushing the shield or eliminating its intended spacers. Inspect around the entire repair, not only the repaired hole. The shield should remain clear of the pipe, body, wiring, and hangers, with no new contact created by the bracket, washer, or fastener.
Start the vehicle from cold and listen during warm-up. Check several engine-speed ranges, including the range where the original rattle occurred. If safe access is available after the system has cooled again, inspect for fresh contact marks or movement around the repaired mounting point.
Replace the shield or obtain professional help when corrosion has removed too much supporting metal, the front shield is inaccessible, or a broken fastener requires drilling in a confined area. Suspected internal muffler or catalytic-converter damage also needs separate diagnosis. Unsafe vehicle support is a reason to stop the job immediately.
The correct result is a shield with no uncontrolled movement and the correct clearance from the exhaust and surrounding parts. It does not need to be clamped rigidly to every adjacent component. If the shield continues to rattle after a structurally sound repair, investigate the exhaust internals, hangers, and body contact instead of adding more hardware.
Frequently asked questions
The right repair depends on the shield’s condition, access, and the source of the noise. These factors also determine whether a simple mounting repair is reasonable or replacement and professional inspection are safer.
How much does it cost to repair a rattling heat shield?
There is no reliable single price because access, corrosion, fastener condition, labor time, and the repair method can vary substantially. A reachable shield with sound metal may need only a suitable fastener and washer, while seized or broken fasteners can require drilling, additional labor, or replacement hardware.
The estimate also changes if the shield must be replaced rather than repaired. Ask whether the inspection includes checking the hangers, pipe-to-body contact, and internal exhaust noise, since repairing the shield alone will not solve a different source.
How long should a heat shield repair last?
A repair anchored in sound metal can last substantially longer than a washer installed through active corrosion. Durability also depends on retaining the correct spacer, preventing contact with the exhaust, and protecting the mounting area from further corrosion.
An adhesive-only repair should not be treated as a universal permanent solution. If the substrate is still deteriorating or the shield is separating between layers, replacement or a properly supported metal repair is more dependable.
My heat shield is rattling. How can I fix it?
First, confirm that the noise comes from the shield and that the vehicle is completely cold. Inspect the fastener, welded nut, spacer, and metal around the mounting hole; then use a large, rigid washer only if enough sound sheet metal remains. Extensive corrosion calls for a repair bracket or shield replacement.
Afterward, verify clearance from the exhaust, body, wiring, and hangers, then check a cold start and several engine-speed ranges. If the noise comes from inside the muffler or catalytic converter, or if the vehicle cannot be supported safely, the shield repair will not address the real problem.
How do you secure a loose exhaust heat shield?
Secure it with a suitable heat-resistant fastener and, where the metal permits, a sufficiently wide and rigid washer. Preserve any original spacer and the designed gap from the exhaust. The hardware must be short enough to avoid nearby pipes, wiring, bodywork, and moving parts.
Do not use plastic ties, ordinary sealant, or random household hardware in a hot exhaust zone. If the mounting metal is badly corroded, install a properly supported repair bracket or replace the shield instead of clamping a washer onto material that can no longer carry the load.







