
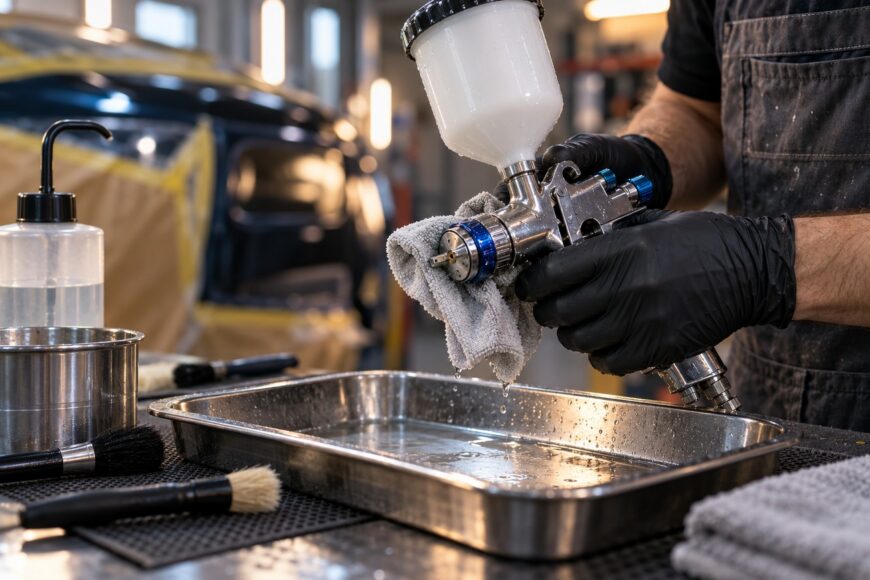
Delaying cleanup allows coating to dry in the fluid passages, around the needle, and inside the air cap. The result can be spitting, a narrow or crooked fan, higher material use, and surface defects. A trigger that begins to stick is another warning that residue or solvent-related wear has reached the needle area.
Use a quick cleaning between jobs to clear fresh material before it sets. After the work is finished, perform a complete cleaning with the air cap, fluid tip, needle, and relevant passages removed and cleaned as the DeVilbiss manual specifies. The solvent must match both the coating and the gun’s seals, O-rings, plastics, and finish.
- Why DeVilbiss Spray Guns Need Immediate Cleaning
- Choose the Solvent and Cleaning Tools Before You Start
- Quick Cleaning Immediately After Spraying
- Full After-Use Cleaning: Air Cap, Tip, Needle, and Body
- Dry, Reassemble, and Test Before Storing the Gun
- Cleaning Mistakes That Cause Clogs, Leaks, and Poor Spray
- Frequently Asked Questions
- What solvent should I use to clean a DeVilbiss spray gun?
- How do I clean a DeVilbiss gun after a two-component coating has started to cure?
- How can I tell whether a poor spray pattern is caused by dirt or a damaged air cap?
- Which DeVilbiss spray-gun parts should be replaced instead of repeatedly cleaned?
Why DeVilbiss Spray Guns Need Immediate Cleaning
HVLP and fine-finish DeVilbiss guns generally need cleaning immediately after use because coating left in the gun hardens quickly. Fast-drying materials can set in the fluid tip, needle area, and internal passages before the outside of the gun appears dirty. Once residue dries, flushing alone becomes less effective, and mechanical cleaning becomes more demanding.
The air cap deserves the same attention as the fluid path. A small deposit in one of its calibrated openings can disturb the air balance and change the fan shape. The gun may still spray, yet the pattern can become narrow, crooked, or uneven enough to create dry areas, heavy edges, or other coating defects.
A quick inter-operation cleaning clears leftover material before the next job. It usually includes emptying the cup, flushing the fluid path with a compatible solvent, and wiping exposed surfaces. A full after-shift clean goes further: it includes teardown and cleaning of the air cap, fluid tip, needle, needle channel, and other passages.
Heavy, fast-curing, or two-component materials justify the complete procedure even when the gun will be used again soon. For occasional household use, the exact frequency may differ, but leaving coating in the gun until the next day creates avoidable blockage and makes every later cleaning harder.
Choose the Solvent and Cleaning Tools Before You Start
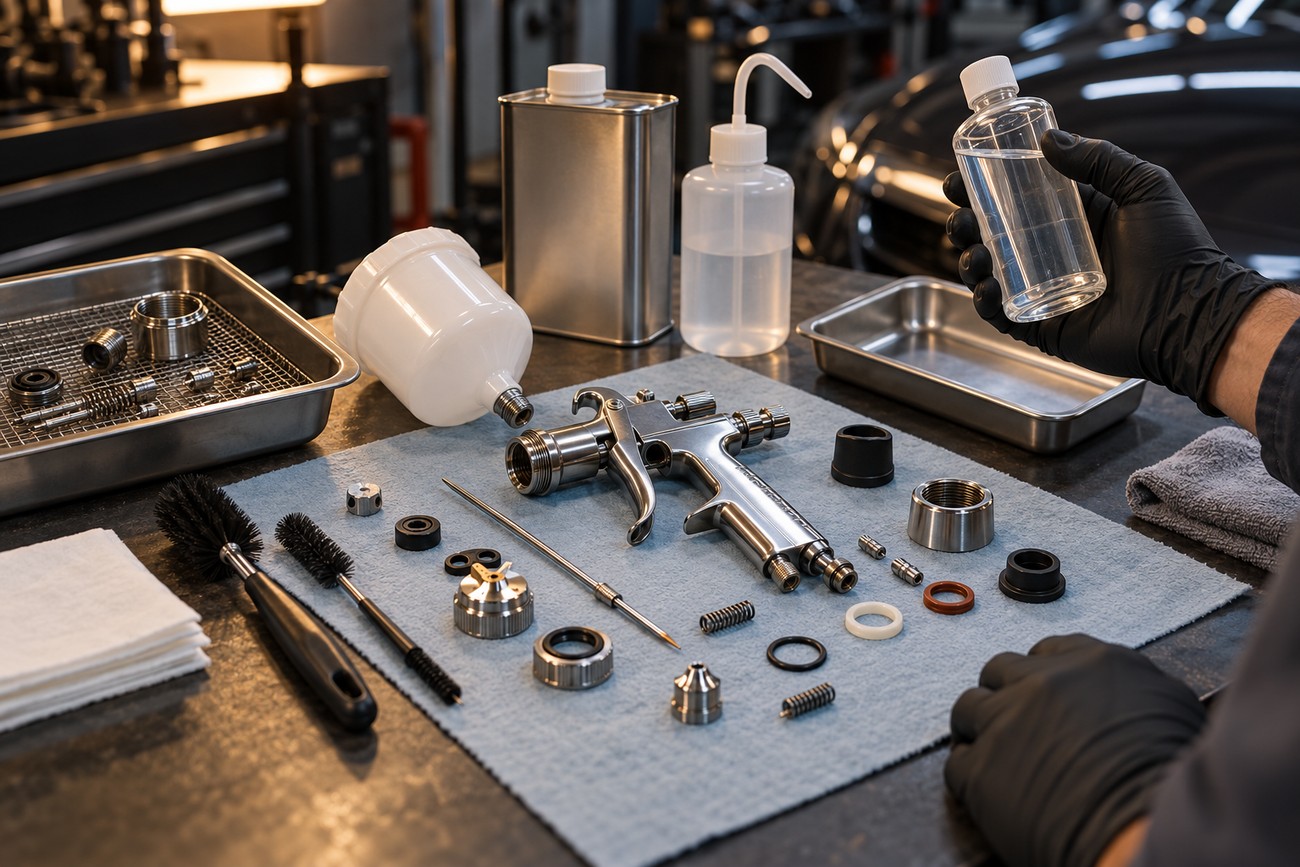
Select the cleaning liquid according to the coating and the gun materials. A solvent suitable for the paint can still harm seals, O-rings, plastics, lubrication, or the gun’s finish. Check the coating documentation and the applicable DeVilbiss manual before using a product, especially if its compatibility with seals is unclear.
Prepare the basic equipment before opening the gun:
- A solvent compatible with the coating and the gun’s seals and O-rings.
- Soft brushes and small cleaning brushes for passages and fittings.
- Lint-free wipes for the cup, exterior, needle, and removable parts.
- Clean air for draining and drying the passages.
- A clean tray or container for small parts during teardown.
Mechanical cleaning with soft brushes removes deposits that a solvent flush can leave behind. Use the solvent to soften and carry away coating, then use the brush to lift residue from accessible surfaces. Prolonged soaking is a poor substitute for this work and can expose seals and rubber components to solvent longer than necessary.
Do not immerse the complete gun in an unsuitable solvent. Liquid can reach areas that need lubrication or contain seals, and aggressive exposure may cause damage that appears later as air leaks, a sticking trigger, or unstable needle movement. Keep the body out of the cleaning container unless the model manual specifically permits that treatment.
Quick Cleaning Immediately After Spraying
Start while the coating is still fresh. Empty the cup into the appropriate waste container, then wipe the cup and its outlet with a lint-free cloth. Add a compatible cleaning liquid and flush the fluid path according to the gun’s operating instructions, activating the fluid path as appropriate until the discharge is clear.
Wipe the exposed fluid tip, needle area, cup connection, and exterior. Remove visible material before it dries around threads, adjustment points, or the front assembly. Keep the cleaning liquid away from areas that the manual identifies as unsuitable for solvent exposure.
This procedure is an inter-operation rinse, not complete maintenance. Flushing can leave a thin film in the air cap, fluid tip, needle channel, and internal passages. That film may be hard to see while already changing atomization and causing the next spray pass to spit or lose its shape.
Waterborne materials require a final draining and drying step. After rinsing, remove remaining water or emulsion and blow the passages dry with clean air. Residual liquid can dilute the next coating, disturb the first pass, or leave moisture where it contributes to later residue.
Full After-Use Cleaning: Air Cap, Tip, Needle, and Body
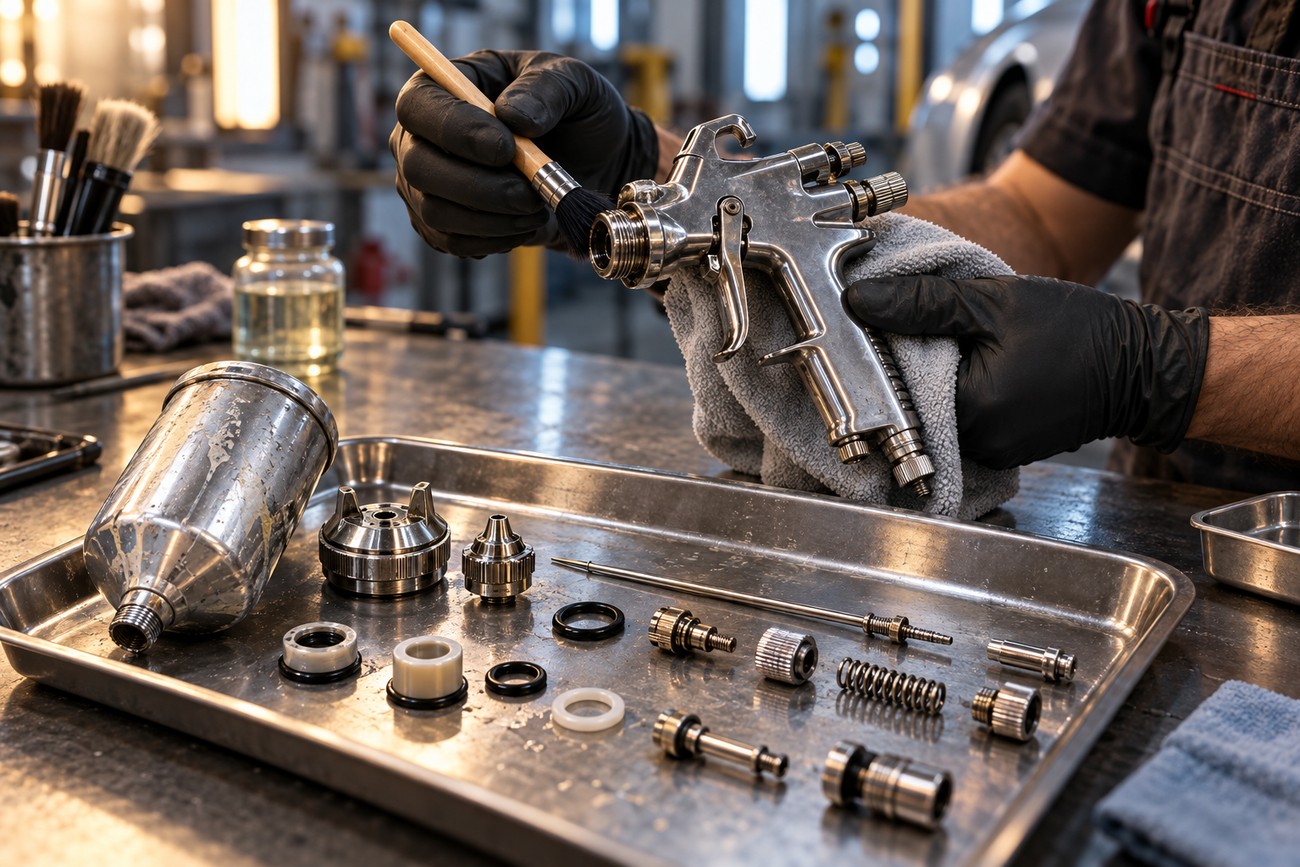
Use the applicable DeVilbiss user manual as the teardown guide. Model-specific disassembly and assembly order can vary, and forcing a part or removing components in the wrong order can damage the needle or leave the fluid tip incorrectly seated. Work over a clean tray so small springs, seals, screws, and adjustment parts remain together.
Remove the cup and the relevant fluid components as directed. Clean the air cap, fluid tip, needle, and needle channel with compatible solvent and soft brushes. Wipe the exterior and the cup separately, then inspect each opening for film, dried coating, or damage before setting the parts aside to dry.
Clean air-cap openings and the fluid tip mechanically with soft tools because a solvent flush may pass around a deposit without lifting it. A shallow tray or parts container also prevents small seals and springs from disappearing during teardown.
Never use a metal needle or wire in air-cap or nozzle openings. These openings are calibrated; scratching or enlarging them can permanently alter atomization and the spray pattern. Use the cleaning tools specified for the model, and replace a damaged part rather than trying to restore its opening with force.
Avoid prolonged soaking, particularly for parts containing seals, lubrication, plastic, or rubber. Allow the solvent to soften residue, then brush and wipe the part. The complete gun should not be submerged in an unsuitable solvent, since hidden exposure can damage components without an immediate visible sign.
Dry, Reassemble, and Test Before Storing the Gun
Drain all remaining cleaning liquid and blow the passages dry with clean air. Dry the air cap, fluid tip, needle, cup connection, and accessible body surfaces before assembly. Water, solvent, or emulsion left inside the gun can affect the next coating and may carry residue into clean components.
Lubricate only the moving areas permitted by the applicable manual. Use a small amount where specified for the needle or trigger mechanism, and keep lubricant out of air passages and the fluid path. Excess lubricant can contaminate the spray and create new deposits.
Reassemble the gun in the model’s specified order. Parts should seat without force; resistance can indicate residue, incorrect orientation, a damaged seal, or a needle that is not aligned correctly. Confirm that the trigger and needle move smoothly before storage.
Carry out a functional check with suitable material or test liquid. Look for air or fluid leaks, blockage, sticking trigger movement, and an even spray pattern. A gun that sprays is not necessarily clean: a partial obstruction may remain hidden while already distorting the fan.
Cleaning Mistakes That Cause Clogs, Leaks, and Poor Spray
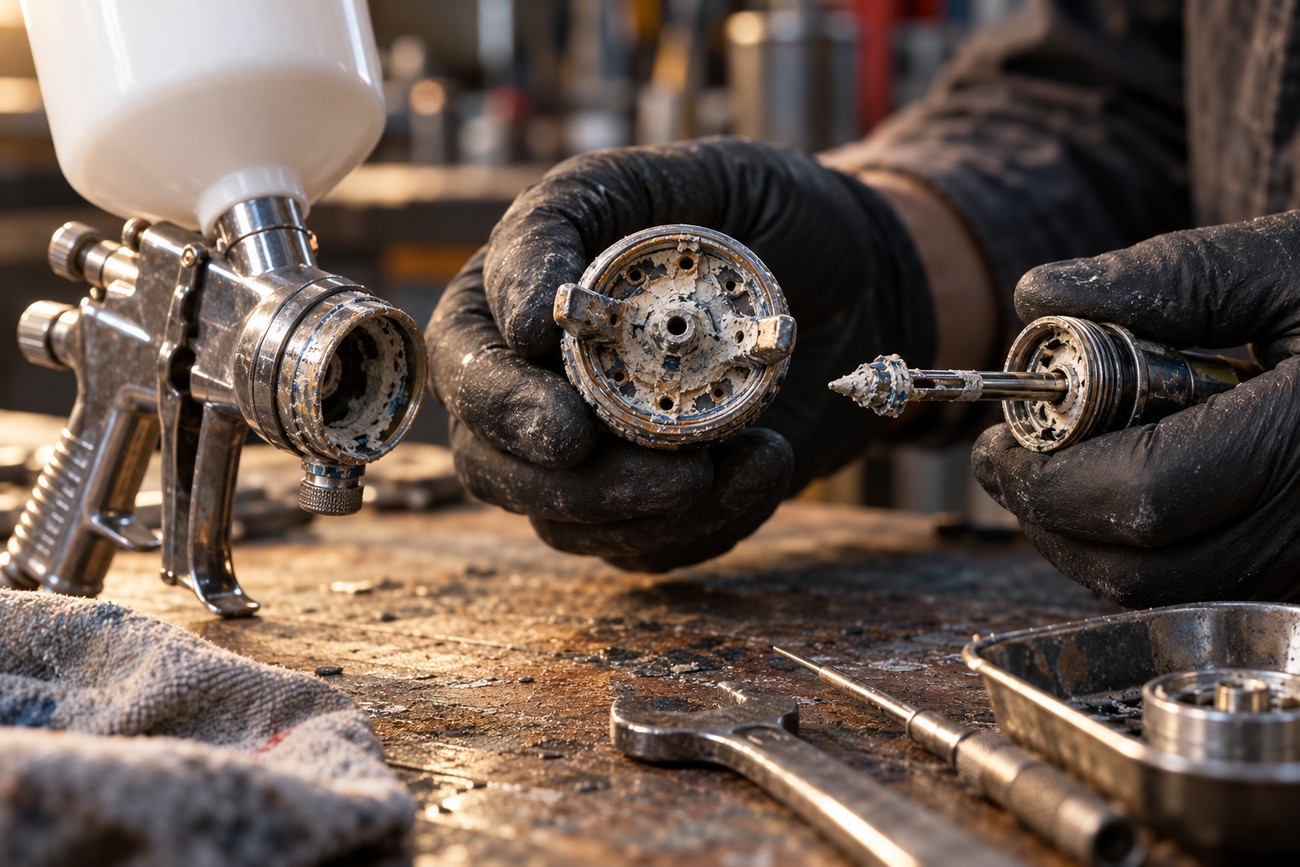
Cleaning only the cup leaves the parts that shape and control the spray contaminated. Residue in the air cap, fluid tip, or needle path can cause spitting and a crooked fan even when the cup looks spotless. A small deposit may be invisible until the first defective pass exposes it.
Leaving coating in the gun overnight is another common failure. Dried material can bind the needle, restrict the fluid tip, and make the next cleaning depend on scraping. This is especially troublesome with fast-drying and two-component coatings, which may continue curing inside passages.
Immersing the complete gun in an unsuitable solvent can damage seals, lubrication, plastic, rubber parts, or the finish. Metal wire, needles, and abrasive tools create a separate risk by scratching or enlarging calibrated openings. Both shortcuts can turn a cleaning task into a component replacement.
Skipping the final test hides problems until the next job. Irregular or aggressive cleaning can accelerate wear in the needle packing and trigger mechanism, leading to sticking or unstable trigger movement. Repeated exposure to an aggressive solvent may shorten seal life without obvious immediate damage, so compatible products and restrained cleaning are part of maintenance.
Frequently Asked Questions
The exact procedure depends on the DeVilbiss model, the coating, and the condition of the gun. Use the applicable user manual whenever a component sequence or solvent compatibility is uncertain.
What solvent should I use to clean a DeVilbiss spray gun?
Use a solvent that is compatible with the coating and with the gun’s seals, O-rings, plastics, lubrication, and finish. For waterborne coatings, use the cleaning liquid specified for that material, then fully drain and blow the passages dry. For solvent-based coatings, verify that the chosen solvent is approved for the coating and will not attack the gun’s seals or finish.
Difficult coatings may require a product recommended by the coating manufacturer or a controlled cleaning procedure from the DeVilbiss manual. If compatibility is unclear, check the technical documentation before putting the solvent into the gun. Avoid treating “stronger” solvent as automatically better; aggressive exposure can create leaks or sticking later.
How do I clean a DeVilbiss gun after a two-component coating has started to cure?
Normal flushing is often insufficient once a two-component coating has started to cure. Use only the cleaning method and solvent permitted for that coating and model, and soften residue before removing it with appropriate soft tools. Do not force cured material through the fluid tip or scrape calibrated openings with metal objects.
If the residue cannot be removed without force, controlled replacement of the affected fluid tip, needle, or other service parts may be safer than continued scraping. A gun with cured material in critical passages may require professional service, particularly when the needle does not move smoothly or the spray remains unstable after cleaning.
How can I tell whether a poor spray pattern is caused by dirt or a damaged air cap?
First clean the air cap and fluid tip with compatible solvent and soft tools, then dry the passages and inspect every opening under good light. Test the gun with suitable material after reassembly. If the pattern returns to an even shape, residue was likely the cause.
If the fan remains crooked, narrow, or uneven after the openings are clean and the fluid path is clear, inspect the air cap for dents, damaged openings, or distortion. A defect that remains after careful cleaning points toward a damaged air cap or another worn fluid component rather than a simple blockage.
Which DeVilbiss spray-gun parts should be replaced instead of repeatedly cleaned?
Replace parts when cleaning no longer restores correct operation or when inspection shows damage. Typical indicators include seals or O-rings that leak, needle packing that allows leakage or causes sticking, and a needle or fluid tip with wear, scoring, or a poor fit. Repeated cleaning cannot restore a damaged calibrated surface.
An air cap should be replaced when its openings are damaged, enlarged, dented, or still produce an unacceptable pattern after cleaning. If the trigger remains rough or unstable, inspect the trigger-related components and needle packing rather than increasing solvent exposure. Follow the model manual for the correct replacement parts and seating procedure.







