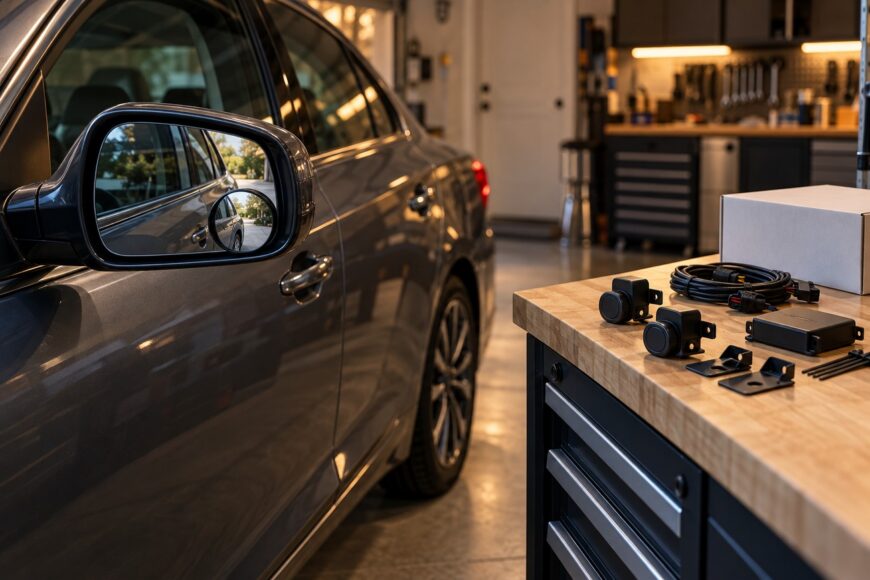
A convex blind spot mirror changes what you can see. An aftermarket sensor kit adds an electronic warning, but its usefulness depends on the vehicle, mounting location, wiring, positioning, and calibration. The choice is between a wider view with distorted distance cues and an alert system that can miss vehicles or warn about objects that pose no lane-change risk.
Neither option makes a lane change safe on its own. Check the mirrors, look at the road and the area over your shoulder, and use a warning as extra information. Installation quality matters because a badly placed mirror can hide part of the standard view, while a poorly positioned sensor can create false confidence.
- Blind Spot Mirrors vs. Sensor Kits: Different Jobs
- What Convex Blind Spot Mirrors Really Change
- How Aftermarket Sensor Kits Detect Vehicles
- Why Blind Spot Warnings Become Unreliable
- Choosing a Kit Without Trusting the Compatibility Label
- Installation and Validation: The Steps That Prevent False Confidence
- Frequently asked questions
- How much does it cost to install blind spot sensors?
- How should I maintain a stick-on blind spot mirror?
- What should I do if a sensor warning stays on after installation?
Blind Spot Mirrors vs. Sensor Kits: Different Jobs
A mirror shows you a scene to interpret; a sensor kit decides when to draw your attention to a possible hazard. Their strengths and limits are different:
| Option | Information provided | Main limitation | Installation burden | Safety role |
|---|---|---|---|---|
| Factory flat mirror | An undistorted view of traffic behind and beside the car | Limited field of view | Already fitted; requires adjustment | Primary visual check |
| Convex blind spot mirror | A wider view near the adjacent lane | Distorts apparent size, distance, and closing speed | Requires careful placement and aiming | Supplementary visual check |
| Aftermarket sensor kit | An alert when its system detects a relevant object | Warnings depend on fitment, setup, and detection logic | Mounting, wiring, and calibration may be needed | Auxiliary warning |
For passenger cars, FMVSS 111 specifies a horizontal field of view through a plane mirror reaching 8 feet to the side at a point approximately 35 feet behind the driver. That is a mirror requirement, not a performance standard for universal aftermarket sensors. A convex overlay does not replace the required flat mirror or its field of view.
The convex surface can reveal a vehicle near the edge of your normal mirror view, but it compresses the scene. A small vehicle may appear farther away, and its closing speed can be harder to judge. Use the flat mirror and a direct check to put that wider image in context.
A sensor alert can draw attention to a vehicle you have not noticed, including one approaching quickly. Its silence is less informative: the system may have missed an object or may have been designed to filter it out. A warning is assistance for observation, not permission to change lanes.
What Convex Blind Spot Mirrors Really Change
A small convex insert works best when it adds a useful view without taking away the flat mirror view you already rely on. Before attaching one, sit in your normal driving position and identify where traffic disappears from the standard mirror as it draws alongside. Choose a location that leaves the factory flat surface usable and does not obscure the view it must provide.
Aim the insert toward the boundary of the adjacent lane, then check what it shows from the driver’s seat. Pointing it vaguely outward can fill the tiny image with road background while leaving the area of interest poorly covered. Adjust the main mirror as well; an insert should address a remaining gap rather than compensate for an unhelpful mirror setting.
Convex optics widen the visible area by making objects look smaller. That makes a nearby car easier to spot in some positions, yet its apparent distance and closing speed are harder to assess. When traffic is moving at different speeds, confirm what the insert shows with the flat mirror and a direct look before moving across.
No insert completely eliminates every blind spot. Its useful view changes with mirror position, your seating position, and the size and position of the approaching vehicle. Treat it as another place to look during a consistent observation routine, not as proof that an unseen area is empty.
How Aftermarket Sensor Kits Detect Vehicles

Universal kits generally need mounting, wiring, and setup for the specific vehicle. Factory systems use purpose-built brackets and integration; a universal kit may lack a suitable mounting point or require a different route for its wiring and indicators. Read the kit’s installation instructions against the actual vehicle before assuming that a general compatibility claim settles fitment.
Radar sensors need a permitted location with the specified height, angle, and orientation. A metal bumper or metal section of trim can shield a radar sensor, so follow the kit manual when choosing a mounting area. Sensor position and left/right symmetry shape the detection zones and determine when a warning appears.
Two sensors can look aligned from behind the car yet sit at different heights or angles. Measuring both mounting positions against the same reference points helps prevent unequal warning behavior from side to side.
The electrical work matters just as much as the brackets. Power, ground, turn-signal inputs, and indicator behavior need to match the kit’s instructions; a lamp that illuminates does not establish that the warning logic is correct. Secure wiring away from moving parts and areas where it may be pinched during bumper refitting.
Some kits promise accurate or automatic blind spot detection. That promise still depends on the specified calibration and a manual check of what the installed system actually detects. Its alert remains an auxiliary signal even after setup appears successful.
Why Blind Spot Warnings Become Unreliable
An alert that appears too often is difficult to use well. Depending on the system and location, sensors may react to traffic in neighboring lanes, barriers, guardrails, or parked vehicles. Drivers can also receive warnings for a car already plainly visible in the mirror, or one traveling two lanes away.
Geometry is a common cause. An incorrect sensor angle or height can shift the detection zone so warnings arrive too early or in situations the driver does not consider relevant. Repeated irrelevant alerts can lead a driver to discount the indicator, even while the sensor is technically operating as installed.
An early alert is not always a fault. Some detection zones and speed filters can trigger a warning for a fast-approaching vehicle before it physically reaches the blind spot. Compare the alert with what is happening in the mirrors and on the road before deciding whether the behavior is inappropriate.
Missed alerts deserve closer attention. Metal shielding, an unsuitable mounting location, or a sensor aimed outside its specified range can leave the indicator silent when a vehicle is present. A system that works on one side but behaves differently on the other also warrants a check of mounting geometry and connections.
Judge performance across several ordinary driving situations rather than relying on one successful demonstration. Record when warnings occur, what was nearby, and whether both sides behave consistently. Those observations give an installer a better starting point than a vague report that the kit is “too sensitive.”
Choosing a Kit Without Trusting the Compatibility Label
Start with the installation manual, not the product’s compatibility headline. Check the vehicle’s bumper material and the kit’s approved sensor locations, height, angle, mounting hardware, and calibration procedure. If the specified position falls behind metal or there is no practical way to secure the sensor at the required angle, resolve that conflict before buying.
Check the electrical plan with the same care. Identify where the indicators will sit, how power and ground will be connected, and which vehicle signals the kit needs. A turn-signal connection alone does not prove that power, ground, or warning logic will work correctly. Allow for post-installation testing, rather than treating the first illuminated indicator as the final check.
A vehicle-specific solution may simplify bracket placement and integration, but it still needs correct installation. A universal radar kit can use detection zones and object filtering that differ from the factory system designed for your model. Ask what mounting changes or bumper work the proposed kit requires, especially if access behind the bumper is limited.
Advertised detection range or “accuracy” cannot be directly compared with the FMVSS 111 field-of-view requirement. That figure describes what a plane mirror must show for passenger cars; a sensor’s claimed range says little about which objects it will warn about on your vehicle. Installation instructions and a credible validation procedure are more useful buying evidence than a broad coverage promise.
Installation and Validation: The Steps That Prevent False Confidence
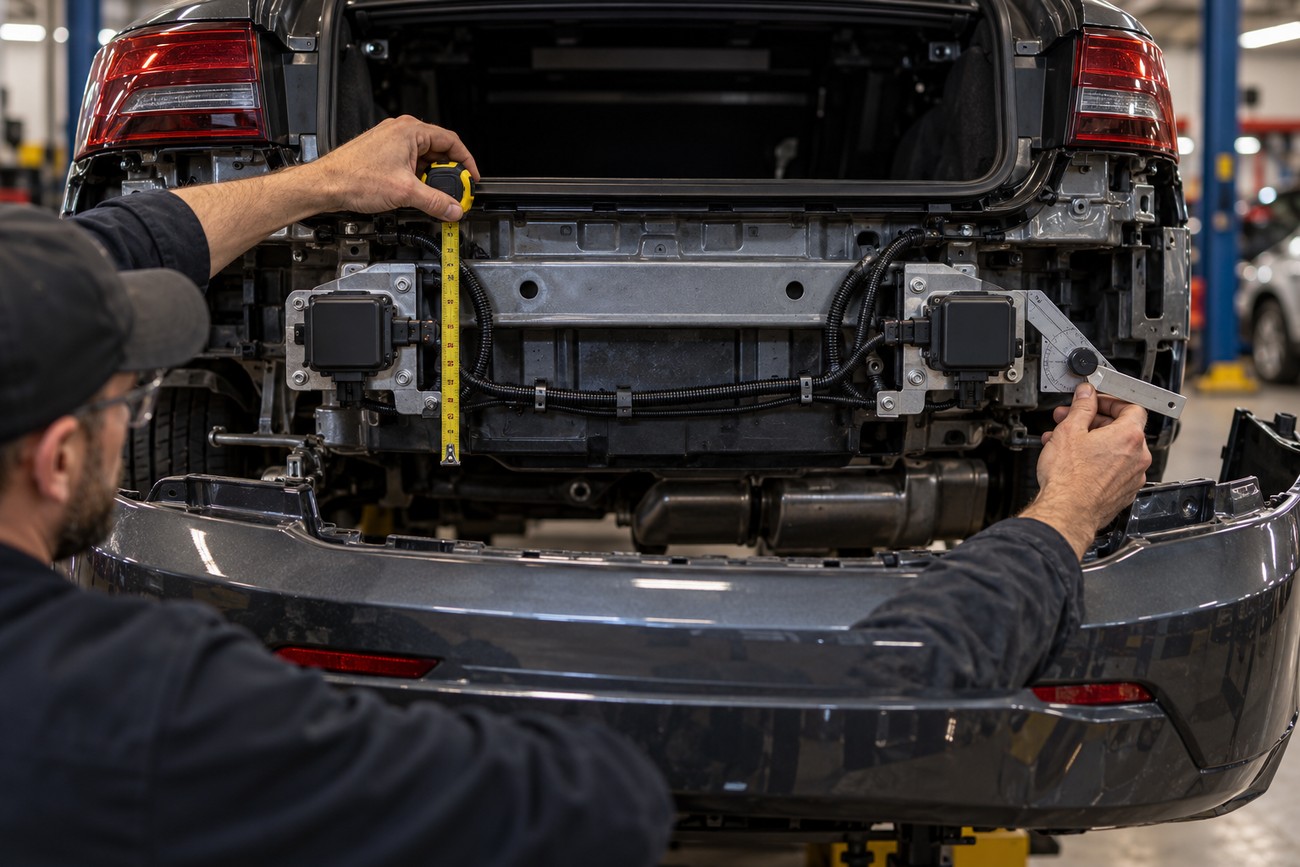
Inspect the bumper, trim, mounting access, and wiring route against the kit manual before making holes or attaching brackets. Mount the left and right sensors at matching heights and orientations using measurements rather than sight alone. An apparently small mismatch can change where each side begins to warn.
Route and secure the wiring, then verify power, ground, turn-signal inputs, and each indicator’s behavior as the manual specifies. Complete the required calibration before testing detection. If an indicator behaves unexpectedly, correct the electrical or setup issue before treating a road test as meaningful.
Validate the system in controlled, safe conditions, comparing alerts with the flat mirrors, any convex inserts, and direct observation of nearby traffic. Check both sides and note warnings from adjacent traffic or fixed objects, as well as situations where an expected warning does not appear. If results are inconsistent, revisit mounting and calibration instead of adjusting sensors by eye.
Removing or replacing the bumper can shift sensor position, even if the sensors themselves remain attached. Inspect their geometry and repeat any required calibration and checks after that work. In daily driving, continue to check mirrors and the area over your shoulder: a silent indicator does not prove the lane is clear, and an alert does not authorize a merge.
Frequently asked questions
These practical details are worth checking before installation and during routine use. They affect the quality of the view or warning you receive, even when the product initially appears to work.
How much does it cost to install blind spot sensors?
There is no reliable universal installation price because vehicle access, mounting work, and electrical integration vary. Ask for a quote that separates the kit, brackets, wiring, indicator integration, calibration, and any bumper removal or modification. Confirm whether post-installation testing is included and whether additional work will need approval before it proceeds.
How should I maintain a stick-on blind spot mirror?
Inspect the adhesive edges periodically, especially after washing the vehicle or during changes in temperature. Clean the reflective surface gently so grit does not scratch it, and check that the insert still points where you intended. Replace it if the surface becomes hazy or the adhesive allows movement; an unstable image is harder to interpret during a lane check.
What should I do if a sensor warning stays on after installation?
Begin with the indicator wiring, power, and ground connections, including any turn-signal input specified by the kit. Then check for an obstructed sensor, incorrect mounting position, and incomplete calibration. Note whether nearby parked vehicles or reflective barriers affect the warning before concluding that a sensor has failed. If the cause remains unclear, have the installation checked against the kit manual rather than disconnecting the indicator and continuing to rely on the system.