

The pressure shown at the compressor or wall regulator may be higher than the pressure reaching the spray gun while air is flowing. A static gauge reading tells you what the line holds with the trigger released; it does not show the pressure available during atomization. Pressure must be checked at the spray gun inlet with the trigger pressed and air flowing.
This difference explains many common complaints. A gun can spit or spray dry when pressure or airflow is too low, while excessive pressure can send material past the panel as overspray. The working result depends on dynamic inlet pressure, air volume, hose losses, fittings, regulator performance, gun type, nozzle, and coating viscosity. One gauge number cannot correct a restricted air line or an unsuitable material setup.
- What Spray Gun Inlet Pressure Actually Means
- Starting Pressure Ranges by Spray Gun Type
- How to Set Pressure at the Gun Inlet
- Why Pressure Drops: CFM, Hoses, and Regulators
- Match Inlet Pressure to the Material and Spray Pattern
- Common Pressure Mistakes and Fast Troubleshooting
- Frequently asked questions
- What is the best air compressor to use with an LVLP spray gun?
- Why does the spray pattern change as the air hose warms up or moves?
- What is the recommended air pressure setting for an HVLP spray gun?
- How much air pressure do you need for a spray gun?
- How do you adjust the PSI on a sprayer?
What Spray Gun Inlet Pressure Actually Means
Spray gun inlet pressure is the pressure measured at the gun connection while the trigger is pulled and air is flowing. This is the value that matters during spraying. Pressure measured at the compressor or at a remote regulator is often static, so it can fall substantially as soon as the gun opens the air passage.
Fit the gauge or regulator as close to the gun inlet as practical, then pull the trigger fully before reading it. A regulator may show a stable value with no airflow, yet the gun may receive less pressure under load. Long hoses, narrow fittings, and restrictive couplers make this difference larger.
Inlet pressure must also be separated from air-cap pressure. The air cap is the point where atomizing air acts on the coating, and its pressure is affected by the gun’s internal design. Graco AirPro documentation cites a 0.07 MPa limit at the air cap for HVLP equipment; that limit does not automatically become the required pressure setting at the gun inlet.
This distinction explains the often-repeated claim that an HVLP gun must use 10 psi. That figure may refer to air-cap pressure, while the inlet setting for a particular gun can be higher. Always use the manufacturer’s specified measurement point and adjustment procedure before applying a generic pressure range.
Starting Pressure Ranges by Spray Gun Type
The figures below are starting references for inlet pressure, not guaranteed final settings. Manufacturer instructions take priority because the correct value changes with gun design, nozzle, coating, fluid delivery, and the required finish.
| Spray gun type | Typical starting inlet range | Reference note |
|---|---|---|
| Conventional or high-pressure gravity | 30–50 psi | STAR documentation lists 2.3–3.0 bar for high-pressure gravity guns. |
| HVLP | 20–29 psi | STAR documentation lists approximately 2.0 bar for HVLP guns. |
| LVLP | 10–25 psi | STAR documentation lists 1.1–1.7 bar for LVLP guns. |
These ranges overlap only partly because the gun technologies use air differently. A conventional gun may require higher inlet pressure for atomization, while an HVLP gun is designed around lower air-cap pressure. LVLP equipment generally works with lower inlet pressure, but its air demand and atomization behavior still depend on the model.
Use the range as a controlled starting point: set a dynamic baseline, spray a test pattern, and make one adjustment at a time. The gun manual, nozzle specification, coating data sheet, and fluid-delivery setup determine the final setting. A generic “30 psi for everything” rule can create overspray on one gun and poor atomization on another.
How to Set Pressure at the Gun Inlet

Start with a clean, dry air supply and a filter that can remove water and oil before they reach the gun. Install the pressure gauge or regulator at the gun inlet, or use the manufacturer’s specified measurement arrangement. If the instructions recommend it, open the gun’s basic adjustment controls fully before fine-tuning pressure.
Pull the trigger fully so air is flowing, then adjust the external regulator while watching the dynamic reading at the gun. Do not set the value with the trigger released and assume it will remain unchanged during spraying. A small pressure drop when the trigger opens is normal; a large or continuing drop points toward inadequate airflow, line restriction, or regulator limitation.
3M Accuspray provides a model-specific example: start at 30 psi (2.1 bar) with the trigger half-pulled, then obtain 20 psi (1.4 bar) at full trigger travel. This sequence belongs to that system and is not a universal setting for every spray gun. Follow the procedure in your own manual if it uses a different trigger position or measurement point.
After setting the inlet pressure, spray a test pattern on a suitable surface. Check atomization, fan symmetry, coverage, and the amount of material landing outside the pattern. Adjust the fan, fluid control, or pressure separately, and recheck the reading with the trigger fully open. The compressor gauge is useful for monitoring the supply, but it is not a substitute for the dynamic gun-inlet reading.
Why Pressure Drops: CFM, Hoses, and Regulators
Pressure alone does not describe whether an HVLP system will work. True HVLP systems may require approximately 8–20 CFM, so the compressor must sustain the gun’s air demand while spraying. A compressor can reach its advertised maximum pressure and still fail to deliver enough continuous airflow for stable atomization.
Pressure sag can come from a long or narrow hose, restrictive fittings, quick couplers, a blocked filter, or a weak regulator. The problem often appears only when the trigger opens: the static reading looks acceptable, then the dynamic value falls and the pattern becomes coarse or dry. Check the complete air path rather than raising the regulator immediately.
One professional instruction suggests allowing approximately 0.6 bar of pressure loss per 10 m of air line. Treat this as a planning example, not a universal correction. Actual loss depends on hose inside diameter, fittings, airflow, line condition, and the gun’s demand.
Correct the restriction before compensating with higher regulator pressure. A technician checks the gun with the trigger fully open because that reveals whether the line can deliver usable air, rather than merely storing pressure between spray passes.
A low inlet-pressure number does not guarantee adequate atomization if airflow is insufficient. If the reading falls sharply, verify compressor output under load, shorten or enlarge the air line where appropriate, and remove restrictive fittings before changing the coating or gun adjustments.
Match Inlet Pressure to the Material and Spray Pattern
Once the dynamic baseline is stable, tune the spray pattern to the coating and the job. Too little pressure or insufficient airflow can produce spitting, coarse atomization, a dry spray, and an uneven fan. The same symptoms can also result from incorrect viscosity, an unsuitable nozzle, restricted fluid flow, or contamination, so pressure should not be treated as the only variable.
Excessive pressure commonly increases overspray, bounce-back, and material loss. More air can break the coating into smaller droplets, but those droplets may lose momentum before reaching the surface. The result is a dry edge, extra airborne material, and less coating transferred to the workpiece.
Nozzle size, coating viscosity, fluid adjustment, fan width, and gun distance interact with inlet pressure. A larger nozzle may need a different fluid and air balance than a smaller nozzle; a wide fan may expose a marginal air supply sooner than a narrow pattern. Use the coating and gun manufacturer’s specifications as the boundary for these adjustments.
Change one control at a time and make a short test pass after each change. If the pattern improves when pressure rises only briefly before deteriorating, the compressor or air line may be unable to sustain the required flow. If pressure is stable but the pattern remains poor, inspect the nozzle, air cap, fluid passage, and material preparation.
Common Pressure Mistakes and Fast Troubleshooting
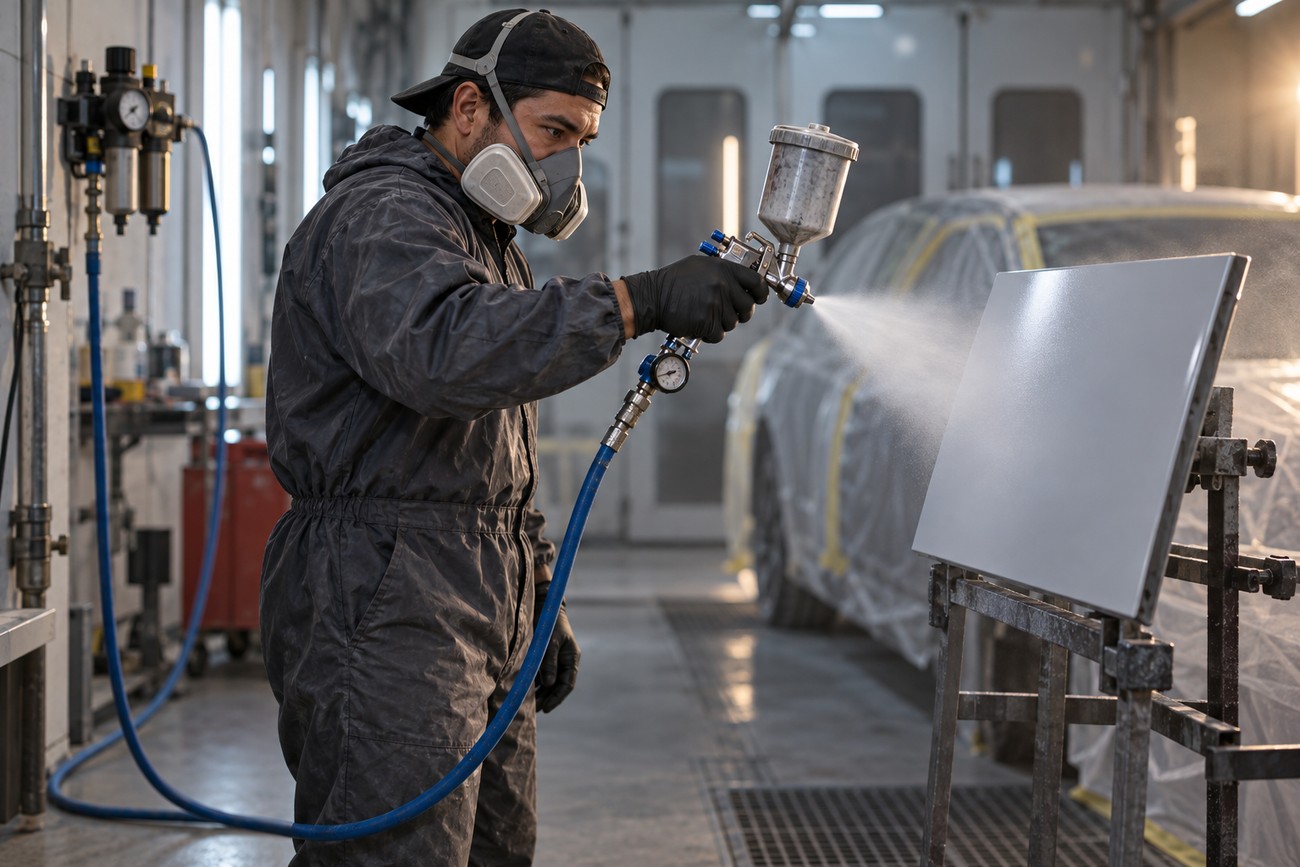
The most common error is setting pressure at the compressor and never checking the gun inlet under load. Another is applying “30 psi for every gun” without considering the gun type, nozzle, coating, or manufacturer’s procedure. The compressor regulator reading alone can be misleading because it may represent static pressure upstream of several restrictions.
HVLP is also frequently reduced to the phrase “10 psi at the inlet.” The often-repeated 10 psi figure may refer to air-cap pressure, not inlet pressure. Graco AirPro documentation, for example, cites a 0.07 MPa air-cap limit; air-cap and gun-inlet pressure are different measurements and must not be substituted for one another.
Use this diagnostic order when the gun spits, sprays dry, or produces a crooked pattern:
- Verify the pressure at the gun inlet with the trigger fully pressed and air flowing.
- Observe whether the reading sags as the trigger opens.
- Inspect the hose, couplers, fittings, filters, and regulator for restrictions or leaks.
- Confirm that the compressor can sustain the gun’s required CFM.
- Check the nozzle, air cap, coating viscosity, fluid setting, fan, and spray distance.
- Change one gun or material variable at a time, then repeat the test pattern.
A poor or badly positioned gauge can create false confidence even when its pointer appears steady. Verify the instrument against a reliable reference where possible, and check the pressure again after the equipment reaches its normal working condition. A stable pattern requires a stable air system, not a convincing number on a remote dial.
Frequently asked questions
The correct answer depends on the gun’s measurement point and operating demand. These distinctions help prevent a static pressure reading or an air-cap specification from being used as an inlet setting.
What is the best air compressor to use with an LVLP spray gun?
Choose a compressor by sustained air delivery, duty cycle, and the LVLP gun’s stated air consumption. Tank size and peak PSI alone do not show whether the compressor can maintain airflow during a continuous spray pass.
Compare the gun’s demand with the compressor’s delivered output under working conditions, then allow for hose and fitting losses. A compressor that repeatedly cycles or loses pressure during spraying will produce an unstable pattern even if its maximum pressure rating looks sufficient.
Why does the spray pattern change as the air hose warms up or moves?
A changing pattern can indicate an intermittent restriction rather than an incorrect pressure setting. A hose may kink as it moves, a coupling may shift, or a damaged liner may reduce the passage when the line bends. Warming can also reveal a soft or poorly supported section that changes shape under airflow.
Watch the dynamic gauge while moving the hose through its normal working position. Check fittings, couplers, and the regulator for a loose connection, then replace or reroute the restricted section before returning the gun.
What is the recommended air pressure setting for an HVLP spray gun?
Use the manufacturer’s specified dynamic inlet setting and measurement point. Professional guide ranges commonly place HVLP inlet pressure at 20–29 psi, while STAR documentation lists approximately 2.0 bar for HVLP guns; these are starting references rather than universal prescriptions.
Do not substitute an air-cap limit for inlet pressure. Set the value with the trigger pressed, confirm that the compressor sustains the required airflow, and finish by checking the test pattern.
How much air pressure do you need for a spray gun?
The required pressure depends on whether the gun is conventional, HVLP, or LVLP, as well as its nozzle and coating. Typical professional guide ranges are 30–50 psi for conventional guns, 20–29 psi for HVLP, and 10–25 psi for LVLP at the inlet.
Those figures do not replace the gun manual. Adequate pressure with insufficient CFM, a restricted hose, or unsuitable viscosity will still produce poor atomization.
How do you adjust the PSI on a sprayer?
Place the gauge or regulator at the gun inlet, open the basic gun controls where the manufacturer recommends it, and pull the trigger fully. Adjust the external regulator while air is flowing, then confirm the value with a test pattern.
Make the final adjustment after the compressor, hose, and gun are operating normally. If the reading drops sharply when spraying starts, correct the airflow restriction or compressor capacity before increasing pressure.







