
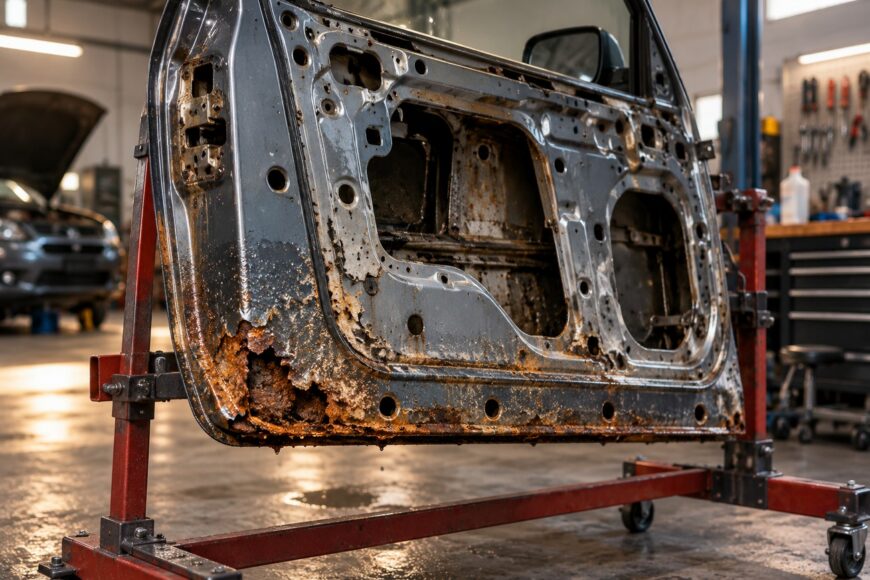
Rust often returns after visible bubbling on a door bottom has been sanded and painted. Water may still be trapped inside the door, and corrosion can remain between the door frame and outer skin, where a cosmetic repair cannot reach it.
The correct repair depends on the condition of the remaining metal. Clear the drainage path when the door is sound, refinish surface corrosion when the metal is intact, cut out and weld in new metal when corrosion has perforated the panel, or replace the door when repair is no longer practical. Do not seal the drain holes or expect filler to replace metal that has already disappeared.
- Why Door Bottoms Rust from the Inside
- Inspect the Door and Trace the Drainage Path First
- Clear Drain Holes and Prepare the Metal Safely
- Choose the Repair by the Condition of the Metal
- Repair Through-Rust and Restore Hidden Protection
- Fixes That Fail and How to Prevent Rust from Returning
- Frequently Asked Questions
- How can I tell whether a used replacement door is worth buying?
- How long should I wait before applying cavity wax after a repair?
- Why does a repaired door rust again even when the paint still looks good?
Why Door Bottoms Rust from the Inside
A door is not completely watertight. Water commonly enters through the window glass seal and should exit through the lower door drain holes. This drainage is normal; the problem begins when dirt, rust scale, wax, or a damaged seal prevents water from leaving freely.
Water that remains inside the door can sit against folded seams and the lower flange. Lower-edge corrosion often develops between the door frame and outer skin, where exterior bubbling may conceal deeper rust. By the time paint has swollen on the outside, corrosion may already extend around the folded edge or into the inner structure.
Rust-colored water from an opening does not by itself prove that the drain is fully blocked. It may be flushing rust and dirt from inside the door. A drain that releases rusty water can still have a restricted path, so inspect whether water actually leaves the door and whether it continues to stand inside afterward.
The visible opening is only the end of the system. The entire path to the outside of the rocker must remain open, including the area behind the lower flange. A clear-looking hole can still lead to a blockage formed by a dirt dam, hardened sealer, or compacted corrosion.
Inspect the Door and Trace the Drainage Path First
Remove the door trim where practical before deciding how to repair the lower edge. The inner side can reveal wet marks, rust scale, flaking coating, and the point where water collects. This inspection also shows whether the corrosion is limited to the outer skin or has reached the frame, seams, and reinforcement.
Follow the route from the inside of the door to the exterior. Check each drain opening, the lower flange, and the area where water should run clear of the door and rocker. A bead of sealer or a ridge of road dirt beyond the visible hole can act as a dam even when the opening itself looks unobstructed.
Drain-hole size and number depend on the door design. Do not drill additional holes simply because the original openings appear small or inconvenient. Unplanned holes can weaken the panel, expose untreated metal, and disturb the corrosion protection intended by the manufacturer.
Use a controlled water test after the inspection rather than flooding the door before the trim is removed. Water should move through the intended route and leave without prolonged standing. If it backs up, find the restriction before sanding or coating the rust, because a new finish will not correct poor drainage.
Clear Drain Holes and Prepare the Metal Safely
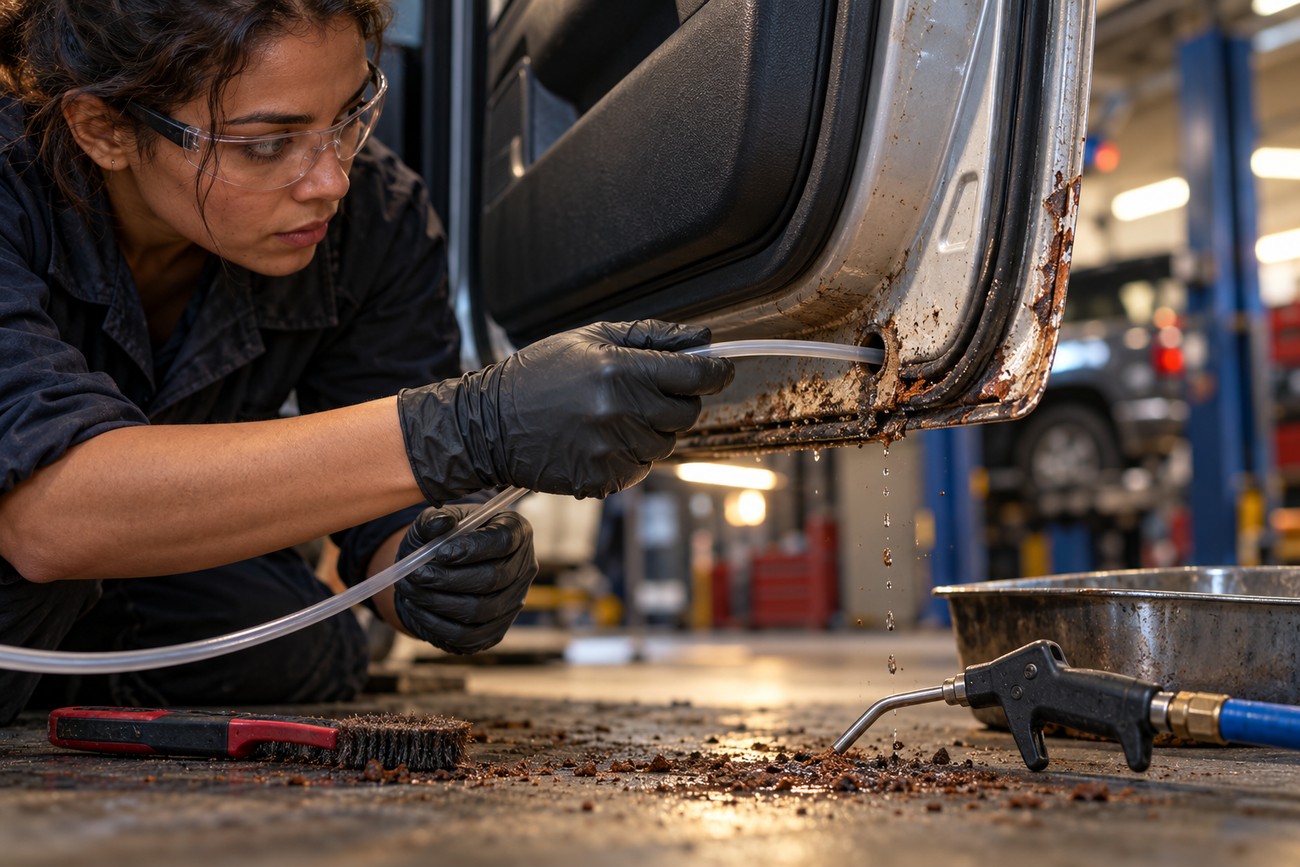
Start by removing loose dirt, rust flakes, and old coating from the lower edge and drain exits. Clear each opening with plastic line or another soft cleaner. A metal pick can enlarge or deform the opening and damage its protective coating, creating another place for corrosion to begin.
Clean away oil and contamination from the surfaces that will receive treatment. If the cavity has been wet, allow it to dry fully before applying internal protection. Compressed air can help move water from seams, but it should not be used to force debris deeper into an enclosed section.
Converters, primers, and paint cannot reliably bond over loose rust, oil, or moisture. Coating those materials can hide continuing corrosion and make later inspection more difficult. Remove unsound material until the remaining surface is stable, then follow the preparation and curing instructions for the selected repair system.
Inspect the drain path again after cleaning. Rust flakes may have moved during the process, and a coating applied near the lower edge can accidentally bridge an opening. Keep every designed drain clear throughout preparation, painting, and final protection.
Choose the Repair by the Condition of the Metal
Sound metal with limited surface corrosion can usually be cleaned, prepared, primed, and refinished. The key test is the condition of the remaining steel, including the folded lower edge. If the metal is firm after cleaning and does not contain deep, unstable pits, a surface repair may be appropriate.
Deep pitting requires more caution. A thin-looking flange may have lost enough material that sanding exposes pinholes or leaves a weak edge. Probe and inspect the surrounding area, because corrosion can extend farther under the paint than the first visible blister suggests.
Filler can smooth a surface but cannot restore metal lost to through-corrosion. Perforated metal generally requires cutting out the damaged section and welding in a replacement insert, or replacing the door. Filling a hole may look acceptable briefly, then crack or absorb moisture as the surrounding metal continues to move and corrode.
A used replacement door can save repair time, but a color match is not proof of condition. The replacement may have hidden lower-edge corrosion, blocked drains, damaged seals, or unprotected internal seams. It may also need color blending even if its listed paint code matches the vehicle.
Repair Through-Rust and Restore Hidden Protection
For through-rust, remove the damaged metal until the cut reaches sound material. Make a properly fitted replacement insert from suitable sheet metal, weld it with controlled heat, and finish the exterior so the repaired contour and edge are stable. The repair should address the full corroded area rather than leave a thin rust shelf behind the patch.
After welding, protect the visible seam and the back of the repair. Hidden flanges, folded edges, and the surrounding cavity also need renewed corrosion protection because welding and cutting remove or damage the original coating. Leaving the rear of the flange untreated allows moisture to attack the repair from inside.
A repaired weld can fail even when the exterior seam is smooth if the back of the flange and the surrounding cavity remain bare. The hidden side needs directed coverage, not merely a spray of product near the lower drain.
Apply cavity wax only to clean, dry metal after loose rust and contamination have been removed. 3M recommends three cavity-wax coats and a spray nozzle providing circular coverage for the required film build. Direct the application toward hidden flanges and internal surfaces rather than coating only the edge around the drain opening.
Keep all drain holes open during final sealing and underbody protection. Do not permanently cover them with caulk, filler, or underbody coating; water must have a free exit. If a product requires a particular cure period, follow its instructions and the repair system’s drying requirements.
Fixes That Fail and How to Prevent Rust from Returning
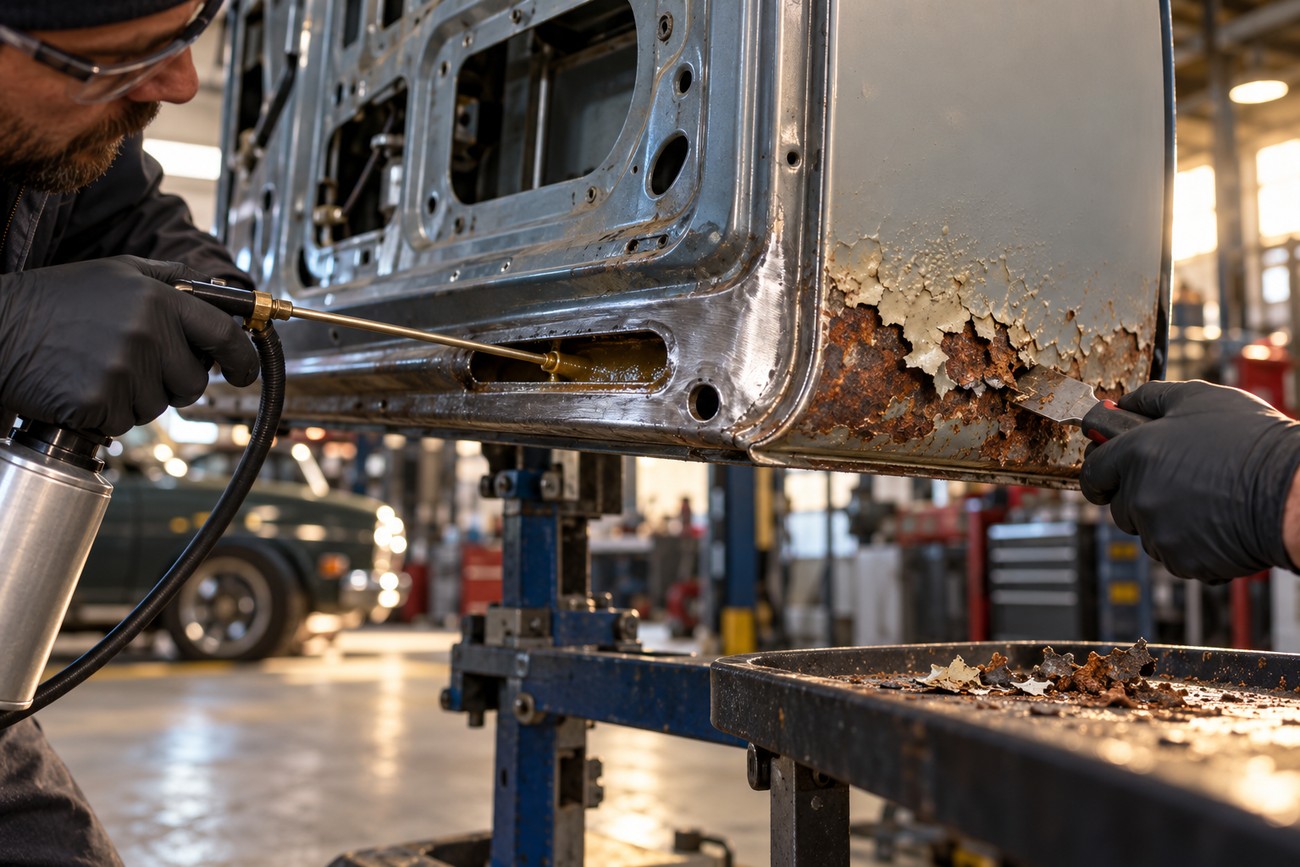
Painting over loose rust is a temporary concealment, not a corrosion repair. The same applies to applying a converter or primer over oil, damp metal, or unstable scale. Preparation must expose a clean, dry, stable surface before the finish or internal protection is applied.
Sealing a drain does not stop water from entering through the window seal. It turns the door into a moisture reservoir, increasing the time that water remains against seams and folded metal. Expanding foam and some improvised fillers can also retain moisture and accelerate corrosion rather than repair the panel.
A damaged window seal or blocked drainage path can recreate the problem after a door replacement. Inspect the seal, the inner cavity, and every intended drain on a replacement door before installation. Check the rocker, sills, wheel arches, floor areas, and other doors when one corrosion site is found, since the same exposure and maintenance conditions may affect nearby panels.
Repeat the inspection after rain or washing, when the drainage system is being tested under real conditions. Water should not remain inside the door, and a continuous flow from the drain indicates an unresolved drainage issue. A dry visual inspection alone can miss a restriction that only appears after water enters through the glass seal.
Frequently Asked Questions
These checks help distinguish a repairable door from one that will continue to corrode after cosmetic work.
How can I tell whether a used replacement door is worth buying?
Inspect the inner lower flange, drain openings, hidden seams, and the area behind the trim before purchase. Look for rust scale, damp marks, bubbling along the lower edge, blocked outlets, and repairs that appear to have been covered with filler. Check the window seal for cuts, shrinking, or gaps that could allow water into the cavity.
A color-matched used door can still have hidden corrosion or unprotected internal seams. Ask whether the lower edge has been repainted, and inspect the transition between old and new paint for sanding scratches, overspray, or uneven filler. If the inner cavity cannot be checked, treat the door as being in unknown condition rather than assuming replacement removes the original problem.
How long should I wait before applying cavity wax after a repair?
There is no universal, technically established 90-day waiting rule for applying cavity wax to a repaired area. The timing depends on the product instructions, the repair materials, and whether the seam, paint, and cavity are completely dry and cured.
Do not apply wax over trapped moisture, uncured coatings, or loose contamination. Follow the specified cure requirements for the products used, then direct the wax onto the hidden flanges and the back of the repair. The drain openings must remain clear throughout the process.
Why does a repaired door rust again even when the paint still looks good?
Begin by inspecting the hidden lower flange and the back of the repaired area. Rust can restart where the weld back, folded seam, or surrounding cavity was left unprotected, while the exterior paint remains intact. Trapped moisture behind a coating can also allow corrosion to progress out of sight.
Next, check the window seal and trace the full drainage path to the rocker. A recurring leak, blocked outlet, or dirt dam can repeatedly wet the same repair. If those areas are sound, inspect adjacent panels and the other doors for similar corrosion sources before refinishing the affected edge again.







