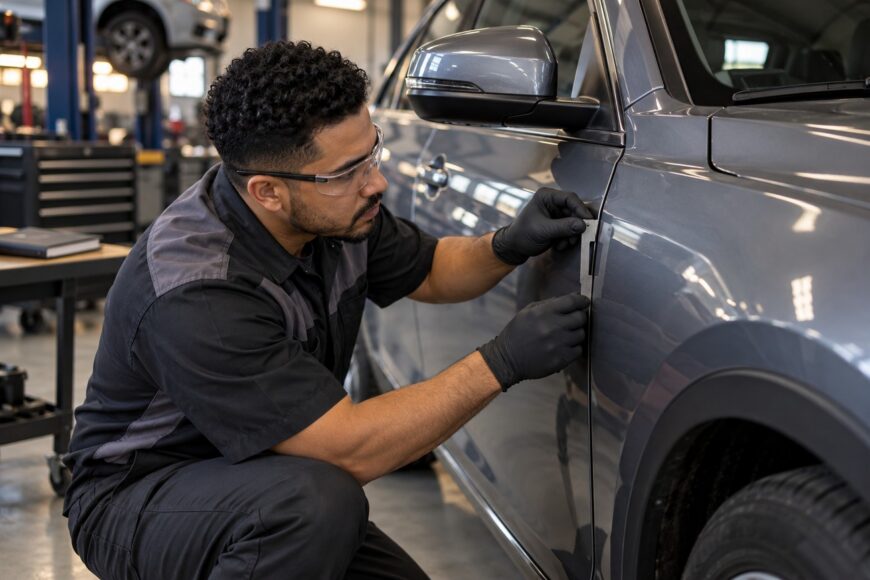
Uneven panel gaps, a door that sits proud or recessed, a front edge that rubs against the fender, and changing wind noise can all point to an alignment problem. The visible symptom may come from the door itself, its hinges, the latch area, or the body opening around it. A door can appear closed while its position remains incorrect.
A visually even gap is only part of the result. Panel flushness, seal compression, edge alignment, and closing effort matter as well. A forced adjustment can improve one line while creating noise, a damaged seal, or a poor match with the rocker and neighboring panels, so diagnose the problem before loosening hardware.
- Start with the Right Standard: Gap, Flushness, and Closure
- Diagnose the Source Before Moving Hardware
- Prepare a Controlled Alignment Check
- Adjust the Door in the Correct Order
- When Panel-Gap Adjustment Is Not the Repair
- Validate the Result and Avoid Common Traps
- Frequently asked questions
- What does “shingling” mean in car panel alignment?
- How much gap should be between a car door and its frame?
- What can I do to fix an uneven gap between my door and frame?
- How do I fix panel gaps?
- How do I fix misaligned doors?
Start with the Right Standard: Gap, Flushness, and Closure
The final reference is the service manual for the exact vehicle model, year, and configuration. Factory gap specifications vary between manufacturers and body designs. Practical guidance places many automotive panel gaps around 3–5 mm, but that range is a general reference, not a universal factory standard.
One model-specific guide lists 4–5 mm with a ±1 mm tolerance for front and rear doors. That example helps explain how a manufacturer may define a gap, but it cannot be generalized to every vehicle. The useful comparison is the specified range for your car, measured along the complete joint rather than at one convenient point.
Three targets must be checked together: gap width and consistency, panel flushness, and closing or latching effort. A door may have an attractive visual line while sitting slightly high, low, proud, or recessed. Excessive seal compression can also make the door harder to close, while insufficient compression may allow wind noise or water entry.
A small height step between adjacent panels can be intentional. This designed overlap, known as shingling, may guide how one panel meets another and should not automatically be corrected. Chasing identical-looking edges without checking the manual and the seal can move the body away from its intended fit.
Diagnose the Source Before Moving Hardware

Start by identifying the pattern of the fault. Rubbing at the front edge can involve the door, fender, hinge position, or a shifted opening. A door that is proud at one end and recessed at the other may have changed position, while a height step can involve the rocker, pillar, adjacent panel, or earlier repair work.
The door may not be the faulty part. An impact to the rear of a door, the pillar, or the fender can alter the geometry of the opening. If the surrounding panel lines disagree with one another, forcing the door into place can disguise a body problem and leave the next gap visibly wrong.
Closing behavior supplies useful evidence. A door can latch while its gaps, flushness, seal contact, or wind-noise performance remain incorrect. If the alignment returns after tightening, inspect hinge pins, bushings, fasteners, and threads before repeating the same adjustment.
Compare the suspected door with the fender, rocker, adjacent door, and opposite side. The other side can reveal the vehicle’s general design, yet it is not automatically a perfect factory template. Previous repairs, production variation, or a separate alignment issue may affect either side.
Prepare a Controlled Alignment Check
Inspect the vehicle on a level surface with the relevant panels closed. Clean the edges so dirt does not create a false step, then examine the full length of each joint. Check the gap width, its consistency, the height relationship between panels, and whether the edge contours continue smoothly through corners.
Use a suitable gap measurement instead of relying only on photographs or eyesight. Angled images and wide-angle phone cameras can exaggerate a narrow section or hide a flushness problem. A straight-on inspection under consistent lighting gives a more reliable starting point.
Before loosening anything, mark the current hinge and striker positions where practical. Protect painted edges with appropriate masking, and confirm how the fasteners are reached. Hinge adjustment may be available through the door opening, the wheel-well area, or after removing trim or interior lining, depending on the vehicle.
Hinges generally allow only limited movement through clearance at their mounting points. That movement is enough for controlled correction when the parts are sound, yet it cannot replace body repair. Support the door safely where necessary, and avoid placing hands near closing edges while testing its position.
Adjust the Door in the Correct Order

Set the door position with the hinges first. Make a small, marked change so the door relates correctly to the fender, adjacent door, rocker, and pillar. After tightening the fasteners, check the complete gap and panel height before deciding whether another small movement is needed.
Use the striker afterward to refine latch engagement and closing consistency. Moving the striker first can hide a door that still sits incorrectly in the opening. The latch may pull a proud or low door into position, leaving uneven seal loading and a misleadingly acceptable closing action.
Hinge position establishes where the door lives; the striker should finish how it latches. Using the striker to correct the door’s main location can conceal a hinge or body problem and transfer stress to the seal.
Open and close the door after every small correction. Check the front and rear edges, the upper frame, the rocker relationship, and the effort required at the handle. A change that improves one corner can reduce clearance elsewhere, so each adjustment needs a complete recheck.
When the door position is correct, adjust the striker in small increments for even engagement. Confirm that the latch reaches its normal position without excessive slamming. Test the seal around the perimeter, since a visually improved gap is incomplete if the rubber is folded, pinched, or unevenly compressed.
When Panel-Gap Adjustment Is Not the Repair
Adjustment has limits. A visibly deformed door skin, a shifted opening, damaged hinge mounting, or evidence of collision repair may require body correction, component repair, or replacement. Hinges cannot restore the original shape of a panel, and repeated movement at the fasteners can create new problems.
One practical source uses a deviation greater than about 2 mm as a warning sign when the available adjustment cannot correct it. This threshold is not an independently confirmed universal replacement rule. It should prompt a closer inspection of the panel, opening, hinges, and previous repair rather than an automatic parts decision.
Compensating for a deformed panel with hinge movement can spoil the fender gap, rocker alignment, latch position, or seal contact. The same applies when a pillar or rear body section has moved. A technician needs to establish whether the reference points around the opening remain positioned correctly before treating the door as an isolated part.
Persistent misalignment after tightening deserves component inspection. Worn hinge pins or bushings, loose fasteners, damaged threads, and structural movement can allow the door to shift again. Repeating the adjustment may temporarily improve the appearance while leaving the cause untouched.
Validate the Result and Avoid Common Traps

Finish with a complete perimeter inspection. Open and close the door repeatedly, check handle effort and latch engagement, and verify that the panel remains flush with its neighbors. Inspect the seal for distortion and listen for wind or road noise during a controlled drive when safe to do so.
Every vehicle does not require a 3 mm gap. A practical range of 3–5 mm can help identify an obvious anomaly, while the service manual for the exact vehicle remains authoritative. Differences between models, years, configurations, and production fit mean that a universal measurement can lead to unnecessary correction.
Identical-looking gaps are not always superior. A deliberate shingling detail or a designed change in edge height may be correct, while excessive visual leveling can alter seal pressure and create noise. The finished result should satisfy the vehicle’s specification and operate correctly, rather than match a marketing promise of “perfect gaps.”
A tightening-only repair is not a diagnosis. If the door moves again, if the gap changes along its length, or if the surrounding panels disagree, investigate the hinges and body structure. The most reliable result combines measured alignment, sound hardware, correct latch adjustment, and a final check of sealing and operation.
Frequently asked questions
Panel alignment questions often begin with a visual comparison. The answer depends on the vehicle’s design, its service information, and the condition of the surrounding structure.
What does “shingling” mean in car panel alignment?
Shingling is an intentional height overlap or step between adjacent body panels. One edge may sit slightly above or below the next panel as part of the designed body fit. A small step is therefore not automatic evidence of a misaligned door; compare it with the service information, neighboring contours, and seal behavior.
How much gap should be between a car door and its frame?
The exact gap must come from the service manual for the vehicle’s make, model, year, and configuration. About 3–5 mm is a general practical reference, while one example guide specifies 4–5 mm with a ±1 mm tolerance. Those figures illustrate model-specific practice and do not create a universal automotive standard.
What can I do to fix an uneven gap between my door and frame?
First determine whether the door, hinge, fender, pillar, rocker, or previous repair is causing the uneven line. Measure the gap along its full length, check panel flushness, and inspect for movement or damage. If the structure is sound, make small hinge-position adjustments, then set the striker for consistent latching. Persistent movement or a deformed opening requires further repair inspection.
How do I fix panel gaps?
Use the vehicle-specific specification, then align the panel against its surrounding reference points rather than matching one gap alone. Check width, consistency, height, edge contour, seal contact, and closing effort. Hinge adjustment addresses position; striker adjustment refines latch engagement. A distorted panel or shifted body opening may need repair or replacement instead of more adjustment.
How do I fix misaligned doors?
Inspect the complete opening and compare the opposite side without treating it as an unquestionable template. Mark the original hardware positions, adjust the hinges in small steps, tighten and recheck, then adjust the striker. Test repeated opening and closing, seal compression, flushness, and noise. If alignment returns, inspect hinge wear, fasteners, threads, and body movement.