
Rust returning after a careful-looking treatment usually points to a preparation or coverage failure. Wax may have been sprayed over salt, trapped water, loose corrosion, or sections the probe never reached. A coated access hole does not prove that the seam, reinforcement, or far end of the cavity received protection.
Cavity wax protects hidden steel only when the cavity is clean, dry, accessible, and properly drained. Its job is to displace moisture and reduce oxygen access to the metal, creating a barrier against electrochemical corrosion. Thin, well-distributed coverage is more useful than flooding the cavity, while service life depends on preparation and inspection rather than the longest claim printed on the label.
- What Cavity Wax Protects—and What It Does Not
- When Should Cavity Wax Be Used?
- Prepare the Cavity Before Spraying
- How to Apply Cavity Wax Evenly
- Drains, Overspray, and Other Application Failures
- Product Choice, Curing, and Realistic Service Life
- How to Inspect and Maintain the Treatment
- Cavity Wax Myths That Cause Rust to Return
- Frequently Asked Questions
- When should cavity wax be used after welding or body repair?
- How can you verify coverage inside a cavity you cannot see?
- How can cavity wax treatment be maintained over time?
What Cavity Wax Protects—and What It Does Not
Cavity wax is intended for internal body cavities such as sills, frame rails, reinforcements, seams, and other enclosed zones that ordinary exterior coatings cannot reach. These areas are exposed to condensation, road salt, dirt, and water entering through joints or openings. A suitable wax leaves a protective film on steel and remains flexible enough to tolerate ordinary movement and temperature changes.
The barrier works by displacing moisture and reducing oxygen access to steel. That limits the conditions needed for electrochemical corrosion, provided the film reaches the vulnerable surfaces. Coverage at an access hole or along the first section of a sill says little about the unpainted seam farther inside.
Cavity wax is also used to restore factory corrosion protection after welding, cutting, panel replacement, or other body repair. Heat and mechanical work can remove or damage the original coating, leaving bare metal inside a closed structure. Wax helps close that protection gap after the repaired metal and surrounding cavity have been properly prepared.
It does not replace cleaning, drying, removal of loose corrosion, or restoration of damaged metal. Applying wax over flaky rust can seal contamination against the steel while corrosion continues underneath. If a reinforcement or sill has lost structural metal, corrosion protection cannot substitute for inspection and structural repair.
When Should Cavity Wax Be Used?
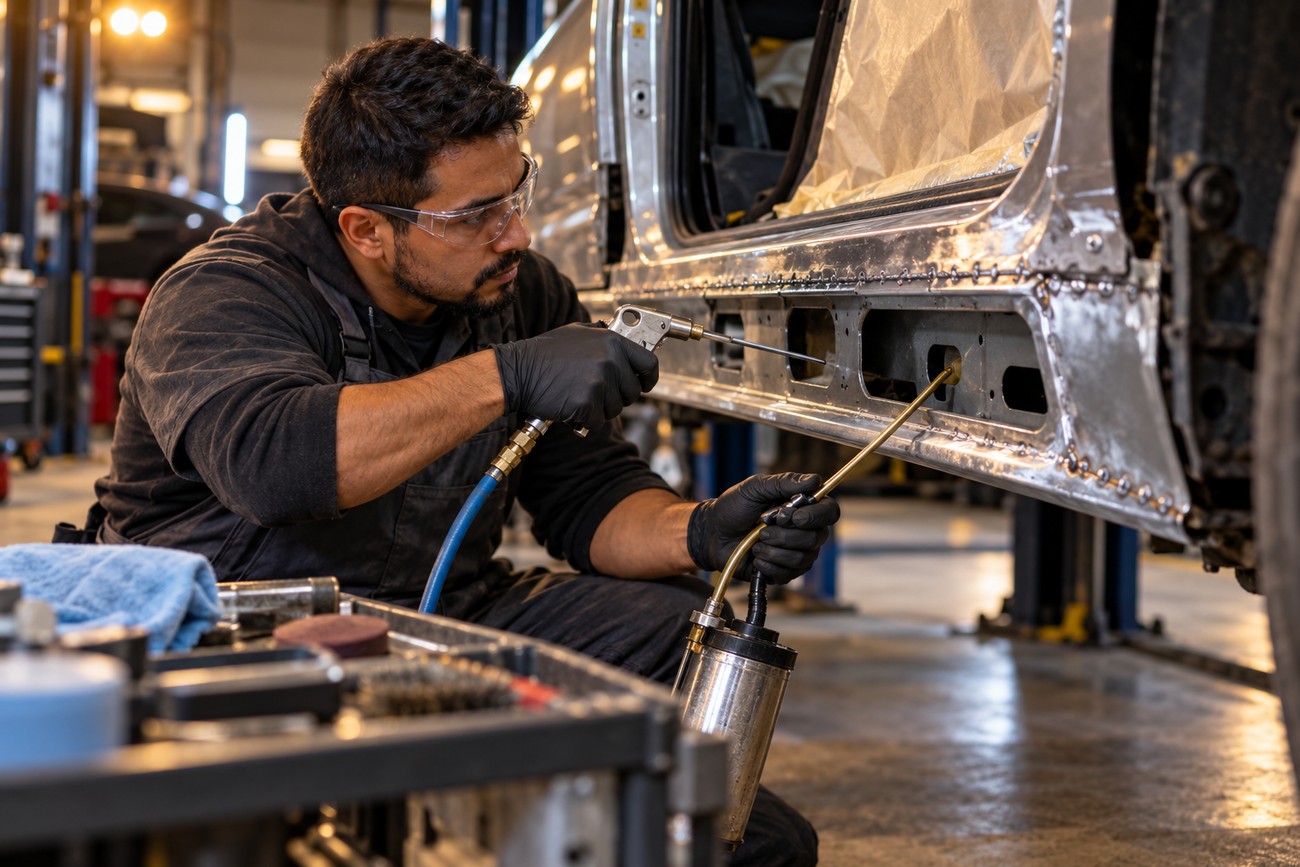
The most predictable time to apply cavity wax is after body repair, welding, or cutting, once the repaired area and the surrounding cavity are clean and dry. The coating can then restore protection that was removed during the work. Application should follow the repair system’s instructions, including any required primers, seam sealers, or topcoats.
Already-used vehicles can also benefit from cavity wax when the accessible cavity is structurally sound and can be prepared properly. This is common around sills, door structures, frame rails, and repaired seams. Existing surface oxidation may be manageable after cleaning, while loose or actively advancing corrosion requires more direct treatment before wax is considered.
Timing matters because wax applied over wet, salty, or dirty metal traps the conditions that caused the problem. A cavity that still contains rinse water may look treated at the opening while remaining wet farther inside. Drying may require access from more than one point and enough time for moisture to leave seams and reinforcements.
Check the drain openings and available access before treatment. If the probe cannot reach the relevant sections, the job needs a different access point, a suitable extension, or a repair decision rather than additional material. Drainage must remain functional after spraying.
Prepare the Cavity Before Spraying
Start by locating every practical access point, including factory holes, inspection openings, trim openings, and holes created during the repair. Remove dirt and salt as far as possible without driving contamination deeper into the structure. Cleaning the visible edge alone is insufficient if loose debris remains in the probe’s path.
Loose corrosion should be removed or addressed before wax is applied. A film over tightly bonded surface oxidation may provide some barrier value, depending on the product and repair plan, but flaky rust has already weakened the substrate and can keep shedding beneath the coating. Wax does not convert deteriorating metal into sound metal.
Dry the cavity thoroughly, then confirm that every drain opening is open. Compressed air can help clear accessible passages, although it should be used carefully so that water and debris are not forced into another closed section. The cavity should be dry at the time of application, and surrounding surfaces should be protected from runoff.
Geometry determines the result. A straight probe may cover a short sill while missing a bend, an upper seam, or the far side of a reinforcement. Plan the probe path before spraying and use an extension or directional nozzle when required. If access cannot be established, coverage should be treated as incomplete rather than assumed from visible spray or dripping.
How to Apply Cavity Wax Evenly
Select a probe suited to the cavity and the product. A long flexible tube, a directional tip, or a 360-degree cavity probe can change the result substantially because each distributes material differently. Mask paint, glass, trim, brakes, tires, and nearby work surfaces, and place a tray or absorbent protection where runoff is expected.
Move the probe while spraying so the film builds along the cavity instead of collecting at one point. Work through the access opening in a controlled pattern, covering the near section first and then the deeper areas. Several thin, even passes generally provide better penetration into seams and fewer runs than one heavy flood.
Moving the probe while spraying prevents a local pool from forming before the material reaches the surrounding seams. Light passes also make it easier to judge where the film is traveling and where a second access point is needed.
For unprotected metal, 3M recommends a minimum of 3 coats for Cavity Wax Plus. That is product-specific guidance, so the relevant technical sheet controls the exact procedure. KBS Coatings lists approximately 1 mil for one thin coat and about 10 minutes before excess is removed; those figures also apply to that product’s instructions rather than to cavity wax as a universal category.
Allow each pass to behave as intended before adding more material. Excess wax can run out of seams, soil surrounding panels, and collect near drains. A thin film that reaches the full cavity is usually more serviceable than a thick layer that leaves dry areas while creating cleanup and drainage problems.
Drains, Overspray, and Other Application Failures
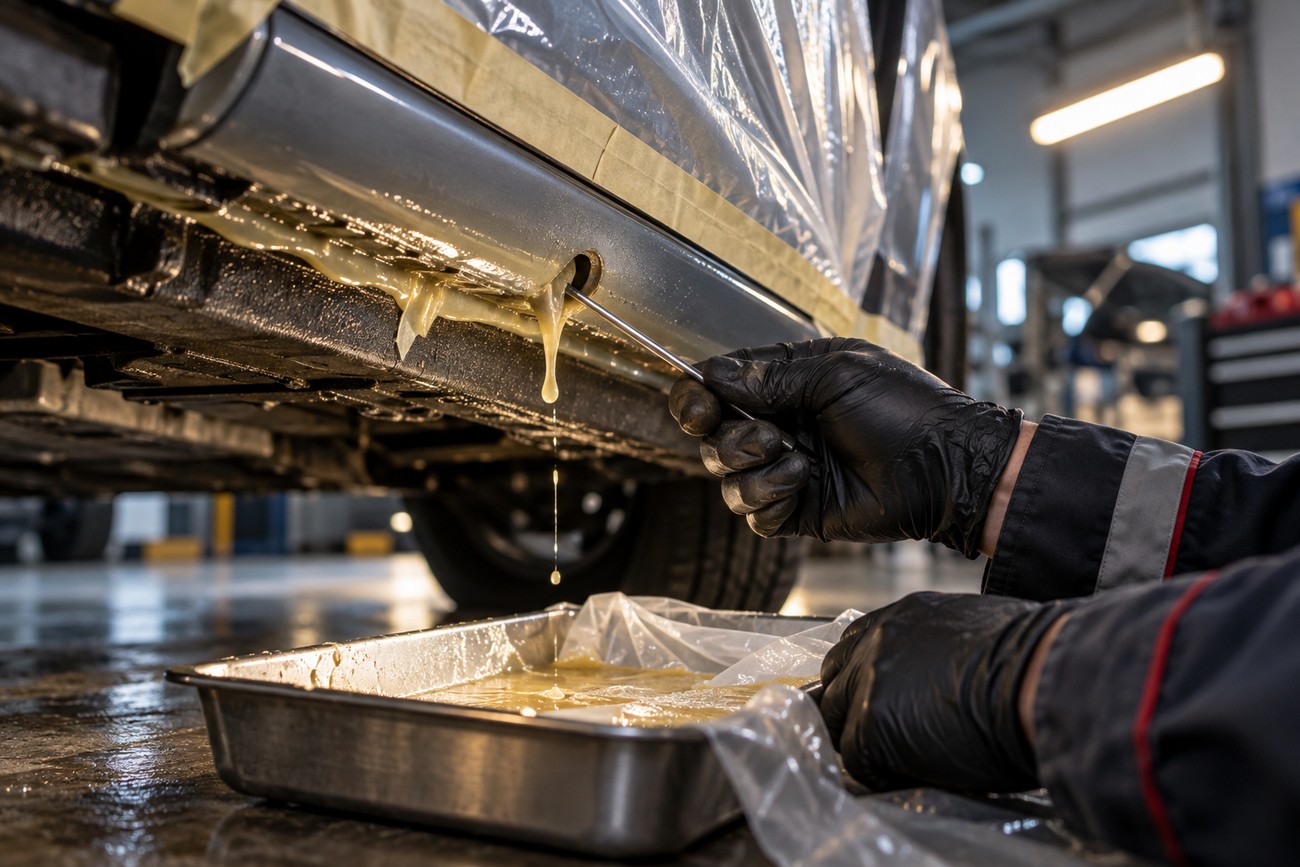
Drain holes in sills and other enclosed structures must be checked before and after application. They are part of the corrosion-control system because they allow water to leave the cavity. Keep the openings clear while spraying, and remove any soft buildup or wax that has collected across the drainage path.
Masking and runoff control are basic parts of the job. Cavity wax can drip from seams, access holes, and lower edges after spraying, especially when the cavity is warm or the application is heavy. Catch the excess, wipe exposed surfaces before it spreads, and allow the product to settle according to its instructions before returning trim or panels.
Material consumption depends on the size, shape, and condition of the job. Simple work may use about one-tenth to one-half of a can, while complex repairs can require several separate applications. Rapid can consumption often indicates excessive spray duration, poor probe control, or repeated treatment of one opening rather than proof that the cavity is fully covered.
Water sloshing or a renewed hissing and dripping sound after washing or winter use deserves attention. It can indicate retained moisture or a partially obstructed drain. Reopen the access points, verify drainage, and inspect the film before adding more wax; additional material can worsen a blockage.
Product Choice, Curing, and Realistic Service Life
There is no universal “best” cavity wax for every structure. Selection should consider viscosity, creep, flexibility, non-hardening or self-healing behavior, solvent system, cure time, and compatibility with existing coatings, seam sealers, wiring, and plastics. A fluid product may reach distant seams more easily, while a heavier film may be better suited to a particular exposed edge if the product allows that use.
Products also differ substantially in curing behavior. Some solvent-borne options are described as curing in approximately 4 hours, while some professional formulations are listed as fully cured in 168 hours. The product sheet controls reassembly, washing, exposure, and any required ventilation period.
Flexible or non-hardening films can remain useful where panels move with temperature and vibration. That same softness may attract dust in an exposed or poorly sealed area. The correct product depends on whether the material will remain inside a protected cavity, contact an existing coating, or approach a drainage opening.
Manufacturers may claim protection for years or up to 20 years under proper application. Those claims are conditional on preparation, access, climate, salt exposure, and drainage, so they are not universal service-life guarantees. A vehicle used on salted roads with incomplete probe access requires closer inspection than the label’s longest marketing interval suggests.
How to Inspect and Maintain the Treatment
Hidden-cavity treatment needs follow-up because the protected surface cannot be inspected continuously. At access points, look for exposed steel, washed-out film, heavy contamination, and signs that wax has migrated away from an upper seam. Check that drains remain open after the material has settled and after the vehicle has been driven in wet conditions.
Moisture symptoms are useful warnings. Water noise, dampness around a lower seam, fresh bubbling at an external joint, or returning rust near a repaired area can indicate incomplete coverage or a drainage problem. These signs call for investigation before another coat is applied.
3M reports that Cavity Wax Plus was tested to ASTM B117 and SAE J2334, with 1500 hours without significant corrosion on steel panels in the cited salt-spray result. Such testing provides useful product evidence under defined conditions. It does not reproduce every vehicle’s cavity geometry, contamination, climate, salt exposure, or repair history.
Renew the treatment when the film has degraded, coverage was incomplete, or repair work has reopened the structure. Reapplication should begin with cleaning and drying, followed by a check of access and drainage. Long-term protection is a maintenance result, not a one-time assumption.
Cavity Wax Myths That Cause Rust to Return

The first myth is that cavity wax belongs only on new vehicles. In reality, it is used on new vehicles, repaired vehicles, and already-used body cavities when the metal can be prepared and the cavity can be reached. Post-repair application is especially important where welding, cutting, or panel replacement removed factory protection.
The second myth is that thicker coverage always provides better protection. A thin, even film is preferred over flooding the cavity with excess material because it reaches seams more consistently and creates less risk of runs, contamination, and blocked drainage. Several controlled passes are generally more useful than holding the probe in one location.
The third myth is that wax stops any rust. It functions as a barrier and moisture-management coating, while loose corrosion, trapped water, salt, and structural damage still require separate attention. Applying wax over actively deteriorating metal can hide the condition without stopping the underlying loss of material.
The fourth myth is that a multi-year or up-to-20-year label claim applies everywhere. Actual durability depends on preparation, access, climate, salt exposure, and drainage. Inspection and renewal remain necessary even when the initial application followed the product instructions.
Frequently Asked Questions
When should cavity wax be used after welding or body repair?
Use it after the repaired cavity has been cleaned and dried, exposed repair areas have been properly prepared, and the repair system permits the application. Welding residue, abrasive dust, solvent, moisture, or uncured adjacent materials can interfere with adhesion and compatibility. The product instructions determine whether primer, seam sealer, or another coating must be applied first.
Sequence also matters around access holes and replacement panels. Confirm that the welds and repaired metal have been inspected, that drainage remains open, and that the probe can reach the affected seams before closing the trim or structure. Applying wax before those checks can make later inspection and correction harder.
How can you verify coverage inside a cavity you cannot see?
Use evidence from the access points rather than treating visible runoff as proof of complete coverage. Confirm that the probe reaches the intended depth and direction, then spray while moving it through a planned path. A controlled film appearing at a secondary opening or along an expected seam can support the coverage assessment, while heavy dripping from one opening may only show that the nearby area was flooded.
Inspect the likely uncoated geometry: bends, upper seams, reinforcement intersections, and sections beyond a change in direction. If the probe cannot reach those areas, add an appropriate access method or record the limitation for future inspection. Endoscopic inspection can help where available, although it still depends on access and visibility; the absence of visible rust does not prove that every surface is coated.
How can cavity wax treatment be maintained over time?
Inspect access points and drain openings periodically for exposed steel, washed-out wax, contamination, retained water, or returning rust. Water noise, damp seams, and bubbling near repaired areas can indicate incomplete coverage or a drainage problem.
When the film has degraded or repair work has reopened the structure, clean and dry the cavity again before reapplying product. Confirm access and drainage first, and follow the product instructions for compatibility, curing, and reassembly.