
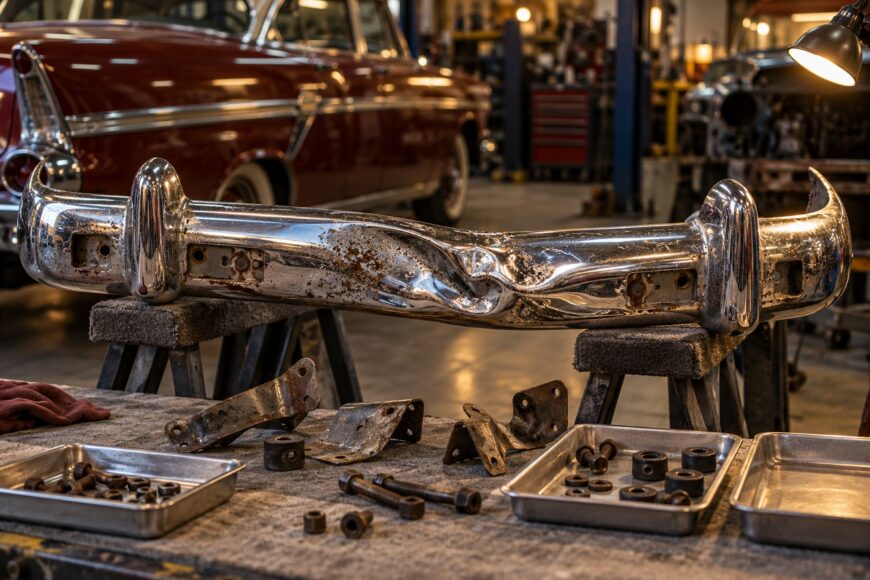
A bent chrome bumper can look like a straightforward cosmetic repair from the outside. Under the shine, however, the steel may be stretched, the mounting points may have shifted, and corrosion may have traveled beneath the plating. Brackets, reinforcements, bushings, and fastening holes can also be damaged while the visible surface appears repairable.
The governing rule is simple: restore the geometry and the metal first, then rechrome the prepared part. Polishing can improve gloss, and new chrome can make a surface look bright, but neither process reliably conceals a deep dent, thin steel, poor alignment, or corrosion left in the base metal. A durable restoration depends on preparation that remains sound after installation.
- Assess the Bumper Before Repair
- Set the Geometry Before Straightening Metal
- How to Straighten a Bent Chrome Bumper
- Prepare the Metal Before Rechroming
- Choose a Rechroming Shop and Control the Result
- Verify Fitment and Decide Whether to Repair or Replace
- Frequently asked questions
- How much does it usually cost to rechrome a bumper?
- How long does rechroming a classic-car bumper usually take?
- What should I ask about the chrome process before approving the job?
Assess the Bumper Before Repair
Remove the bumper before judging the damage. Support it securely, photograph the brackets and fasteners, and label hardware that may differ from one mounting position to another. Inspect the outer shell, brackets, reinforcements, mounting holes, bushings, and contact areas for distortion, cracks, torn metal, and signs that the bumper has been forced into place.
A typical decorative chrome bumper has a steel base, a copper layer, a nickel layer, and a thin decorative chrome layer. The visible finish therefore says little about the condition of the steel beneath it. Decorative chrome is a thin finish, not a thick filler capable of hiding deep dents, pits, or uneven base metal.
Look for stretched areas around a dent, sharp creases, ripples, elongated holes, and metal that has become unusually thin. Blisters and small rust spots can indicate corrosion below the visible surface, especially around seams, drain points, and mounting features. Old repairs may also be hidden under plating and become clear only after the layers are removed.
Plan for the inspection to change the scope of work. Removing old plating may reveal cracks, perforation, thin sections, or distorted steel that was impossible to assess from the outside. A bumper that shines well can still be structurally unsuitable for installation, so surface appearance should be treated as one observation rather than a condition report.
Set the Geometry Before Straightening Metal
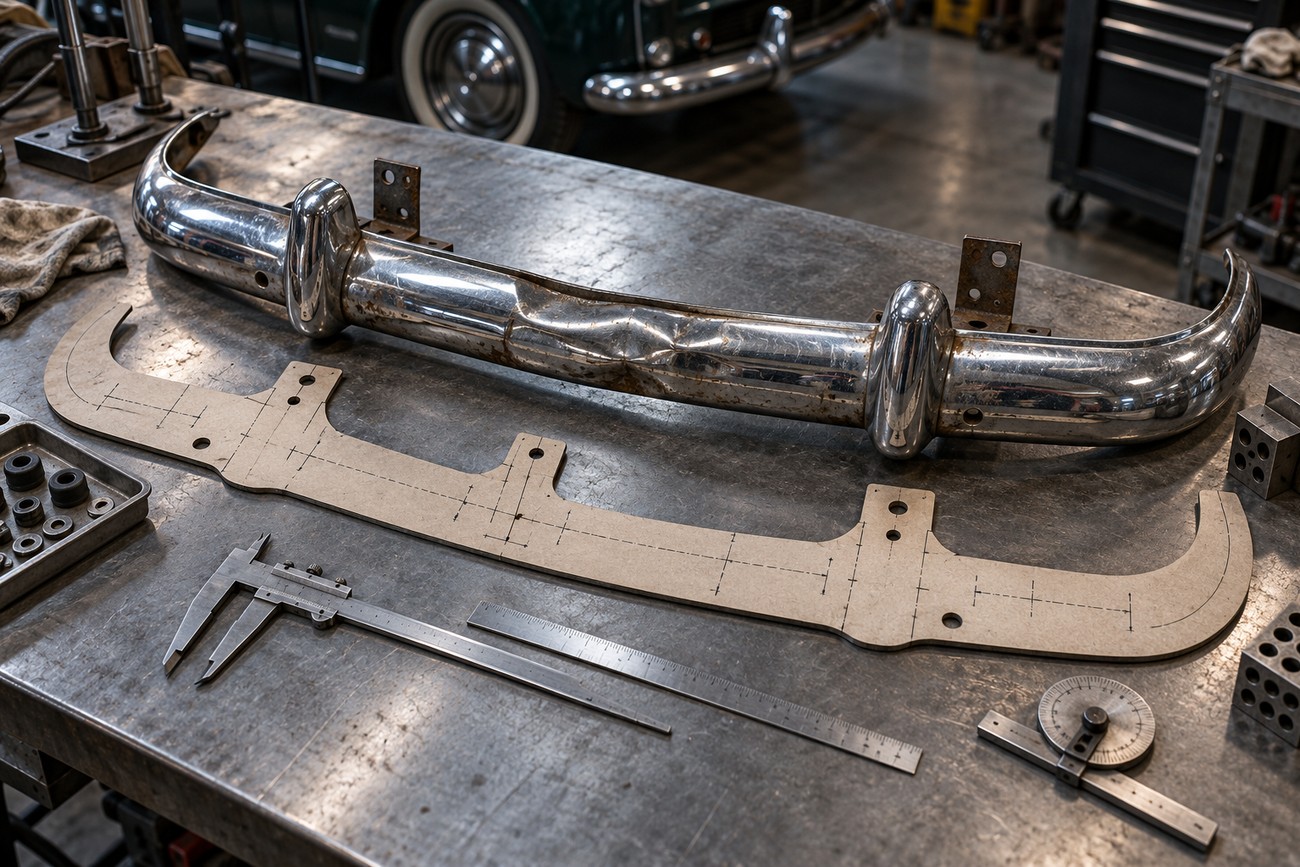
Check the bumper on a flat reference base before applying force. Record its overall length, key curves, end-to-end height, and the position of every bracket and mounting hole. Where the design is symmetrical, compare the damaged side with the undamaged side, while remembering that visual symmetry alone can miss a shift in depth or angle.
A simple template made from the sound side can preserve useful reference points. Control measurements should include the distance between mounts, the relationship of brackets to the bumper shell, and the seating surfaces for bushings and fasteners. Mark the measurements clearly so they can be checked again after straightening.
Inspect the brackets and reinforcements before correcting the outer skin. A straight shell can still sit too high, too low, or too far forward if a bracket remains bent. The correct sequence starts with removal, geometric inspection on a flat base, and measurement of bracket positions before the metal is reshaped.
Fitment matters because body gaps expose errors that are easy to miss on a workbench. A bumper can appear centered while one end sits closer to the fender, or while fasteners pull the shell into a strained position. Establish the target geometry before repair, then verify it after each major correction rather than relying on a final visual guess.
How to Straighten a Bent Chrome Bumper
The repair method depends on the location, depth, and extent of the deformation. Controlled hydraulic pressure is useful for broad bends when the bumper is supported correctly. Forming fixtures and wide forming tools can distribute force across the steel, while carefully placed hammer work can refine a contour after the main distortion has been relieved.
Force should be spread over a suitable area instead of concentrated at one point. Pulling aggressively on the center of a dent may create a high spot beside it or stretch the metal further. Gradual correction, frequent measurement, and support behind the panel help preserve the original contour and reduce the need for excessive finishing work.
Controlled heating may be appropriate for the base metal in selected repairs, but strong or uncontrolled heat applied to a chromed surface can damage adhesion, appearance, and underlying plating layers. Impact on an already chromed bumper can stretch the steel and create microcracks or other damage in the finish. For that reason, substantial straightening should normally occur before rechroming.
Grinding is not a substitute for metal correction. Sanding a deep dent removes material around the defect, can make the area thin, and may leave a low spot that becomes more visible after plating. If a crack, torn hole, or weakened section is present, the repair may require welding or replacement metal before the surface can be prepared for a new finish.
Prepare the Metal Before Rechroming
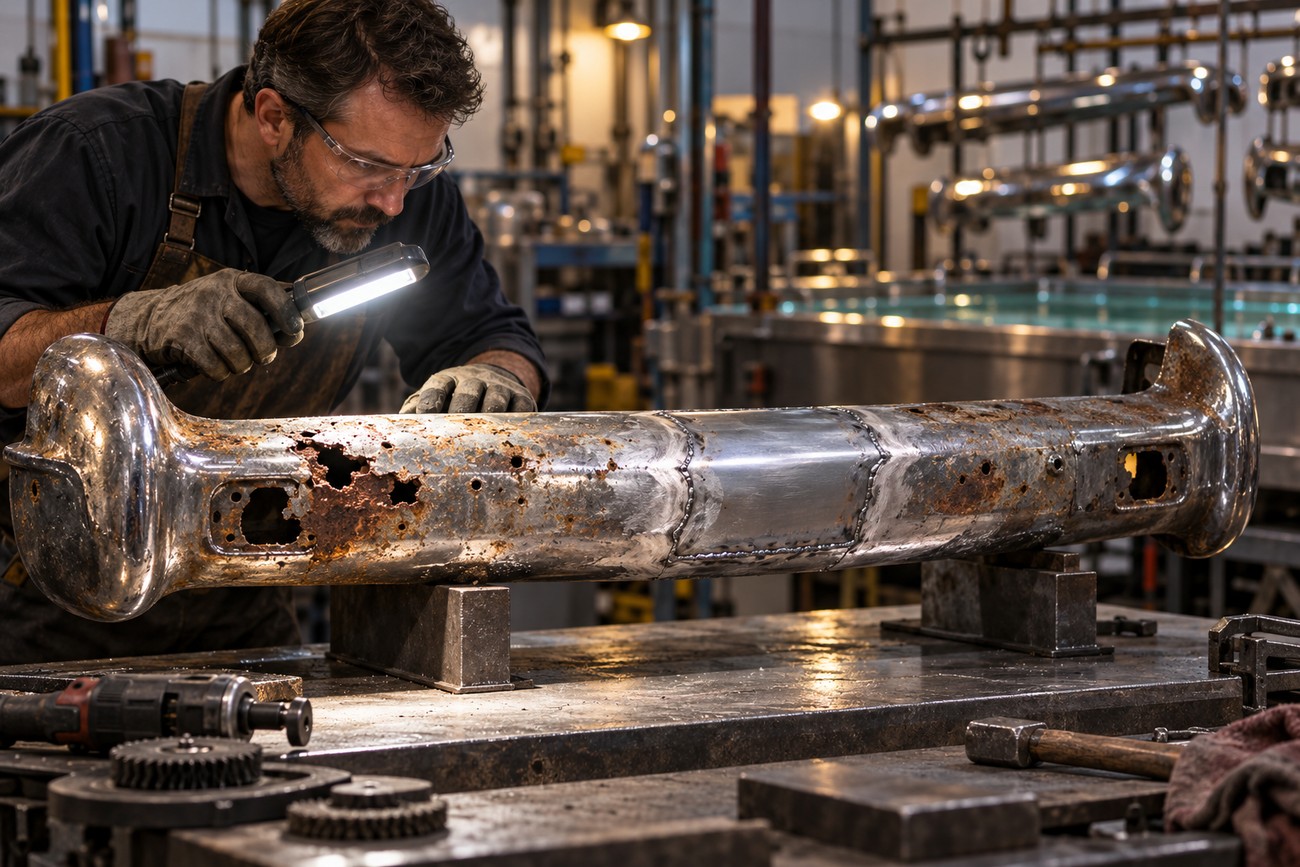
Old plating must be removed before the condition of the base metal can be judged properly. Stripping can expose deeper corrosion, previous welds, stretched areas, cracks, and holes that were hidden by copper or filler. This is why a rechroming estimate can change after disassembly and stripping, even when the bumper looked complete at intake.
Repair all structural and surface defects before the plating stages begin. Cracks and torn mounting holes need suitable metal repair, while thin or perforated areas may require replacement sections. Old welds should be inspected and blended where appropriate, because uneven repairs can remain visible through the finished coating.
The usual coating stack is steel, copper, nickel, and thin decorative chrome. After metal preparation, copper may be built and leveled where required, followed by nickel and then decorative chrome. Nickel supports adhesion and corrosion protection beneath the decorative layer, while the final chrome provides the characteristic appearance and additional surface protection.
Rechroming does not automatically repair stretched, cracked, perforated, or poorly shaped metal. Confirm in writing whether the shop includes welding, replacement metal, straightening, hole repair, and surface leveling. A bright finish over an unstable or uneven base can produce waves, pits, visible corrosion traces, or peeling that becomes apparent only after the bumper is installed.
Choose a Rechroming Shop and Control the Result
Request a written description of the complete process rather than a price for “chrome” alone. The quotation should identify stripping, corrosion repair, copper leveling, nickel, decorative chrome, metal straightening, and any test-fitting or final geometry checks. Ask how the shop handles damage discovered after stripping and whether additional work requires your approval.
Chrome work involves industrial chemical controls. Hexavalent chromium, Cr(VI), may be used in industrial chrome work; OSHA classifies it as carcinogenic and sets a permissible exposure limit of 5 micrograms per cubic metre over an 8-hour shift. Professional facilities therefore need appropriate ventilation, mist and emissions controls, housekeeping, and waste handling. Home plating is not equivalent to work in such a facility.
The final test fit should be treated as an acceptance checkpoint, because a shop can deliver a bright bumper while bracket positions and body gaps remain wrong. Record the intended mounting position and the finish standard before plating begins.
Trivalent chromium systems are described by EPA as a less toxic alternative in evaluated applications, but the term “eco-friendly” does not identify the chemistry, shade, durability, or originality of a particular process. Ask which system is used, whether it is intended to match the other bumpers, and what safety controls apply to the actual facility.
Put the agreement in writing. State whether welding or replacement metal is permitted, whether local repair marks are acceptable, how gloss and shade will be judged, and whether acceptance occurs before or after test fitting. This prevents a disagreement in which the shop considers the polished surface complete while the owner is evaluating the installed bumper.
Verify Fitment and Decide Whether to Repair or Replace
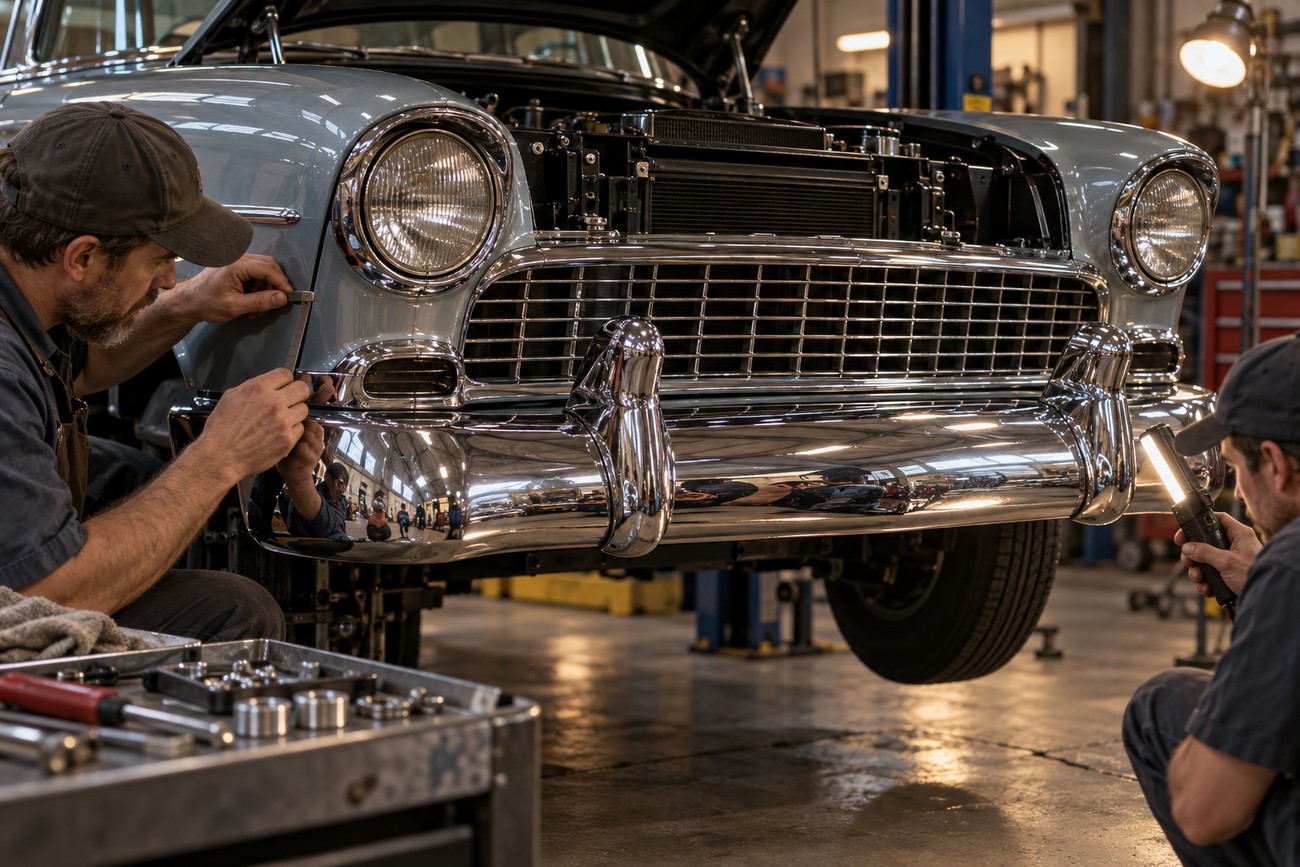
Final inspection should cover installation as well as appearance. Install the bumper, or perform a controlled test fit using the correct brackets, bushings, spacers, and fasteners. Check body gaps, alignment with the fenders and grille, bracket loading, and fastener seating. A glossy finish can still conceal incorrect geometry that becomes obvious only during installation.
Inspect the finish under consistent light from several angles. Look for waves, pits, cloudy areas, exposed corrosion, discoloration, and differences in shade between adjoining parts. Different components may have different alloys, thicknesses, and original plating processes, so identical procedures do not guarantee an identical shade.
Restoration is usually sensible when the original bumper retains sound, recoverable metal and its mounting features can be returned to specification. Replacement becomes reasonable when the steel is excessively thin, torn across important areas, extensively missing, or so distorted that reliable geometry would require disproportionate reconstruction. Originality, availability, and the condition of a replacement part also affect the decision.
Compare quotations by included work, not by the visible chrome figure alone. Confirm whether stripping, metal repair, copper leveling, nickel, decorative chrome, hardware treatment, and fitment checks are included. The lowest initial quote can become the least predictable option once hidden corrosion and mounting damage are discovered.
Frequently asked questions
These questions address the main practical issues in bumper rechroming. Costs and schedules can change after stripping reveals hidden damage. Process details, safety controls, and final fitment should be confirmed with the shop before work begins.
How much does it usually cost to rechrome a bumper?
There is no universal rechroming price because the visible chrome work is only one part of the job. The total can rise when stripping reveals corrosion, cracks, stretched steel, thin areas, damaged holes, or bent brackets that require separate metal repair.
Ask the shop to separate the quote into stripping, straightening, welding or replacement metal, copper leveling, nickel, decorative chrome, and fitment inspection. Also confirm how newly discovered damage is authorized. A quote based only on the final shine gives you too little information to compare two restoration proposals fairly.
How long does rechroming a classic-car bumper usually take?
A reliable schedule depends on the condition found after removal and stripping. The work may involve inspection, corrosion removal, metal straightening, repairs, surface preparation, plating stages, handling between stages, and final inspection. A simple calendar promise made before disassembly can therefore be misleading.
Ask when the shop will report hidden damage and whether your approval pauses the work. Confirm whether test fitting is included before the bumper is considered complete. This scheduling framework is more useful than a guaranteed turnaround that assumes the bumper contains no concealed repair work.
What should I ask about the chrome process before approving the job?
Ask which chrome chemistry is used, how the facility controls ventilation, mist, emissions, housekeeping, and waste, and whether the process is intended to match the car’s other plated parts. The word “eco-friendly” alone does not establish the chemistry, finish characteristics, or safety controls.
Confirm what metal repairs are included, how hidden corrosion is handled, whether additional work requires authorization, and what warranty terms cover. Finally, ask whether the quoted result is judged before or after test fitting, and define acceptable gloss, shade, local repair marks, and final body gaps in writing.







