
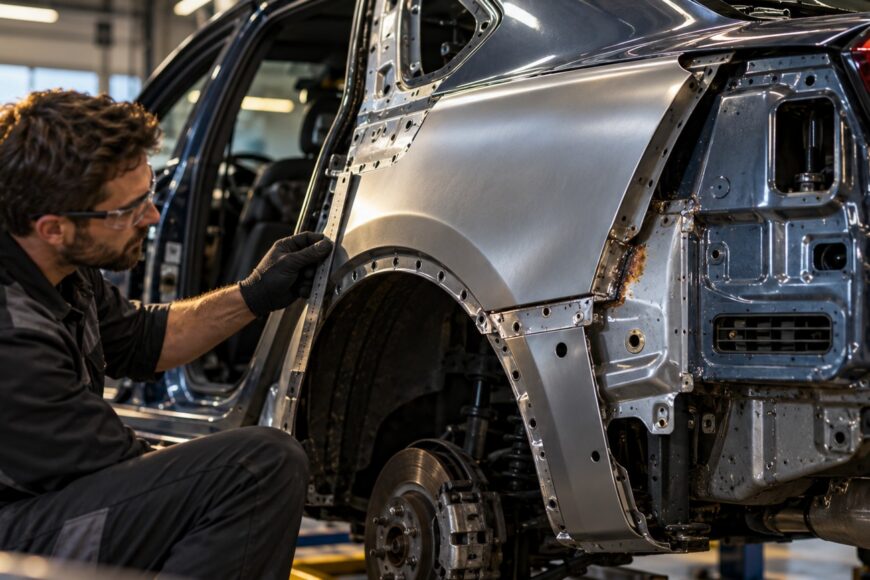
A damaged quarter panel can look like a small body repair, yet it is welded into the vehicle’s unibody. Its position affects door and trunk alignment, interior trim, corrosion protection, and the vehicle’s resale record. A poor repair may look acceptable during a quick walk-around while leaving distorted gaps, hidden rust, or new rattles.
Replacing a quarter-panel section can be a sound repair when the vehicle is suitable, the cut follows the manufacturer’s approved location, and the work is measured and documented. A cheaper-looking shortcut usually removes those safeguards. Sectioning is not automatically appropriate for every impact, especially when inner structure or a suspension mounting area is involved.
- What Replacing a Quarter-Panel Section Really Means
- When Sectioning Is Appropriate—and When It Is Not
- Preparation: Measurements, Access, and Panel Fit
- Cutting, Welding, and Protecting the Joint
- Finishing, Paint Matching, and Quality Checks
- Time, Cost, Insurance, and the Risks of a Shortcut
- Frequently Asked Questions
- How hard is it to replace a quarter-panel section?
- How much does it cost to replace a quarter panel on a car?
- What paperwork should I request after a quarter-panel section repair?
What Replacing a Quarter-Panel Section Really Means
On most modern vehicles, the quarter panel is a non-removable unibody component welded to the roof, rocker, rear body panel, and inner reinforcements. It forms part of the body shell around the rear door opening, wheelhouse, trunk opening, and rear glass area. Damage can therefore affect more than the visible outer skin.
Sectioning is a structural repair involving cutting out part of the quarter panel and welding in an approved replacement section. The replacement may be supplied as a partial panel or cut from a complete quarter panel. Either way, the repair changes a factory-joined part of the unibody and must follow the vehicle maker’s body-repair information.
The joint location matters. A factory seam or approved sectioning location is selected for its access, strength, shape, and relationship to the inner structure. Cutting in the middle of an unsupported panel simply because it is easier can create a weak area, make alignment difficult, and leave a seam that remains visible after refinishing.
A carefully performed section repair can provide near-factory strength for ordinary civilian use when the OEM procedure and measurements are followed. It should still be treated as documented structural body repair rather than marketed as identical to an untouched factory panel.
When Sectioning Is Appropriate—and When It Is Not
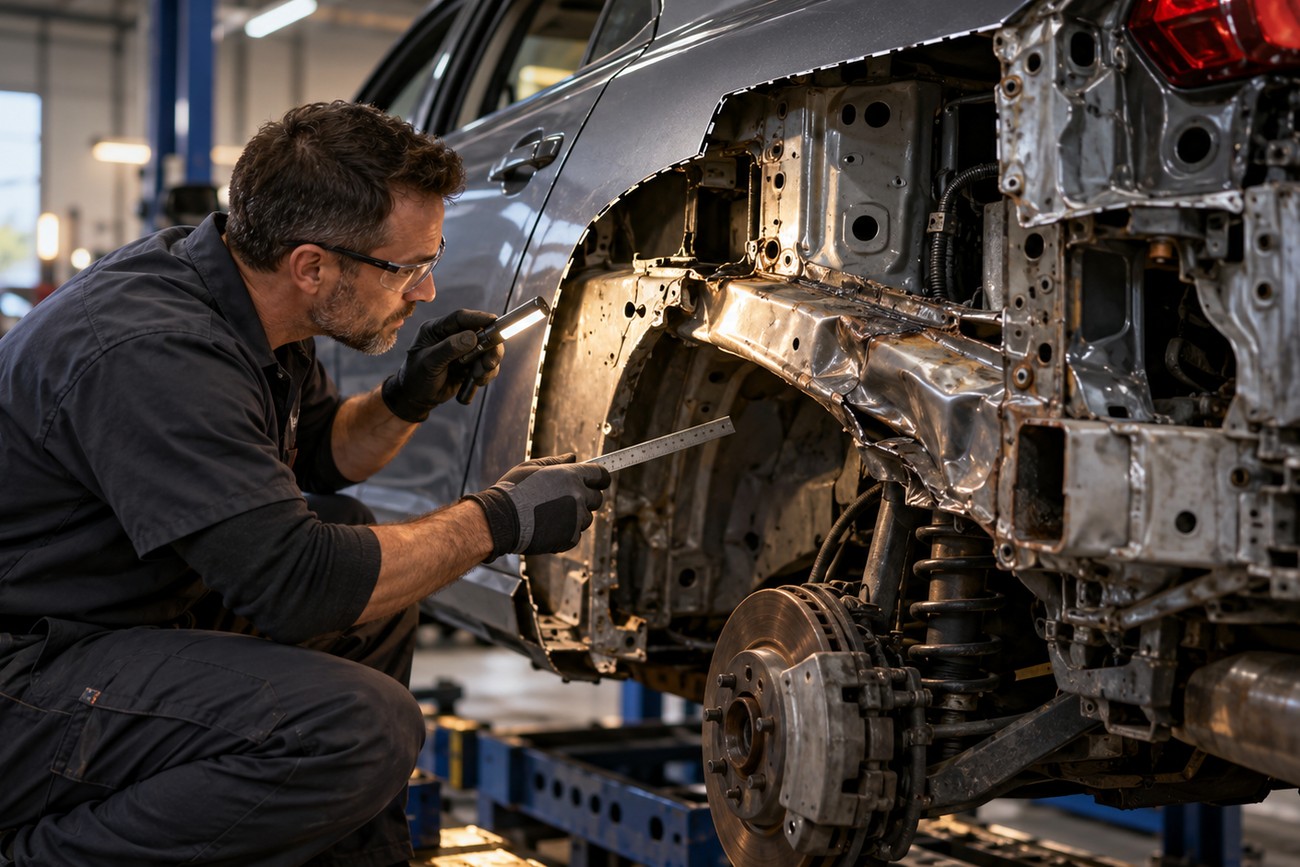
The decision should begin with the damage behind the quarter panel. The technician needs to inspect the inner reinforcements, wheelhouse, roof and rocker connections, rear body panel, and any area near a suspension attachment. Hidden corrosion can also change the repair plan because sound metal is needed for a reliable joint.
If the impact has distorted a major inner structural element or damaged a suspension mounting area, sectioning for economy is generally a poor choice. A complete quarter-panel replacement or measured structural correction may be more appropriate. The outer panel cannot conceal a damaged mounting point or restore unibody geometry by itself.
Complete quarter-panel replacement with labor and paint commonly costs about $2,000–$6,000 in the United States and Canada, depending on the vehicle and scope. Sectioning may reduce parts and labor costs, but access, measuring, glass removal, interior disassembly, paint blending, and corrosion treatment still form part of the real job.
The suitable repair is the one that restores the body’s measured shape and follows the applicable repair procedure. A low quote is useful only when it includes the same safety and corrosion-control steps as a proper repair. If the estimate excludes those steps, the saving has shifted into future risk.
Preparation: Measurements, Access, and Panel Fit
The body must be securely fixed before cutting begins. Reference measurements, diagonals, and openings are recorded so the technician can distinguish accident distortion from the replacement panel’s fit. Door gaps and trunk gaps provide practical checks, although they should support the manufacturer’s measurement data rather than replace it.
Interior trim, wiring, insulation, and sometimes glass must be removed or released to reach inner seams. This access also allows the technician to inspect the cavity and apply the specified corrosion protection later. Leaving components in place to save disassembly time can expose them to heat, sparks, dust, or overspray.
The replacement section is trimmed according to the approved joint and temporarily held with clamps or fasteners. The door and trunk lid should then be installed or positioned in their normal locations, with the latch and surrounding panels checked. A difference greater than about 2–3 mm around the repaired perimeter is a practical warning sign that requires investigation before welding.
Final welding should follow only after the panel sits correctly in relation to the door, trunk opening, roof line, wheel opening, and rocker. Once the section is permanently attached, correcting a bad gap becomes a much larger repair. This trial-fit stage is where careful work separates a structural repair from a panel that has merely been made to cover the hole.
Cutting, Welding, and Protecting the Joint
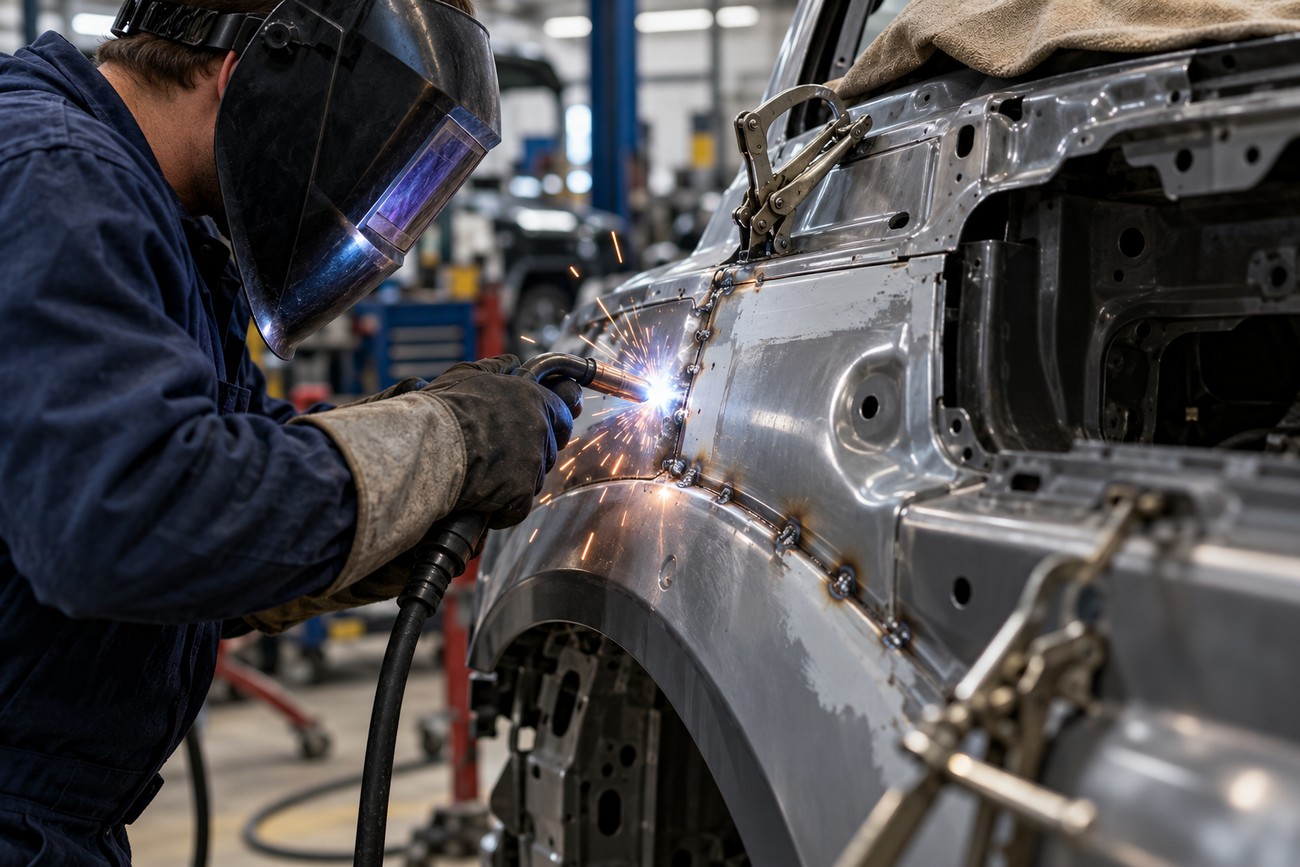
The cut follows the vehicle maker’s factory seam or approved sectioning location. The replacement section is aligned to the surrounding contours, temporarily secured, and checked again before the joint is completed. The welding pattern must match the vehicle-specific OEM procedure because metal thickness, coatings, access, and crash behavior vary between models.
OEM procedures commonly specify MIG/MAG spot or stitch welding with about 25–40 mm spacing, subject to the repair manual. Controlled intermittent welds limit heat input and allow the thin sheet metal to retain its shape. Long continuous welds can warp the quarter panel, create waves, increase filler thickness, and leave a visible repair line.
Installing the door and trunk lid before completing the welds locks the replacement panel into its working position. It is far safer to correct a gap while the section is clamped than to chase alignment after the metal has been permanently attached.
Panel-bonding adhesive may supplement welding where the vehicle maker’s procedure allows it. It can help manage corrosion protection and heat distortion in approved areas, but it is not a universal replacement for specified structural welds. The product, preparation, cure time, and joint design must all match the applicable procedure.
After welding, exposed and internal seams require the specified primer, epoxy or seam sealer, cavity protection, or wax. Factory access holes may be needed to reach hidden joints; closing them without a plan can make later corrosion protection difficult. Underbody coatings and cavity wax belong to the repair process because paint on the outside does not protect an untreated seam inside the quarter panel.
Finishing, Paint Matching, and Quality Checks
Heat distortion in thin sheet metal can leave a seam visible under certain lighting even after filler and paint. Waves, excessive filler, and orange peel often point to poor heat control or hurried preparation. A sound weld does not guarantee a straight outer surface, so the panel should be inspected from several angles before refinishing.
Where possible, the joint can be positioned along an existing body crease or character line. That does not hide bad metalwork, but it gives the repaired contour a consistent visual reference. Paint should commonly be blended into adjacent panels rather than stopped at a hard color edge, since a sharp boundary can reveal the repair even when the color match is close.
Reassembly is part of quality control. Clips, trim, wiring, seals, and glass must sit correctly, and the door and trunk must latch and operate without unusual effort. New wind noise, water entry, glass vibration, or trim rattles can indicate a missed seal, a displaced component, or a body opening that remains out of position.
Before accepting the vehicle, check the panel gaps, latch operation, glass and trim fit, visible weld evidence, and the repair record. Ask how internal seams were treated and whether photographs were taken before closure. These details help distinguish a complete repair from a cosmetic finish applied over an incomplete one.
Time, Cost, Insurance, and the Risks of a Shortcut

A complete section repair with preparation, welding, corrosion protection, and paint often takes about 3–7 working days. Claims of one or two days usually describe a narrow scope or omit preparation, disassembly, curing, blending, and inspection. The schedule can extend when glass, wiring, interior trim, or adjacent panels require careful removal and refitting.
Quotes can grow when the work reveals hidden damage or when the original estimate covered only a local outer-panel repair. Ask whether the price includes measurements, vehicle fixation, replacement-panel preparation, glass and trim handling, corrosion treatment, paint blending, reassembly, and final checks. A written scope is more useful than a low headline price.
Insurers or dealers may require photographs, measurements, OEM procedure compliance, and evidence of corrosion treatment before accepting the work as structurally safe. Some may also question a cut made outside the approved location. Keep the repair documents because they explain what was replaced and how the structure was restored.
Sectioning can affect resale because vehicle-history reports and inspections may identify the work as structural body repair. Possible loss of corrosion or passive-safety warranty coverage should be discussed before authorization, since policies and manufacturer terms vary. Disclosure is usually safer than allowing a later inspection to discover undocumented structural work.
Shortcuts can produce rust from the inside, a visible seam, trim rattles, water or wind noise, and disputed insurance or warranty claims. The practical test is simple: the repair should be measured, performed to the applicable OEM method, corrosion-protected internally, refinished correctly, and supported by a clear record.
Frequently Asked Questions
How hard is it to replace a quarter-panel section?
It is advanced body-repair work because the task involves more than cutting and welding. The technician must hold unibody geometry, access hidden seams, match the OEM weld pattern, protect wiring and trim, and restore corrosion protection inside closed cavities. A home workshop may lack the fixation, measuring equipment, welding control, and refinishing setup needed to verify the result.
Difficulty also depends on the damage location. A section near a suspension attachment, roof connection, or major inner reinforcement requires a deeper structural assessment and may call for a different repair. The correct skill boundary is the ability to prove alignment and procedure compliance, not simply the ability to join two pieces of sheet metal.
How much does it cost to replace a quarter panel on a car?
A complete quarter-panel replacement with labor and paint commonly falls around $2,000–$6,000 in the United States and Canada. Actual pricing depends on the vehicle, parts, damage, labor rates, paint system, and the amount of disassembly required.
A section repair quote can still rise when the job requires glass removal, interior access, measuring, corrosion treatment, or blending into adjacent panels. Compare written scopes rather than comparing the section price with a complete replacement price that includes different work.
What paperwork should I request after a quarter-panel section repair?
Request the applicable OEM repair procedure, before-and-after photographs, and measurement results. The handover record should also identify the replacement part, describe the welding or approved adhesive method, and confirm that internal seams and cavities received corrosion protection.
Keep the invoice and any insurer or inspection documents with the vehicle records. This makes future disclosure clearer and gives a buyer or repair professional useful information if the area needs inspection later.







