
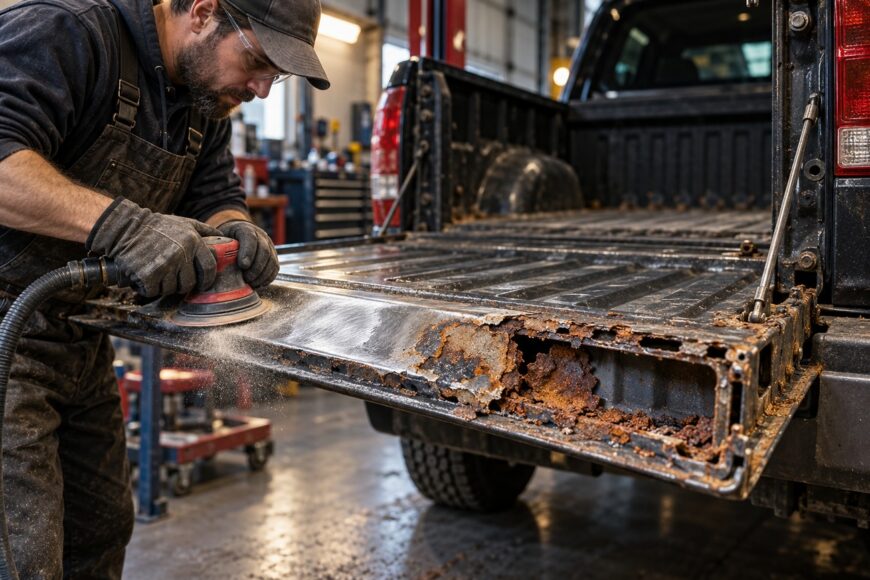
Rust bubbles can return soon after a tailgate has been sanded and repainted. The visible blister is often only the exposed part of a larger problem, especially along the lower edge, folded seams, drains, under trim, and inside the tailgate panel.
The first repair decision is whether the damage needs surface treatment or replacement of lost metal. Sound metal with superficial corrosion can be cleaned and coated. Thin edge metal, perforation, or a weakened lower flange usually requires metal repair because filler and paint cannot restore strength or stop corrosion hidden inside the panel.
- Surface Rust, Edge Rust, or Rust-Through?
- Why Tailgate Rust Comes Back After a Good-Looking Repair
- Repair Method by Tailgate Damage
- A Durable Tailgate Rust Repair: Step by Step
- The Hidden Work: Inner Panels, Drains, Seams, and Hardware
- Common Shortcuts That Fail—and What They Cost
- What a Tailgate Rust Repair May Cost
- Frequently asked questions
- What should a body-shop estimate include for tailgate rust?
- How can I inspect the inside of a tailgate before deciding on repair?
- How to fix rust on a truck tailgate?
- How much does it cost to fix surface rust on a truck?
- How much to fix a tailgate on a truck?
Surface Rust, Edge Rust, or Rust-Through?
Begin by removing enough paint and corrosion to understand the condition of the metal. A small bubble may surround a much larger area of loose oxide, particularly where the lower edge folds around the inner panel. Sanding only the visible blister can leave active corrosion beneath apparently sound paint.
Surface rust is limited to metal that remains solid after cleaning. Remove all loose, flaky oxide mechanically until sound, clean metal is exposed. A rust converter can be used afterward as a supplementary treatment, followed by primer and paint, but it cannot create a reliable substrate over loose rust.
Edge rust deserves more caution. If the metal becomes thin, flexible, or visibly distorted after cleaning, the repair area may extend beyond the original bubble. A tailgate that sounds unusually thin or hollow after corrosion removal is unlikely to receive a durable cosmetic repair.
Perforation means corrosion has removed metal completely. Filler can correct a contour over sound, prepared metal, but it cannot restore structural material. Once holes or a missing lower edge are present, the affected section generally needs to be cut out and replaced with fitted metal or a repair section.
Why Tailgate Rust Comes Back After a Good-Looking Repair
Tailgate corrosion commonly persists where moisture, salt, dirt, and road debris collect in seams, drains, folded edges, under trim, and beneath weatherstrips. These areas can remain wet after the exterior has dried, allowing corrosion to continue behind the coating.
Pickup trucks used on salted or wet roads face additional abrasion from grit and repeated small impacts along exposed edges. Each damaged area can break the protective coating and give moisture a route into the seam. The lower edge then bubbles again even though the outside initially looks properly refinished.
Exterior paint alone cannot reliably stop corrosion remaining in inner panels, folded edges, or seams. A repair that treats only the visible face may seal the evidence from view while leaving the source active on the reverse side.
Weatherstrips, trim clips, and fasteners can also hold contamination against the panel. Removing them during inspection often reveals staining or corrosion that was impossible to judge from the painted surface. The repair therefore has to address how water enters, remains, and drains from the tailgate.
Repair Method by Tailgate Damage
Choose the repair method after exposing the full damaged area. The condition of the remaining metal matters more than the size of the original paint bubble.
| Condition | Preparation | Suitable repair method | Filler use | Main durability risk |
|---|---|---|---|---|
| Surface rust on sound metal | Remove loose, flaky oxide mechanically to clean metal, then decrease and prime. | Corrosion treatment followed by a suitable primer, paint, and edge or seam protection. | Acceptable for minor contour correction over sound, prepared metal. | Rust returns if contamination, remaining oxide, or moisture paths are left untreated. |
| Weakened or bubbling lower-edge metal | Open the area beyond the blister and inspect the folded edge and inner panel. | Repair sound metal where possible; replace weakened sections if cleaning leaves inadequate material. | Only over stable metal after corrosion repair; it cannot reinforce a flexible edge. | Cracking, renewed bubbling, and corrosion beneath the filler. |
| Perforated tailgate metal | Cut back to sound metal and remove corrosion from the surrounding inner and outer surfaces. | Cut out the affected area and weld or fit replacement metal, then protect both sides. | For final contour correction only, after the metal repair is complete. | A no-weld cosmetic repair generally has lower durability when the panel or edge has been lost. |
A Durable Tailgate Rust Repair: Step by Step
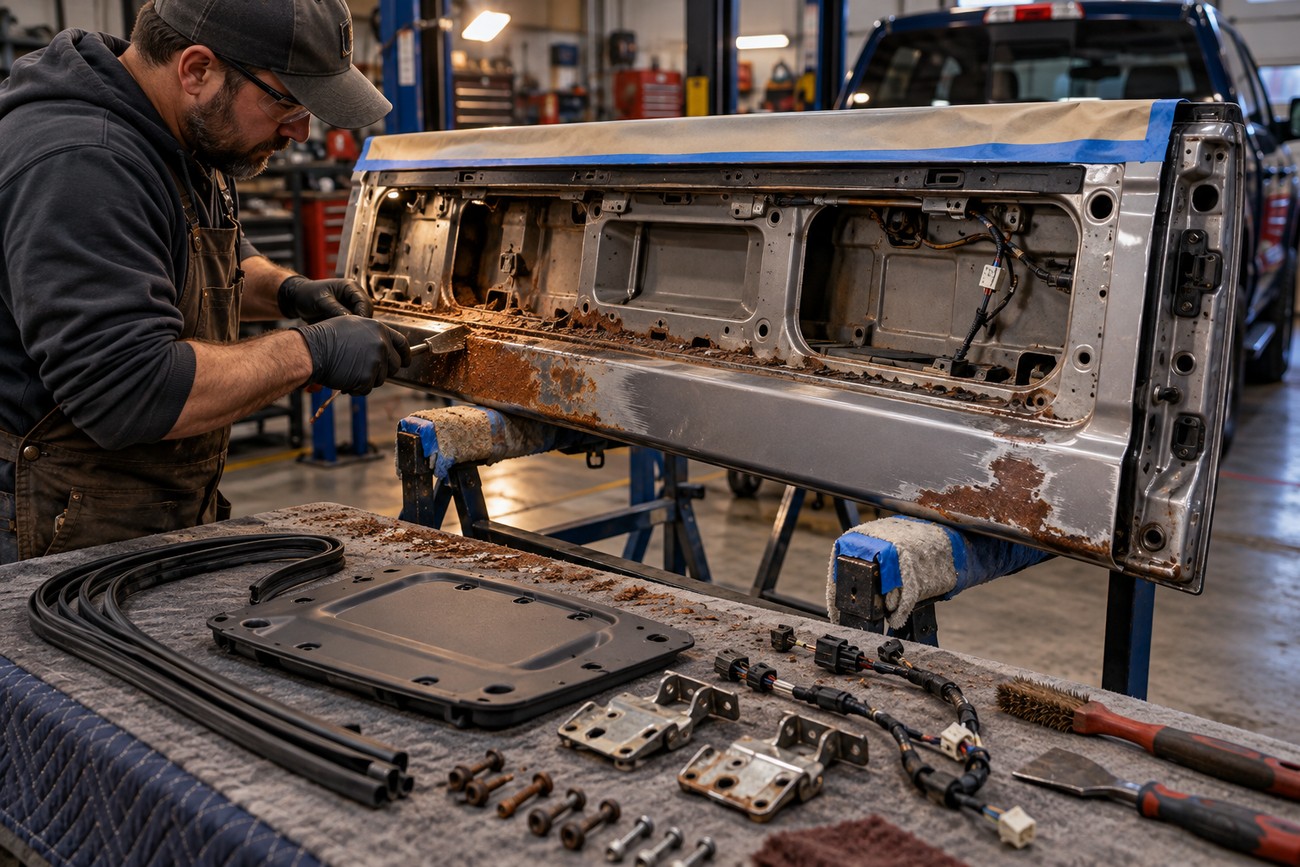
Start by removing trim, weatherstrips, access panels, and hardware that prevent a complete inspection. Support the tailgate safely before disconnecting components, and protect wiring and painted surfaces during disassembly. Access from both sides is often necessary because the cleanest-looking exterior may conceal corrosion inside.
Clean the panel and mechanically remove all loose, flaky oxide before applying converter, primer, filler, or paint. Abrasive work should extend into the surrounding coating until the repair has a firm boundary. Afterward, decrease the surface carefully; dust, oil, and silicone residue can reduce adhesion even when the metal appears clean.
If cleaning exposes holes or an edge that has lost its strength, cut out the affected metal and weld or fit a replacement section. Control heat carefully on thin tailgate steel to limit distortion, and check the fit of the lower edge before finishing the welds. Filler belongs only over sound, stable metal for contour correction.
Protect the prepared repair with an appropriate corrosion-resistant system. Epoxy or polymer primers and 2K systems generally provide more reliable moisture isolation than quick aerosol products. Zinc-containing primers or coatings can add corrosion protection, yet they cannot restore lost metal strength or compensate for poor preparation.
Finish the outside with compatible paint, then seal seams, transitions, and folded edges without blocking the drains. Apply cavity protection through suitable openings so the inner panel and inaccessible sections receive coverage. Reinstall trim only after the coating and sealant have been prepared according to the product requirements.
The Hidden Work: Inner Panels, Drains, Seams, and Hardware
The inner side of a tailgate often retains more moisture, dirt, and salt than the visible exterior. Inspect the lower inner flange, reinforcements, spot-welded joints, and areas beneath the weatherstrip. Corrosion at a folded edge can continue between layers even when the outer face appears clean.
Use service openings or remove appropriate access panels to inspect cavities and apply corrosion protection. Some inner sections are difficult to reach directly, so cavity treatment may require controlled spraying through these openings. Keep the product away from mechanisms and electrical connectors unless it is approved for those locations.
Clean exterior paint does not prove that the folded lower edge is sound; inspection and cavity protection through service openings often reveal and treat the area that starts the next corrosion cycle.
Clear every drain and confirm that water has a path out of the tailgate. Seal seams and transitions so moisture cannot remain trapped, while preserving designed drainage points. Blocking a drain with sealant can turn a finished repair into a moisture reservoir.
Disassembly can also expose damaged hinges, latches, wiring, supports, and internal reinforcements. Corrosion may develop around fasteners or at joints between dissimilar materials, so these contact points deserve inspection before the trim is reinstalled.
Common Shortcuts That Fail—and What They Cost
Sanding only the visible paint bubble leaves hidden corrosion around and behind the repair. The new coating may initially look smooth, while the remaining oxide continues to lift the edge. A sound repair boundary must reach stable metal rather than stopping at the first visually clean spot.
Applying converter over flaky oxide does not create a sound substrate. The loose layer can separate from the panel under the converter, primer, or paint. Mechanical removal comes first, with the converter used only as one part of the subsequent corrosion-control system.
Filling a perforated lower edge avoids welding for the moment, but filler cannot replace metal or restore strength. Thin, flexible, or perforated steel allows the filler to crack or detach as the tailgate moves. Repeated cosmetic repairs can eventually cost more time and materials than addressing the damaged section correctly.
Painting only the outside leaves the reverse side, folded edges, seams, drains, and cavities exposed to the same moisture cycle. Inexpensive replacement panels can also require adjustment because their thickness or geometry may differ from the original part. Fit, drainage, and inner protection should be checked before final paint.
What a Tailgate Rust Repair May Cost
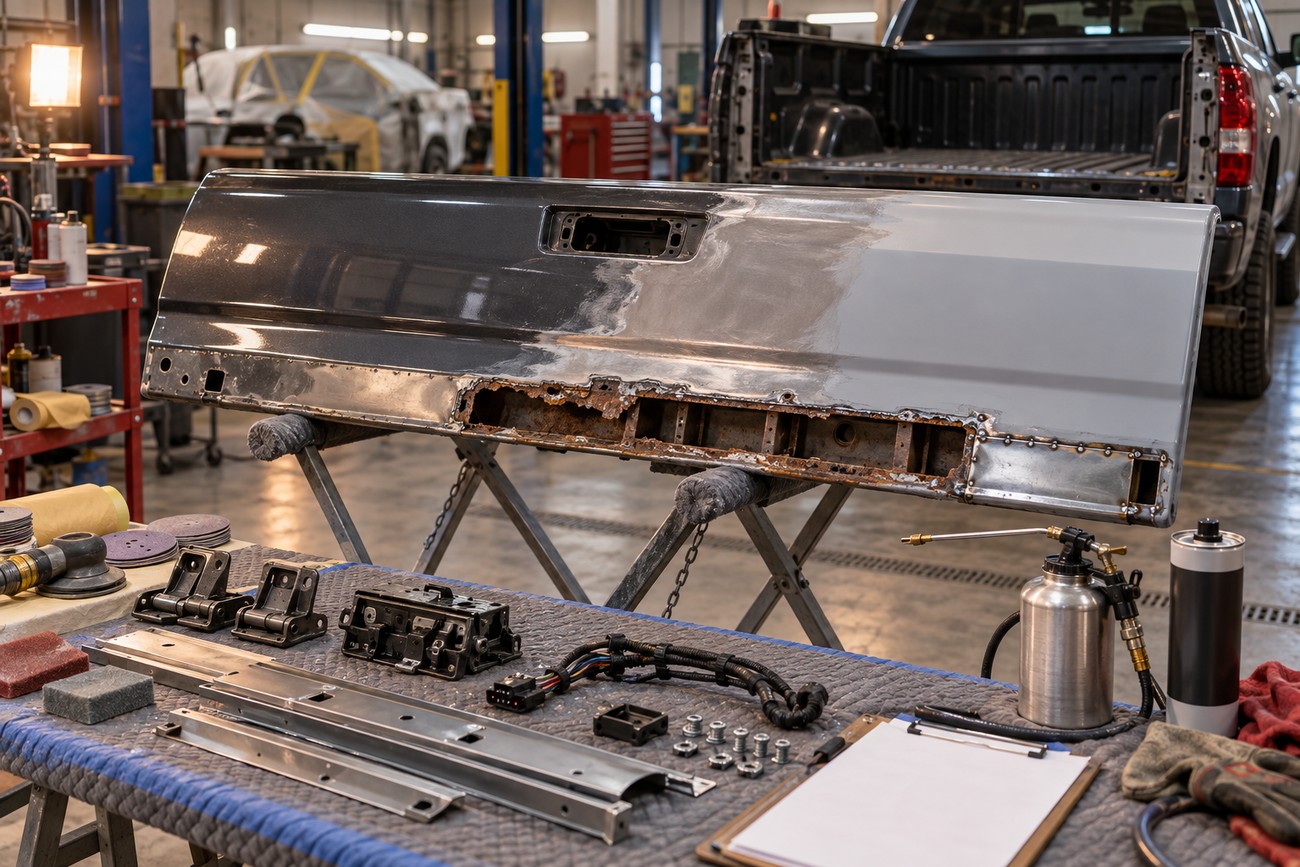
The estimate depends first on whether the tailgate has surface corrosion or lost metal. Cleaning and refinishing sound steel is less involved than cutting out perforation, restoring the lower edge, and refinishing the repaired area. Tailgate removal, panel alignment, and paint blending add further labor.
Disassembly can expand the scope when it reveals corrosion in the inner panel or damage to hinges, locks, wiring, supports, and reinforcements. A shop may also need to repair drainage, replace damaged fasteners, or apply cavity protection through service openings.
A useful estimate should identify what happens to both sides of the panel. Ask whether the quote includes mechanical corrosion removal, metal replacement where required, seam sealing, drain restoration, reverse-side protection, cavity treatment, paint blending, and reassembly.
Compare warranty language as carefully as the total. A low-cost no-weld repair may be reasonable for limited surface damage, but its durability is generally lower when the metal is perforated or the edge has been lost. Request photographs of hidden damage and clarification about any work that may be approved separately after disassembly.
Frequently asked questions
The right repair depends on the condition of the remaining metal, not the size of the visible bubble. Inspection should cover the outer surface, folded edges, inner panel, drains, seams, and cavities. The estimate should also explain how corrosion will be removed, protected, and repaired on both sides.
What should a body-shop estimate include for tailgate rust?
The estimate should describe the inspection and preparation area, with photographs of hidden corrosion where possible. It should state whether the tailgate will be removed, whether perforated metal will be cut out and replaced, and whether filler is limited to contour correction over sound metal.
It should also identify reverse-side corrosion protection, cavity treatment, seam sealing, drain restoration, paint blending, hardware work, and reassembly. Ask how newly discovered damage will be documented and what the warranty covers, especially if the quote separates visible repairs from concealed corrosion found after disassembly.
How can I inspect the inside of a tailgate before deciding on repair?
Open the tailgate and inspect the lower inner edge, drain openings, weatherstrip contact areas, and visible seams. Use service openings or remove trim only where it can be done safely and without damaging clips or wiring. Look for damp dirt, orange staining, flaking coating, swollen seams, and metal that flexes or sounds thin after light, careful probing.
Check that the drains are open and inspect around hinges, latches, supports, and reinforcements. A clean outer panel does not rule out corrosion between folded layers. If access is limited or the metal appears compromised, a body shop can inspect the cavity during disassembly before the repair method is selected.
How to fix rust on a truck tailgate?
Remove trim as needed, expose the full damaged area, and mechanically remove all loose corrosion to sound metal. Treat and prime stable metal, use filler only for final contour correction, and cut out perforated sections for welded or fitted replacement metal. Protect the inner panel and cavities, restore drainage, seal the seams, and refinish both the repaired exterior and vulnerable edges.
The correct method depends on the remaining metal. Surface corrosion may suit a careful coating repair, while a weakened lower edge or perforation usually needs metal work for lasting results.
How much does it cost to fix surface rust on a truck?
There is no reliable single figure because the scope varies with corrosion depth, access, preparation, paint matching, and whether hidden damage is found. Surface rust on sound, accessible metal generally requires less work than corrosion extending into a folded edge or inner panel.
Ask for a written breakdown covering preparation, primer and paint, reverse-side protection, drain and seam work, and any possible additional damage. This shows whether the estimate addresses the corrosion source or only refinishes the visible blister.
How much to fix a tailgate on a truck?
The total depends on whether the tailgate needs cosmetic refinishing, metal replacement, removal and alignment, or repairs to hardware and internal components. Perforation at the lower edge usually requires cutting and welding or a fitted metal insert, which involves more preparation than surface treatment.
Compare quotes by the work included rather than by the paint result alone. A durable estimate should account for the reverse side, cavities, drains, seams, corrosion protection, paint blending, and inspection of hinges, locks, wiring, supports, and reinforcements.







