
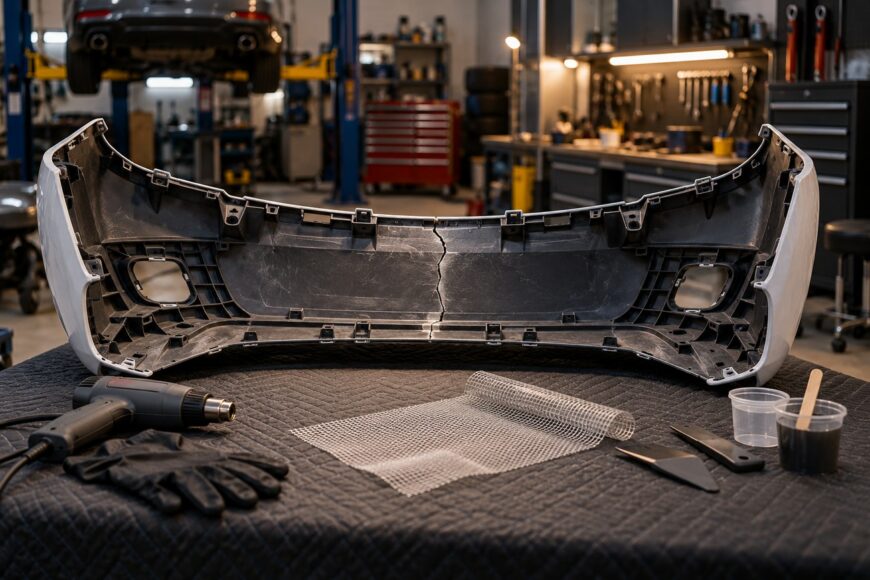
A cracked bumper cover may appear fixed after glue, hot staples, or a quick weld, then reopen the first time the bumper flexes. The visible crack is only part of the problem: the plastic may still be distorted, the repair may be limited to the face, or an underlying mount, reinforcement, or wheel-contact issue may continue loading the area.
The practical decision is whether the cover is a sound repair candidate or whether replacement is more sensible. A durable repair depends on identifying the plastic, restoring its original geometry, preparing a clean surface, and extending compatible reinforcement across the back of the damage. A cosmetic filler can improve the finish, but it cannot replace a flexible structural connection.
Repair becomes less predictable when material is missing, the cover is badly distorted, mounting points are broken, or a shifted reinforcement keeps pushing against the cover. Even a well-executed repair can fail again if the original source of deformation remains.
- Decide Whether the Bumper Is Repairable
- Identify the Plastic Before Choosing a Repair
- Prepare, Realign, and Test the Damaged Area
- Choose a Repair Method by Plastic and Damage
- Reinforce the Back and Restore the Visible Face
- Why Bumper Repairs Reopen: Common Mistakes and Myths
- Frequently asked questions
- How can you repair a plastic bumper crack without removing the bumper?
- What should the best cracked-bumper repair kit include?
- What is the best glue for a cracked plastic bumper?
Decide Whether the Bumper Is Repairable
A crack in an otherwise intact bumper cover is often a reasonable repair candidate. The plastic should still have enough material to realign, the surrounding shape should be recoverable, and the repair area should be accessible from the back. The crack’s depth, the plastic type, surface preparation, reinforcement, and continuing deformation all affect the likely result.
Replacement becomes more sensible when a large section is missing, the cover has stretched or folded into a badly distorted shape, or the damaged area cannot be returned to its original position. A completely broken-through crack may still be repairable, and some practitioners report durable repairs on severe damage. Repeat failure remains possible when the separated edges carry impact loads or the thin fascia has lost too much material.
Inspect the mounting points before committing to the repair. Broken tabs, torn screw areas, or a shifted reinforcement can pull the repaired crack apart as the cover is installed or flexes in service. The same applies to renewed wheel contact caused by a loose liner, incorrect fit, or a displaced component.
Repairing the crack alone does not remove the cause of stress. Correcting the geometry, securing damaged mounts, checking the reinforcement, and eliminating contact with the tire or liner may be more important than adding another layer of adhesive.
Identify the Plastic Before Choosing a Repair
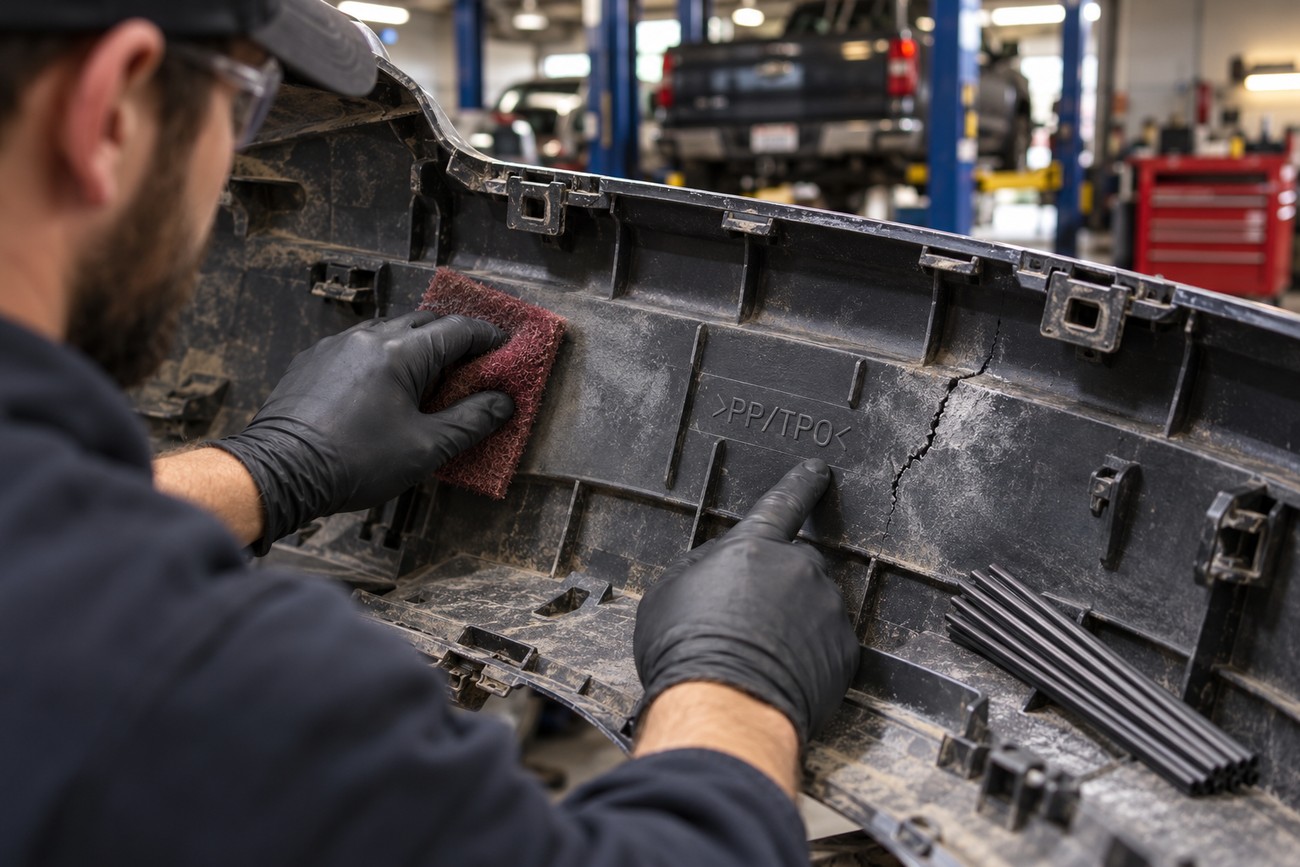
The plastic marking is usually molded into the back of the bumper cover. Common markings include PP, PP/TPO, ABS, PUR, and EPDM-containing blends. Clean the rear surface enough to read the code, and record it before choosing a rod, adhesive, primer, or repair kit.
Material identification controls the joining method because different plastics soften, melt, and accept adhesives differently. PP can require a compatible plastic-welding rod or a two-component polyolefin compound. ABS, PUR, and blended materials may call for different repair compounds or welding materials, so a rod that looks similar is not proof of compatibility.
PP, PE, TPO, and EPDM have low surface energy. Reliable adhesion generally requires a compatible system and, where specified, an adhesion promoter or primer. A label claiming suitability for “all plastics” does not establish reliable bonding to a polyolefin bumper.
Read the product data sheet for the marked material, preparation requirements, flexibility, and cure conditions. If the marking is missing or unclear, a small test melt on a scrap from the same cover or an inconspicuous area can help reveal whether the rod and bumper soften and fuse in a compatible way.
Prepare, Realign, and Test the Damaged Area
Begin by washing the damaged area and allowing it to dry completely. Use the cleaner approved for the repair material according to its instructions, sand the prepared surface, and clean it again. Sanding a contaminated or silicone-covered surface spreads the problem through the scratches and can leave a weak bonding layer underneath the repair.
Remove wax, silicone, road film, and loose paint without thinning the surrounding fascia unnecessarily. The cleaning product must suit the plastic and the repair system; an aggressive solvent can soften or distort some bumper materials. Good preparation creates a surface the chosen compound or weld can actually contact.
Restore the bumper to its original geometry before joining the crack. Align the edges, correct any bow or twist, and temporarily hold the shape with suitable clamps or tape while checking the fit against adjacent panels. Joining a deformed cover permanently fixes the wrong shape and can preload the repair as soon as the bumper is refitted.
Use a test melt when welding is planned. The repair rod and bumper should behave similarly under controlled heat, without the bumper burning, separating, or remaining unmelted while the rod flows. This test does not replace the material marking, but it can prevent an obvious mismatch from being built into the repair.
Choose a Repair Method by Plastic and Damage
Choose the joining method from the material marking and the type of damage. Flexible repair compounds and reinforcing patches address cracks and holes, while ordinary rigid filler is intended for surface leveling and cannot serve as the structural repair.
| Plastic or damage | Suitable repair approach | Preparation or reinforcement | Principal failure risk |
|---|---|---|---|
| PP | Compatible plastic-welding rod or a two-component polyolefin compound | Use the specified cleaner and adhesion promoter or primer where required; reinforce the back across a long transition zone | Incompatible material, poor adhesion, or a repair limited to the visible face |
| PP/TPO, TPO, PE, or EPDM-containing material | Material-compatible flexible compound or validated welding process | Low-surface-energy plastics generally require a compatible system and, where specified, an adhesion promoter or primer | The compound holds initially, then releases when the bumper flexes |
| ABS or PUR | Repair compound or welding material specified for the marked plastic | Follow the product preparation instructions and use reinforcement where the crack carries load | Heat damage, incompatible filler, or excessive stiffness in a flexible area |
| Crack or hole with missing material | Flexible repair compound with a compatible reinforcing patch or backing material | Support the repair from the back and restore missing shape before cosmetic finishing | Rigid filler bridges the surface while the underlying crack continues to move |
| One cited TPO-urethane repair product | Two-component application according to its technical data sheet | About 50 seconds of working life, about 30 minutes before sanding, and about 1 hour to full cure at the specified temperature | Rushing the application or assuming the same times apply in a cold garage or with a thicker layer |
Reinforce the Back and Restore the Visible Face
Once the edges are aligned, make the primary structural repair from the back where access allows. A long, compatible backside repair zone distributes load beyond the sharp end of the crack and reduces reliance on a visible face repair. Apply the material in the thickness and width specified by the product rather than creating a heavy, rigid lump.
A through-crack may still need attention on the visible side. A controlled V-shaped groove increases the area available for the repair material, allowing the surface to be filled rather than leaving a narrow line over a partly joined crack. Excessive material removal can weaken a thin fascia, so the groove should be proportionate to the wall thickness.
Stabilize the original shape first and extend the backside repair beyond the visible split. Concentrating heat or staples directly on the crack can leave the surrounding plastic carrying the same concentrated load.
Hot staples can help hold separated edges while the compatible repair material is applied. They are mechanical fixation only, do not replace compatible welding or chemical bonding, and must be fully recessed and covered. Poorly placed staples can remain visible, overheat thin plastic, or create new stress concentrations.
Structural joining ends when the crack and missing material are properly supported. Filling, leveling, texturing, and repainting then restore appearance. Even a strong repair does not automatically reproduce factory texture or paint quality, so the visible surface may require careful sanding, flexible finishing material, texture reproduction, primer, and refinishing.
Why Bumper Repairs Reopen: Common Mistakes and Myths
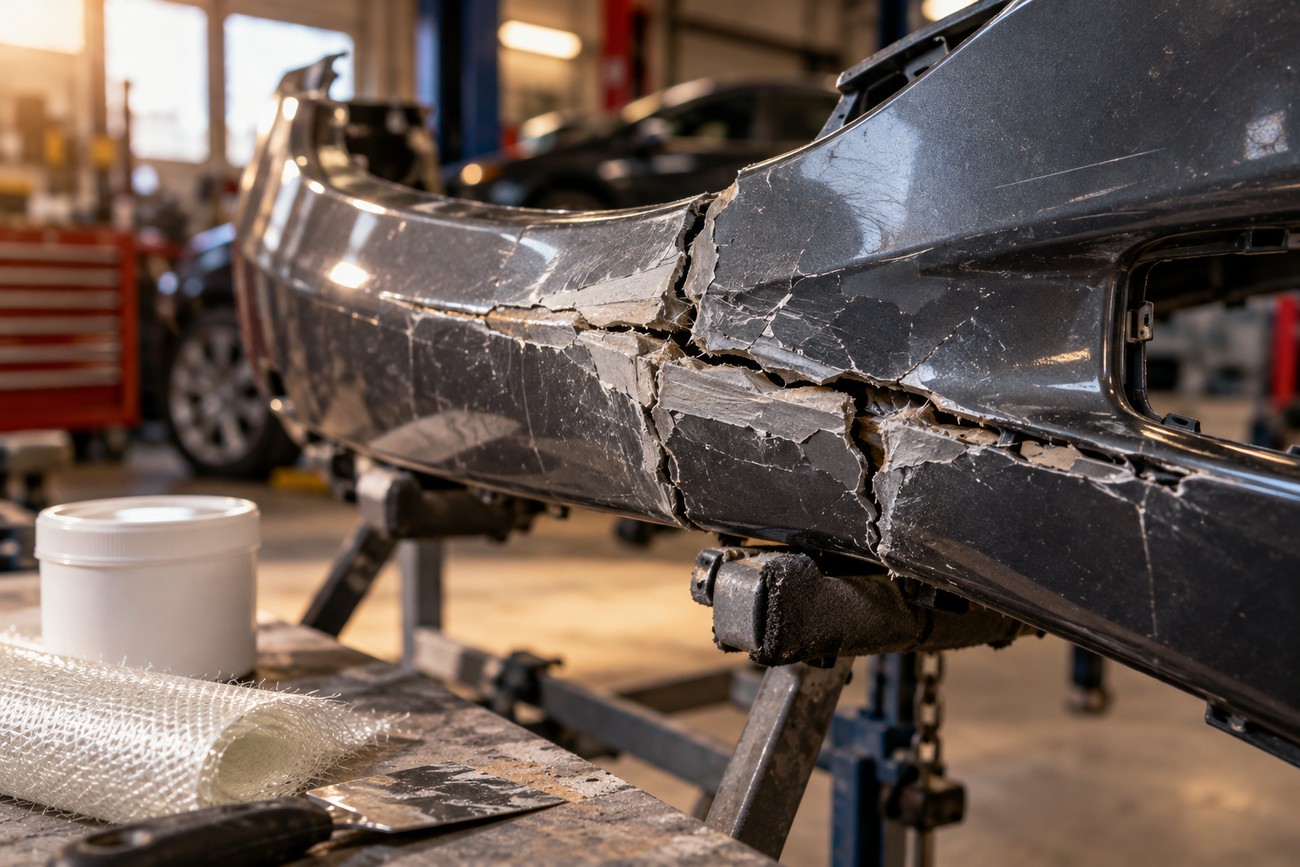
Universal superglue is an unreliable answer for PP, TPO, and PE. These low-surface-energy plastics generally need suitable preparation, an appropriate system, and, where specified, an adhesion promoter or primer. Cyanoacrylate may hold the edges briefly while leaving the flexible bumper unable to absorb normal movement.
Ordinary epoxy and rigid body filler create a similar problem when used as the structural repair. They can bridge a line or level a surface, yet the bumper still needs a flexible connection underneath. If the filler is asked to carry the crack, flexing commonly separates it or transfers the load to the edge of the repair.
Face-only repairs fail because the back of the cover continues to open and bend. Contaminated sanding creates another hidden failure: silicone and road film become embedded in the scratched surface, reducing contact between plastic and repair material. Cleaning, sanding, and cleaning again is slower than applying a product immediately, but it removes a common source of early release.
Heat must be controlled carefully. Overheating thin plastic can burn it, embrittle it, and distort its geometry; a wide, slow weld is not automatically stronger than a controlled repair. Hot staples can retain the crack while moving stress into nearby weak plastic, so reinforcement should be designed around the load path rather than added only where the split is easiest to see.
There is disagreement over soldering-iron repairs. Some practitioners report durable results, while others consider a fully separated crack prone to repeat failure and recommend replacement. Both positions point to the same limitation: a tool can join plastic, but it cannot correct incompatible material, poor preparation, missing geometry, damaged mounts, or repeated impact.
Frequently asked questions
The repair method depends on access, plastic type, damage severity, and the condition of the surrounding mounts. These factors also determine whether an on-car repair is practical and which products are compatible. The following answers address common choices without treating a universal adhesive or kit as a solution for every bumper.
How can you repair a plastic bumper crack without removing the bumper?
An on-car repair can work when the crack and its backside are safely reachable, the edges can be aligned, and the area can be cleaned without contaminating nearby parts. You also need enough room to apply a long backside reinforcement and to hold the cover in its original shape while the repair cures.
Limited access makes removal the safer choice when you cannot clean behind the crack, inspect the plastic marking, place reinforcement beyond the split, or keep the edges aligned. A face-only repair may look acceptable while leaving the main load-bearing surface untreated.
What should the best cracked-bumper repair kit include?
Choose the kit from the bumper marking rather than the word “universal.” It should include compatible repair material, the specified cleaner and adhesion promoter or primer where required, and reinforcement suitable for the crack or hole. For a two-component product, check that the kit includes the correct cartridge, mixing nozzle, and applicator.
Finishing supplies may also be needed, including suitable abrasive materials, flexible finishing compound, and products for restoring texture and paint adhesion. A kit that lacks backside reinforcement or material-specific preparation may be incomplete even if it contains a strong-looking adhesive.
What is the best glue for a cracked plastic bumper?
The best adhesive is the material-specific two-part product whose technical data sheet lists compatibility with the marked PP, TPO, or other bumper plastic. Check whether it requires an adhesion promoter or primer, whether the cured material remains flexible, and how much working life is available for alignment and application.
Also check cure conditions, layer thickness, and sanding time. One cited 3M TPO-urethane product has about 50 seconds of working life, about 30 minutes before sanding, and about 1 hour to full cure at its specified temperature. Those times apply to that product and its stated conditions; colder conditions can extend curing.







