
A car can feel quiet on smooth asphalt, then become tiring the moment the road turns coarse. Tire roar rises through the floor, doors, and wheel arches, making conversation harder and leaving your ears and head fatigued on a long drive. The same vehicle can sound acceptable on one surface and harsh on another because the road changes both the volume and frequency of the noise.
The sensible starting point is diagnosis. Before adding heavy sheets under the carpet, identify whether the main problem comes from tires, pressure, uneven wear, a leaking seal, vibrating panels, or aerodynamic airflow. The goal is a meaningful reduction in fatigue, vibration, and conversation difficulty, rather than complete silence. Cost, added mass, trim clearance, adhesive durability, and workmanship all affect the final result.
- Why Road Noise Gets Worse—and How to Identify Its Source
- Start With Tires, Pressure, and Mechanical Condition
- Choose the Right Sound-Deadening System, Not Just a Heavy Sheet
- Prioritize the Cabin Areas That Carry Tire Noise
- A Practical Treatment Plan: From Quick Wins to Full Disassembly
- Common Soundproofing Mistakes and Realistic Expectations
- Frequently asked questions
- How can I tell whether tire noise is coming from the front or rear of the car?
- How do I check whether a soundproofing job has actually worked?
- How can I reduce road noise in a car cabin?
- What is the best sound-deadening material for reducing road noise?
- What can I do to reduce road noise in my house?
Why Road Noise Gets Worse—and How to Identify Its Source
Highway cabin noise in a passenger car is commonly approximately 60–75 dBA, with coarse pavement and noisier body designs capable of producing higher levels. That figure describes a broad operating range rather than a promise for every vehicle. Perceived loudness also changes with fatigue, weather, tire condition, and the road beneath the car.
Speed changes the balance between noise sources. After roughly 60–80 km/h, tire noise often becomes the dominant contributor, while aerodynamic noise increases at higher speeds. Tire vibration can travel from the tire contact patch through the wheel, suspension mounting points, wheel arches, liners, and floor. Airborne sound also enters through door gaps, wiring passages, damaged weatherstripping, and poorly sealed trim.
Road surface is a useful diagnostic tool. Smooth asphalt, coarse asphalt, and concrete can produce substantially different noise levels and frequency profiles in the same vehicle. A low, steady boom that appears mainly on coarse asphalt points toward tire and body-path transmission; a rushing sound that rises with speed on several surfaces suggests aerodynamic leakage or wind noise.
Use listening as a practical guide rather than treating it as a laboratory measurement. Compare the sound from the front and rear seats, briefly drive on two different surfaces at the same speed, and notice whether the noise changes during gentle bends. A change in pitch or volume when the load shifts can indicate a tire, wheel, or bearing issue, while a steady hiss around one door often deserves a seal inspection before any interior is removed.
Start With Tires, Pressure, and Mechanical Condition

The cheapest effective improvement may sit outside the cabin. Tire construction, tread pattern, width, sidewall stiffness, and the vehicle’s wheel choice all influence NVH. Wider, stiffer, or more performance-oriented tires are often noisier, even when they are new and correctly fitted.
Check inflation pressure against the vehicle manufacturer’s specification, preferably when the tires are cold. Overinflation can worsen ride comfort and perceived road noise, while incorrect pressure can also change the way the tread contacts the road. Do not reduce pressure below the specified range in pursuit of quietness; handling, tire temperature, and wear can suffer.
A tire set can make a previously acceptable car suddenly loud because its tread design, casing stiffness, or wear pattern differs from the previous set. Uneven wear, cupping, and alignment problems can create a repeating hum that is easily mistaken for a weak floor or inadequate sound treatment. Rotate tires only when the vehicle and tire design permit it, and inspect the tread rather than relying on a visual glance from a distance.
Alignment and suspension condition are equally important. Worn dampers, loose mounting components, damaged wheel bearings, or incorrect alignment can increase vibration and abnormal tire noise. If the sound changes with cornering, follows wheel speed, or is accompanied by steering vibration, mechanical inspection should come before interior soundproofing.
Choose the Right Sound-Deadening System, Not Just a Heavy Sheet
Vibration-damping materials reduce the vibration of body panels. They are useful on large, resonant metal surfaces, yet they do not by themselves eliminate all road noise. A panel can stop ringing while airborne tire noise continues through the floor, wheel arch, door gaps, or trim cavities.
A more complete treatment may combine four functions: damping, sound absorption, acoustic decoupling, and sealing. Damping controls panel movement; absorption reduces reflected sound in cavities; decoupling separates trim from vibrating metal; and sealing closes paths through which both air and sound can pass. The correct combination depends on the source and the available space.
Mass and coverage area matter. Small isolated patches may produce less benefit than treatment of larger vibration-loaded zones, especially when the untreated metal around them continues to resonate. Thickness alone is a poor buying guide because an oversize layer can prevent clips from locking, distort a door card, raise the carpet, or interfere with seats and trim.
Marketing claims of 50–70% noise reduction should be treated cautiously. Results depend on the vehicle, the noise source, the location treated, the material system, and the quality of installation, so there is no universal percentage. A product that works well on a thin vibrating panel may contribute little when the dominant path is a tire-generated low-frequency boom entering through the wheel arch.
Prioritize the Cabin Areas That Carry Tire Noise
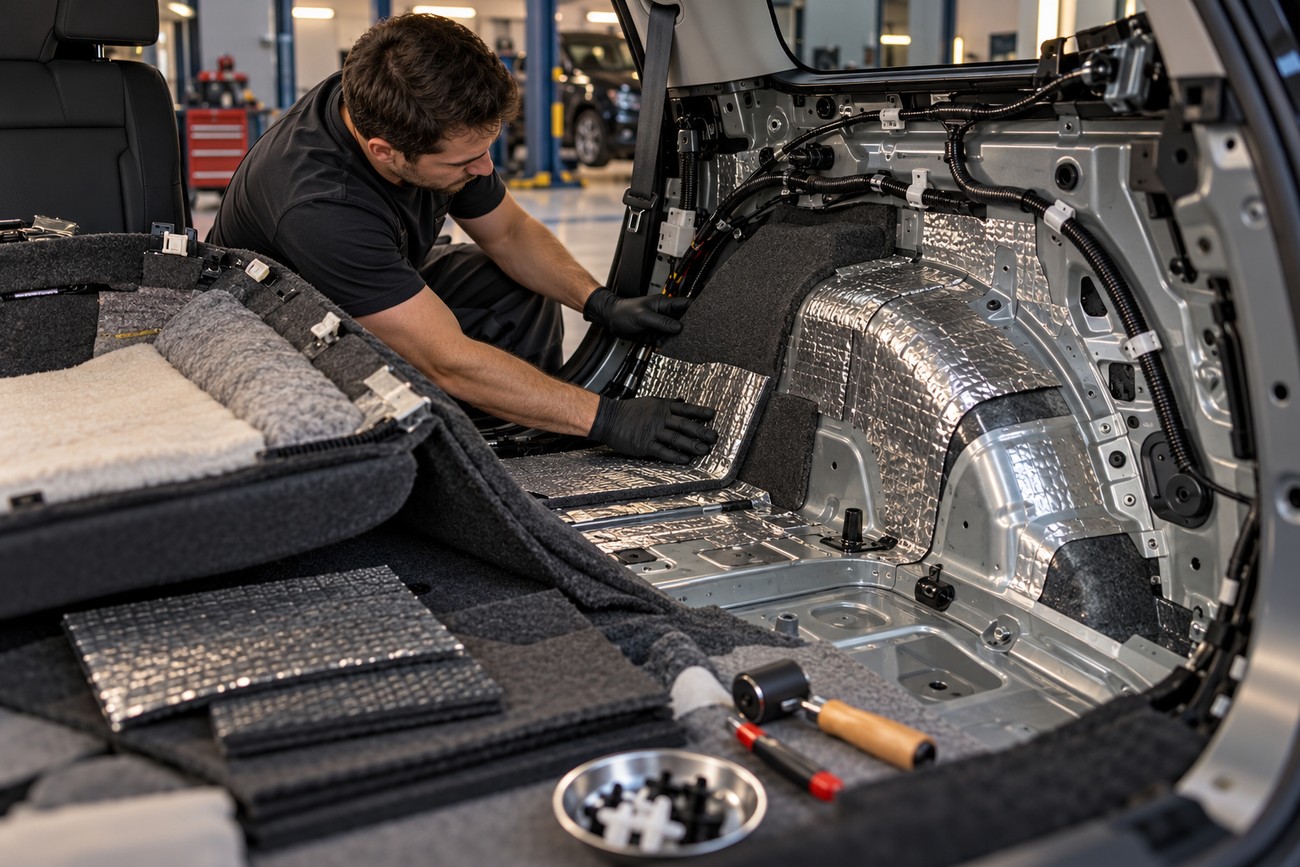
For many cars, the floor and wheel-arch areas deserve priority because tire noise reaches the cabin through the floor, wheel arches, liners, suspension mounting points, and body resonances. A broad treatment of the main vibration-loaded zones can be more useful than scattering small pieces across every accessible panel. The best order still depends on what your listening test identifies.
Doors can improve both road-noise transmission and the sound of the door itself, especially when the inner panel, trim card, and seals are treated as a system. Sealing gaps, wiring passages, door cards, and damaged weatherstripping can produce a noticeable improvement. Door-only treatment remains limited when the main path is through the floor or wheel arches.
The trunk and rear quarter areas matter in hatchbacks, wagons, and vehicles with a large open cabin. Rear wheel arches can transmit a persistent hum that seems to come from everywhere once it reflects through the interior. Check the spare-wheel well, side cavities, hatch seals, and trim fit, while keeping water drains and factory ventilation paths functional.
The firewall is often a difficult target because access is restricted by the dashboard, pedals, wiring, and factory insulation. It can carry both engine-related and road-related sound, but aggressive disassembly carries a higher risk of fitment problems. Low-frequency noise is generally harder and more expensive to reduce than high-frequency hiss, so expectations should remain realistic when the target is a deep motorway boom.
A Practical Treatment Plan: From Quick Wins to Full Disassembly
Use a staged plan. First verify tire condition, pressure, alignment, and suspension condition. Then inspect weatherstripping, door alignment, hatch seals, underbody liners, and obvious openings. These checks can solve a substantial part of the complaint without removing seats, carpets, or trim.
Next, address the highest-priority noise path. If the tires dominate on coarse asphalt, inspect the wheel arches, liners, floor, and suspension mounting areas. If the sound is a localized hiss, repair the seal or trim fit first. Broader treatment makes sense after these checks, especially when you can identify a specific panel or cavity that reacts strongly to tapping or road speed.
Test-fit trim, clips, carpets, and seals before final bonding. After treatment, inspect drainage and moisture paths rather than judging the result only by the first drive.
DIY work can reduce labor cost and lets you proceed in stages, but it requires careful cleaning, controlled cutting, and patient reassembly. Professional work may provide better access and finish, particularly around the floor, firewall, and headliner, although the quality still depends on the installer’s diagnosis. Additional treatment almost always adds mass and may slightly affect fuel consumption and dynamics.
Plan every layer around clearance. Thick materials can interfere with clips, door cards, carpets, seats, and trim joints. Low-quality adhesives and mastic can degrade with heat, moisture, and time, leaving loose material or a new odor. Keep drains, service openings, and ventilation paths open, and preserve corrosion protection wherever metal has been cleaned or exposed.
Common Soundproofing Mistakes and Realistic Expectations
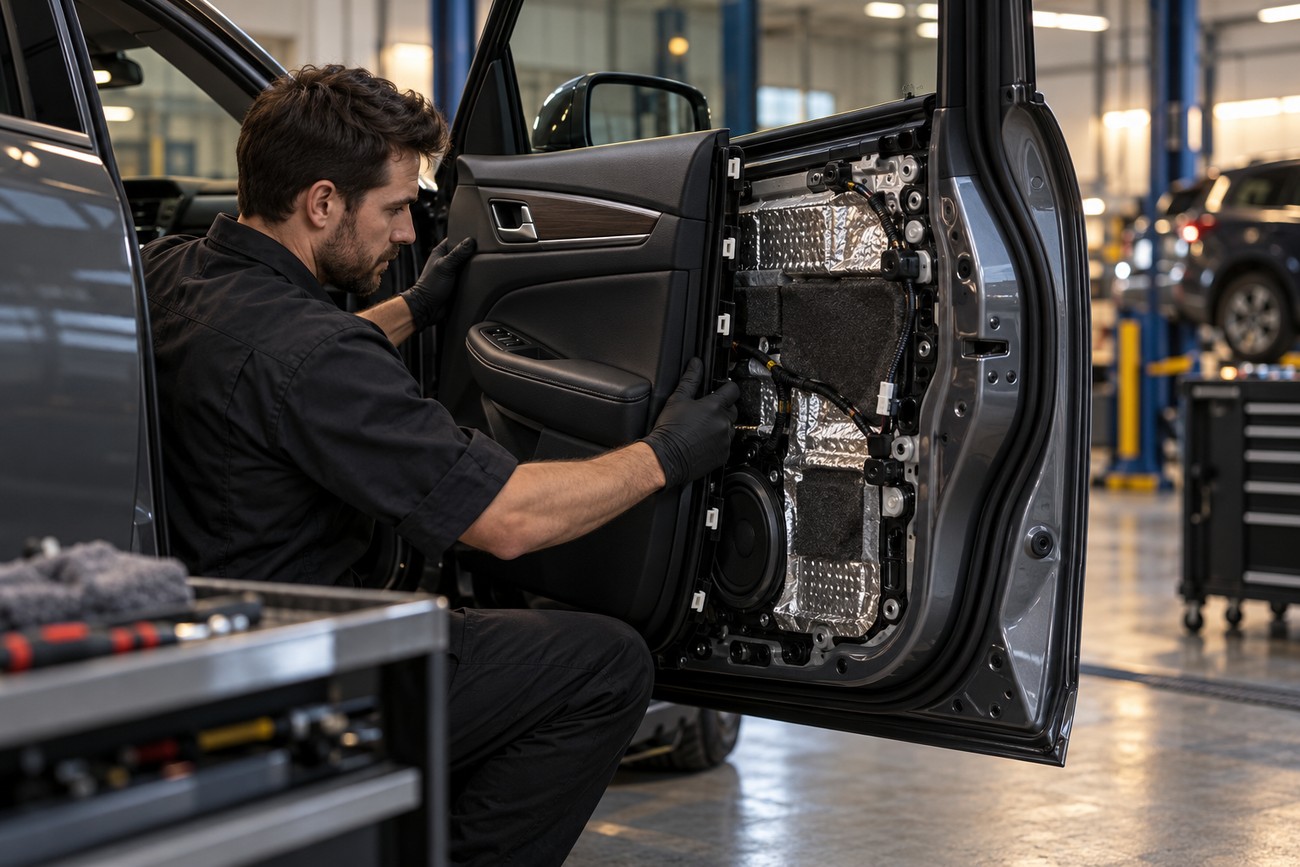
Door sheets alone rarely create a luxury-car cabin. Doors are only one part of the noise path, and the dominant tire energy may be entering through the arches or floor. Door treatment works best when it combines panel control, suitable decoupling, and careful sealing around the trim and weatherstrip.
More thickness is not automatically better. A material must fit its location and work with damping, absorption, decoupling, and sealing. Excess material can make a door heavy, prevent a carpet from sitting correctly, or leave clips under constant tension. Those installation problems can create rattles that draw more attention than the original road noise.
Poor disassembly and reassembly are common sources of disappointment. Loose clips, misaligned trim, pinched wiring, and missing fasteners can introduce squeaks and rattles after the work is complete. The car may feel heavier while the perceived improvement remains small because the main noise source was never treated.
Compare results under similar conditions: the same road, speed, tire set, weather, and cabin configuration. Rain, cold temperatures, and coarse surfaces can change the sound substantially, and fatigue can make a repetitive low-frequency hum seem more intrusive. Vehicle comparisons are more meaningful under the same standardized method, such as an ISO-, SAE-, or UNECE-aligned approach, than through advertising figures measured under different conditions.
Complete silence is not a realistic outcome. Sound treatment can reduce selected noise components, improve conversation comfort, and limit panel vibration, while vehicle design, tires, roads, and workmanship continue to shape the final result. A modest, targeted job can therefore be a better investment than a full interior teardown based on an assumed universal premium-car effect.
Frequently asked questions
The most useful answer depends on the dominant noise path and the constraints of the vehicle. These checks help you localize the problem before buying material or removing trim.
How can I tell whether tire noise is coming from the front or rear of the car?
Drive at the same speed on a smooth surface and then on coarse pavement, with the cabin quiet and the windows closed. Compare the sound from the front and rear seats, and briefly use a gentle, safe lane change to shift the vehicle’s load. A change that follows the loaded side or becomes clearer near one row of seats can help identify the likely end of the car.
Listen for tread rhythm as well as volume. A repeating hum that follows wheel speed and changes with road texture points toward tires or wheel-area transmission; a wind-like hiss that stays near one door suggests sealing. This method only localizes a likely source, so bearing, suspension, and tire defects still require mechanical inspection.
How do I check whether a soundproofing job has actually worked?
Repeat the same route before and after the work at the same speeds, using the same tires, pressure, weather conditions, windows, ventilation setting, and cabin load. Record short sections from the same seat and compare the character of the sound, especially on the road surface that originally caused the complaint. A phone recording can support your memory, though it is not a calibrated NVH measurement.
Check for secondary effects as well. A quieter floor is less useful if new rattles, trim movement, water retention, or seat interference appear. Allow time for your perception to settle after the first drive, because novelty and expectation can make a small change seem larger or smaller than it is.
How can I reduce road noise in a car cabin?
Begin with tires, pressure, alignment, suspension condition, and damaged seals. Then treat the dominant path, usually a combination of floor, wheel arches, liners, doors, or trunk areas, with materials suited to damping, absorption, decoupling, and sealing. Preserve drains and clearance, and test the result under the same road conditions.
A targeted repair often gives better value than covering the entire cabin. If the noise is mainly low-frequency tire roar, expect gradual improvement rather than silence; tire choice and wheel-arch treatment may matter more than adding another layer to the doors.
What is the best sound-deadening material for reducing road noise?
There is no single best material for every location. Choose according to the noise path, the panel, available clearance, moisture exposure, and the function required: damping for vibrating metal, absorption for cavities, decoupling between trim and structure, and sealing for air leaks.
Check adhesive and mastic durability in heat and moisture, along with compatibility with factory finishes. A thinner, correctly fitted system that keeps clips and drains working can outperform a thicker product installed where it cannot bond or where it distorts the trim.
What can I do to reduce road noise in my house?
For a house, first identify whether the sound enters through windows, doors, walls, the ceiling, or ventilation paths. Seal air gaps around frames, improve door seals, and use suitable laminated glazing or secondary glazing where windows are the weak point. Soft furnishings can reduce reflected sound inside a room, while they have limited effect on sound entering through an open leak.
Persistent low-frequency traffic noise usually needs structural work, such as added mass and decoupled layers, designed for the specific wall, floor, or ceiling. Keep ventilation functional and seek a building-acoustics assessment before spending on cosmetic panels.