
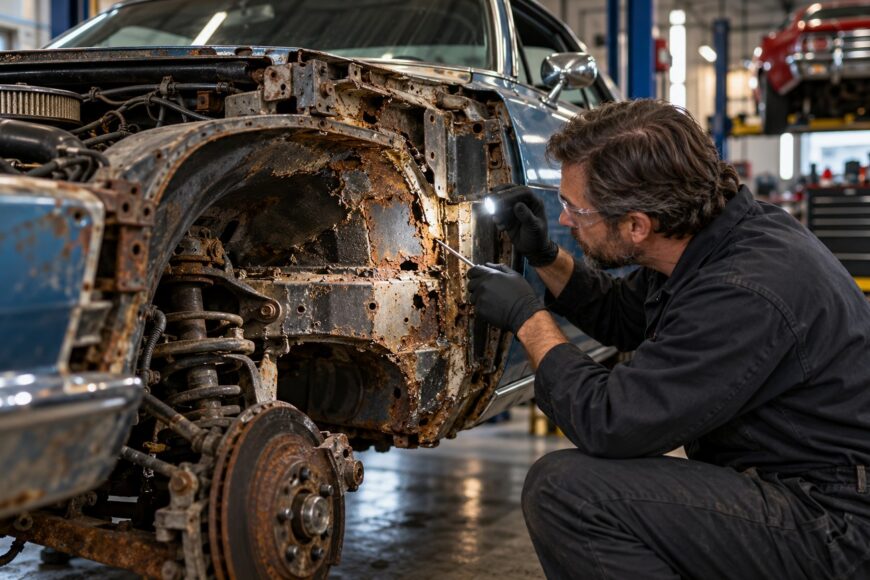
A small rusty edge at the inner fender can conceal perforation, double metal, and damaged reinforcements behind the wheel liner. The visible brown line is often only the exposed part of corrosion that has traveled under seam sealer, through a flange, or into a boxed section. A proper inspection may reveal weakened steel near a strut tower, rail, or suspension attachment point.
That makes the repair decision important. Cosmetic patching may hide the opening for a short time, while a procedure-based repair evaluates thickness, geometry, attachment points, and the condition of adjacent structure. Cutting, grinding, welding, and heat also remove factory corrosion protection, so poor cavity treatment can create a second corrosion problem around an otherwise sound repair.
- Why Inner Fender Rust May Be Structural
- What to Inspect Before Cutting the Rust
- Choosing a Patch, Fabricated Insert, or Replacement Panel
- A Repair Sequence That Protects Structure and Prevents Repeat Rust
- Sealing and Protecting the Repaired Inner Fender
- The Weld-Through Primer and Corrosion-Protection Trap
- Common Shortcuts That Make Inner Fender Rust Return
- When an Inner Fender Repair Is Beyond a Home Garage
- Frequently asked questions
- How much does it cost to fix rust on fenders?
- What is the best filler for rust holes in cars?
- How can I check an inner fender repair after the wheel liner is reinstalled?
Why Inner Fender Rust May Be Structural
Inner fender wells, inner fenders, side reinforces, and engine-compartment side rails can be structural body elements. Their shape and attachment points may help maintain the position of the suspension, hood, front-end panels, or other body sections. Surface appearance alone cannot establish that the vehicle remains structurally sound.
Inspection starts with removing the wheel liner, clips, accumulated dirt, and loose seam sealer around the affected area. The exposed metal should be checked for thickness and continuity, including the reverse side where access allows. A firm-looking outer flange may be attached to a reinforcer that has already lost substantial material inside the overlap.
Rust can extend into a strut tower, rail, reinforcement, or suspension mounting area without producing an obvious change in the panel outline. Measurements and reference points matter because a panel can appear visually aligned while an attachment point has moved. The condition of nearby seams and fasteners also helps determine whether the corrosion is local or part of a larger structural problem.
The applicable OEM repair procedure or I-CAR standards should determine the repair method. Those procedures may specify where cuts can be made, how a replacement section is joined, and which welding method is acceptable. A generic patch method from an unrelated vehicle can change load paths or leave a hidden joint without adequate protection.
What to Inspect Before Cutting the Rust
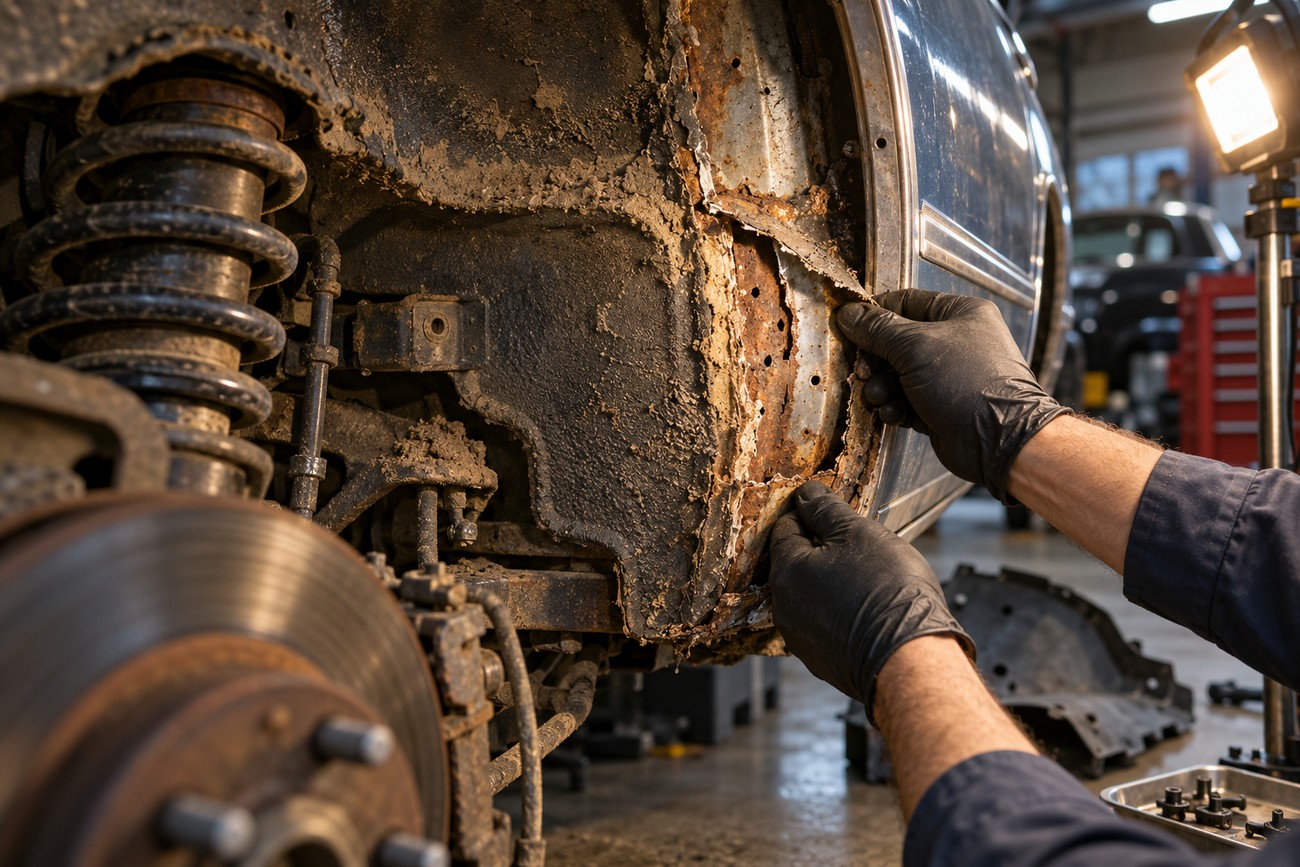
Remove the wheel liner and its clips before marking the repair boundary. Clean mud, loose coating, and contamination from the seam so the inspection reaches solid metal. The corrosion boundary often lies under seam sealer or a flange rather than at the visible brown edge.
Inspect both sides of every accessible panel and look into overlaps, boxed sections, and double-metal joints. A probe or careful thickness check can identify steel that looks intact but has become thin and brittle. If weakened metal remains around a rust hole, the welding edge may burn away, produce a weak joint, or crack beside the repair.
Check drain openings and the way water enters and leaves the area. Existing holes may later provide useful access for cavity-wax application, so they should not be closed without a drainage and protection plan. A repair that removes every access point can leave the back of a new insert difficult to coat evenly.
Before cutting, inspect attachment points, nearby reinforcements, and the relationship between the inner fender, hood, suspension, and adjacent panels. Photographing the exposed area and recording reference measurements can help confirm alignment during refitting. The cut line should follow sound, adequately thick metal and a repair design that permits proper welding and internal protection.
Choosing a Patch, Fabricated Insert, or Replacement Panel
A local patch can be appropriate when corrosion is confined to a limited area and sound metal remains around the full joint. The patch must restore the original shape, flange direction, and attachment function. A flat piece covering a curved or reinforced section may close the opening while leaving the body weaker or allowing water into an overlap.
A local patch becomes unsuitable when corrosion has reached a structural reinforcer, suspension mounting location, rail, or other load-bearing attachment. Those areas require a repair that restores continuity and follows the applicable body-repair procedure. The visible size of the hole is less important than the extent of weakened steel and the role of the affected section.
Replacement panels for older cars may have incorrect contours, flange positions, or mounting features. The part may look similar on the bench and still fail to match the vehicle at the strut tower, hood hinge area, radiator support, or wheel opening. A manually fabricated insert may therefore be necessary, using the original section as a reference only after its geometry has been verified.
Fit should be judged by measurements, reinforcement continuity, and mounting points before it is judged by the outer appearance of the panel. A visually neat repair can place a suspension attachment or hood edge incorrectly. Confirming geometry before final welding prevents the repair from locking in a misalignment that later panels cannot compensate for.
A Repair Sequence That Protects Structure and Prevents Repeat Rust
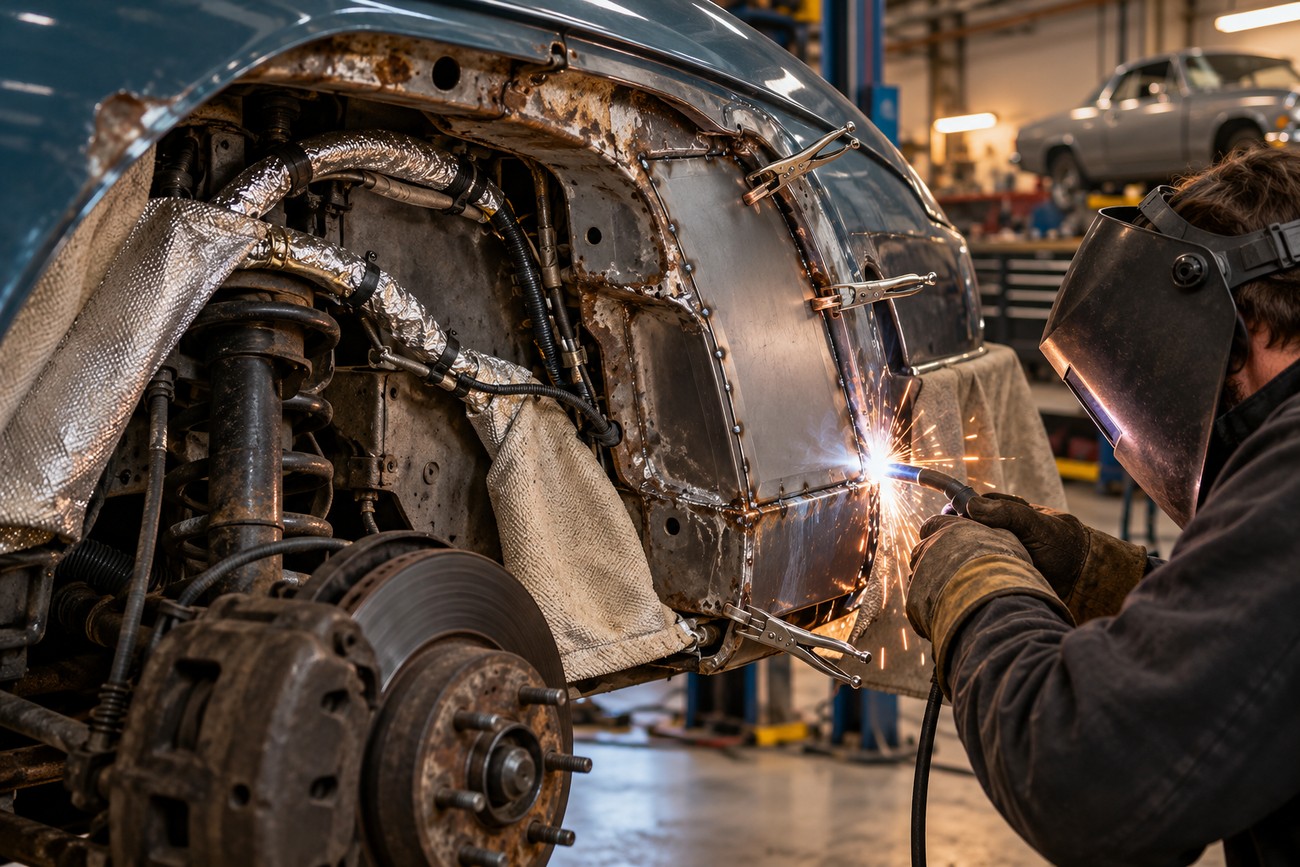
Begin by isolating hazards around the work area. Protect or remove wiring, reservoirs, brake lines, insulation, and other components that could be damaged by sparks, radiant heat, grinding dust, or welding current. Fuel-related parts and combustible insulation require particular care, and the work area should be clean enough to identify hidden heat or fire damage.
Expose sound metal by removing the liner, coatings, seam sealer, and weakened steel identified during inspection. Cut back far enough to reach stable material, then form an insert that matches the original contours, flanges, and reinforcement paths. Test-fit the section and confirm body measurements, suspension-related points, and panel clearances before making the final joints.
Plan probe access and internal coverage before closing a box section. Once the final weld blocks the opening, trying to improvise wax application can leave overlaps and hidden surfaces unprotected.
Use MIG or spot welding according to the applicable unibody repair procedure. Official inspection material lists inner fender wells and engine-compartment side rails among areas where gas welding is not recommended. Excessive heat can distort the panel, affect geometry, damage nearby components, and remove more corrosion protection than the repair system can later restore.
Cutting, grinding, welding, and heat create oxidation-prone zones by removing or damaging factory coatings. Keep the heat-affected area controlled and clean welds only as far as the specified repair system requires. After welding, inspect the joint for incomplete fusion, pores, distortion, and access to the reverse side before applying any coating that could hide defects.
The final structural check should precede cosmetic finishing. Verify that the insert follows the intended contour, that reinforcement paths remain continuous, and that drains and access openings have not been blocked. The repair then needs a corrosion-protection system for the outer joint, the overlap, and the enclosed surfaces.
Sealing and Protecting the Repaired Inner Fender
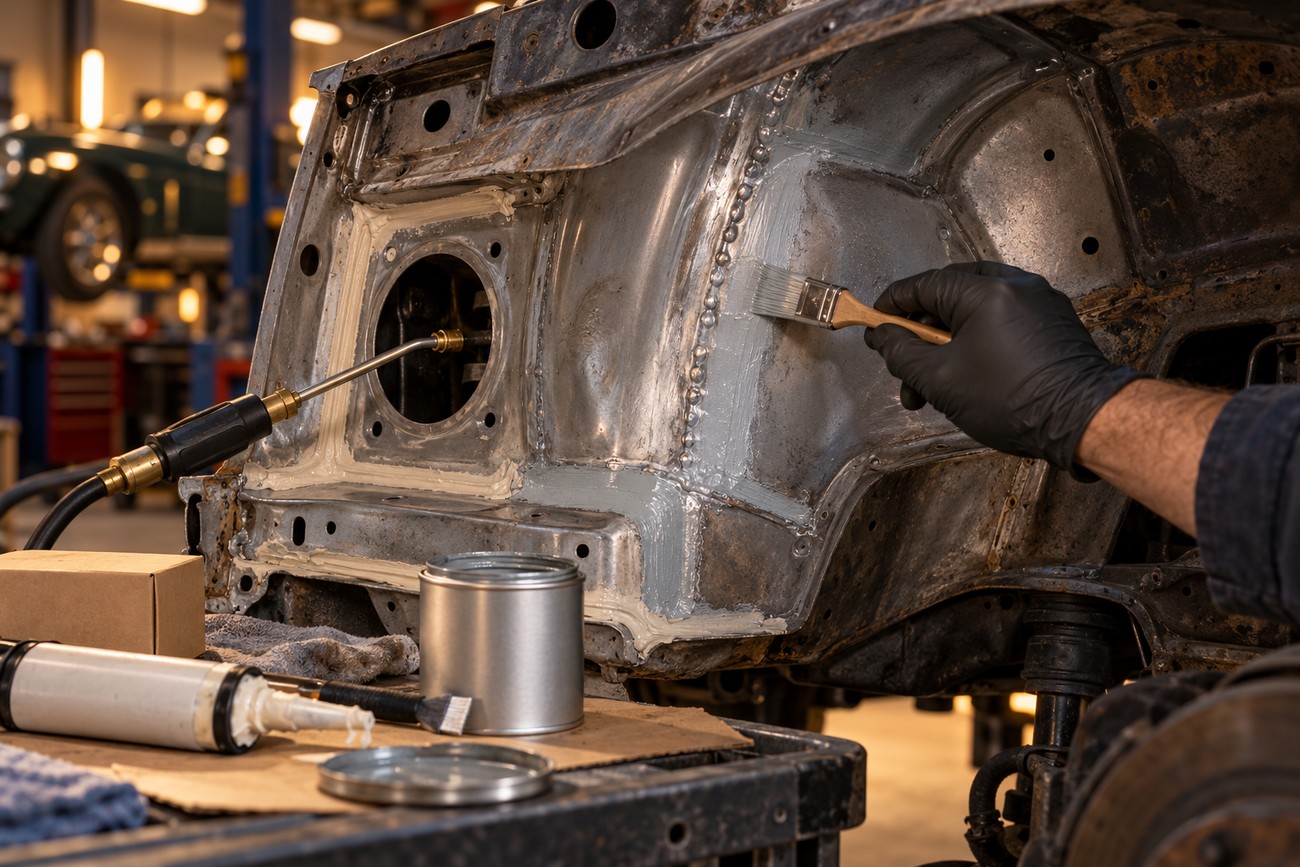
Start with the substrate required by the selected repair system. Seam sealer should be applied over compatible 2K primer or factory e-coat when required, after the surface is clean, dry, and properly prepared. Applying sealer directly to contaminated, damp, or inadequately prepared bare steel can allow water to travel beneath the joint.
The sealer should reproduce the function of the original joint without blocking drainage or concealing an unfinished weld. It helps prevent water from entering between joined panels, while exterior coating and stone-chip protection defend the exposed side from road spray and impact. The layers must remain compatible with one another and with the manufacturer’s curing instructions.
Closed spaces and overlaps need cavity wax applied through a spray tube or long probe. The probe should reach behind flanges and into boxed sections, with enough movement to spread material across the internal surfaces rather than depositing it at the first opening. Existing holes can provide access when they remain clear and suitable for the repair design.
3M recommends three cavity-wax coats for its specified coating thickness. That recommendation is product-specific and does not establish a universal rule for every brand or OEM system. Follow the selected product’s instructions, allow the required application conditions, and confirm that the wax reaches the repaired overlaps and the reverse side of the insert.
Cavity wax is a restorative measure and cannot be fully equated with factory dip e-coat. It protects enclosed surfaces, yet it does not replace structural metal, weld integrity, or exterior seam sealing. Working drain openings must remain open because sealing a cavity without drainage can retain water and accelerate corrosion.
The Weld-Through Primer and Corrosion-Protection Trap
Weld-through primer is a limited part of the corrosion system, not a guarantee that every hidden surface will remain protected. Zinc coatings provide sacrificial protection to steel where the selected repair system permits their use. The product must still be applied to clean, correctly prepared surfaces and used within its welding instructions.
Copper weld-through primer is not a universal best choice for steel. Copper can accelerate contact corrosion of steel under unfavorable conditions, and OEM manufacturers do not universally require copper weld-through primer. A zinc-based product may be preferable where the OEM or material system allows it, but the repairer should follow the specified compatibility requirements rather than a product slogan.
Weld-through primer protects only where its coating remains after welding and surface cleanup. Heat can destroy the film around a weld, while grinding or preparation can remove it from adjacent areas. The exposed zone therefore still needs the rest of the approved protection sequence, including suitable primer, seam sealing, exterior coating, and cavity treatment where applicable.
Heavy undercoating should not be used to compensate for uncertain preparation. A thick layer can hide pores, cracks, and continuing corrosion, making later inspection more difficult. A thinner, documented system that leaves the joint understandable and accessible is easier to monitor and maintain.
Common Shortcuts That Make Inner Fender Rust Return
Fiberglass, body filler, or thick undercoating over active rust does not remove the corrosion source or restore structural steel. These materials may have a finishing role over clean, sound metal after a proper repair. They cannot bridge a weakened flange, replace a missing reinforcement, or make a rust-through hole structurally reliable.
Seam sealer commonly fails when it is applied over moisture, dirt, sanding residue, or inadequately primed metal. It may initially look smooth while water works beneath the edge. The surface should be clean and dry, and the primer or e-coat beneath it must be compatible with the sealer and the surrounding coating system.
Protecting only the visible side leaves the reverse side, overlaps, and closed sections vulnerable. After welding, the cavity must be reached with a spray tube or long probe, and the repair should retain suitable access for that purpose. Cavity wax is useful inside the section, while exterior seam sealing remains necessary at the exposed joint.
Drainage is another frequent failure point. A sealed cavity without working drain openings can retain water from condensation, road spray, or a leaking seam. The wheel liner, clips, drains, and stone-chip protection must be restored so dirt does not accumulate against the repair and water can leave the area as intended.
When an Inner Fender Repair Is Beyond a Home Garage
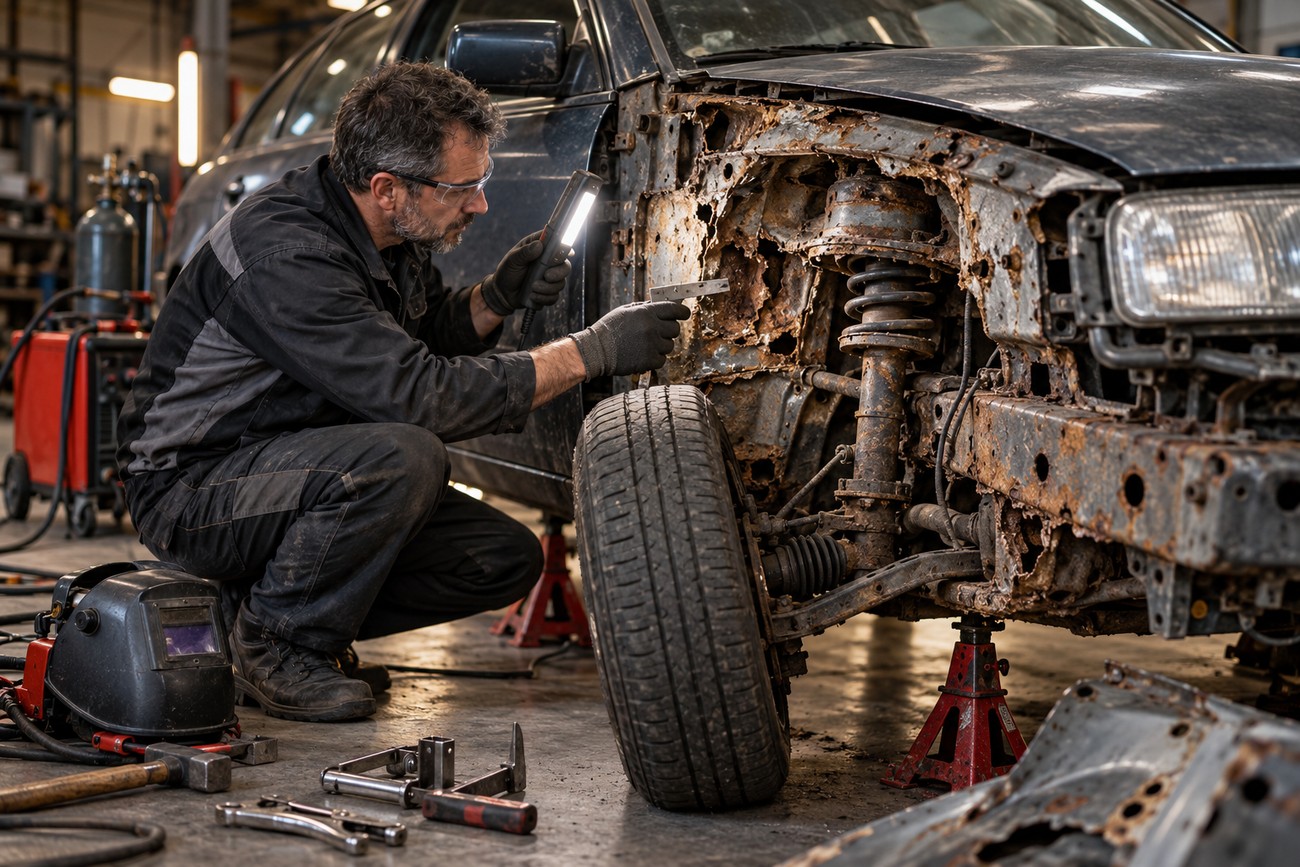
Escalate the repair when corrosion reaches a suspension mount, rail, strut tower, reinforcement, or other attachment point. Uncertain geometry is also a warning sign, especially if the hood, wheel, or suspension position appears misaligned after the corrosion developed. A cosmetic patch cannot confirm the position or strength of those areas.
Extensive double-metal corrosion and inaccessible weld backsides make a controlled repair difficult. The repair design must provide a sound joint and later access for broad cavity-wax coverage, including access around overlaps. If the reverse side cannot be inspected, welded correctly, and protected, the visible repair may give a false sense of completion.
Work near fuel-related reservoirs, brake lines, wiring, insulation, or other heat-sensitive components can create hidden damage and fire hazards. These risks increase when the operator lacks suitable shielding, extraction, measurement equipment, or a controlled welding setup. A qualified collision shop can isolate the area and use the equipment required by the repair procedure.
The shop should document measurements, identify the corrosion boundary, and follow the applicable OEM procedure or I-CAR guidance. That process may include checking attachment points before and after the repair, confirming panel alignment, and recording the corrosion-protection materials used. The correct standard is the vehicle-specific repair information, rather than a generic internet patch method.
Frequently asked questions
How much does it cost to fix rust on fenders?
There is no reliable universal price because the visible rust may represent very different repairs. A quote changes substantially when inspection reveals double-metal corrosion, poor access, damaged reinforcements, or a need to fabricate an insert instead of fitting a replacement panel.
Labor also depends on geometry checks, welding access, removal and refitting of the liner and related components, and the required post-repair protection. A proper estimate should account for cleaning and inspection, removal of weakened metal, fitting, welding, primer, seam sealer, exterior protection, cavity wax, and restoration of drains and clips.
What is the best filler for rust holes in cars?
No filler is the correct structural repair for an active rust-through hole. The corrosion must be removed, and the missing metal must be restored with a suitable repair section or panel according to the applicable procedure.
Finishing filler may be used afterward to smooth a properly repaired, clean, and sound surface. It should remain thin enough to reflect the repaired shape and must never substitute for structural steel, a sound weld, or corrosion protection inside an overlap.
How can I check an inner fender repair after the wheel liner is reinstalled?
Check that the liner sits in its original position, all clips are fitted, and the liner does not rub the tire, suspension, wiring, or repaired metal. Look through accessible openings for exposed seams, heavy overspray, blocked drains, or areas where coating appears to have stopped at the edge of the access hole.
Confirm that water has a route out of the repaired area and that the liner and stone protection direct road spray away from the seam. Signs of trapped water include damp dirt behind the liner, staining below a joint, or a drain that no longer passes water. If access prevents a meaningful inspection of the repaired cavity, ask the shop how the reverse side was coated and how drainage was preserved.







