

A slide hammer can move a large dent, but uncontrolled force can create waves, stretch the panel, tear paint, or damage the attachment point. The tool delivers an impulse along the axis of its attachment, so the result depends on where that force enters the panel and how the surrounding metal is supported.
The safer approach is staged pulling: inspect the damage, establish a sound anchor, use short impulses, and check the reflection after each small change. Removing the low spot is only the shaping stage. Large dents commonly need metal finishing, filler, sanding, and refinishing before the panel looks correct under changing light.
- Can a Slide Hammer Remove a Large Dent?
- Inspect the Dent, Panel, and Paint Before Pulling
- Prepare the Work Area, Tools, and Attachment Method
- Plan the Pull Pattern Instead of Chasing the Deepest Point
- How to Pull a Large Dent With a Slide Hammer
- Common Failures: Waves, Torn Points, and Damaged Paint
- Finish the Repair and Restore Corrosion Protection
- When a Slide Hammer Is the Wrong Choice
- Frequently asked questions
- What should I do if the welded stud or glue tab pulls off?
- How can I tell whether the dent is coming back after repair?
- How to pull a dent with a slide hammer?
- How to pop a big dent out?
Can a Slide Hammer Remove a Large Dent?
Yes, a slide hammer can help restore the broad shape of a large dent when the panel has a reliable attachment area and adequate support. Its slide weight creates an impulse along the attachment axis. That force is useful for moving stubborn metal, though it remains difficult to control if the anchor is weak or the panel can move freely.
Rigid support and a sound anchor matter more than maximum tool mass. A heavy hammer can produce a larger movement than intended, especially on thin outer panels. It may pull the dent outward while also lifting the surrounding area, creating a ridge or a broad wave.
The best working areas are generally accessible edges, flanges, or reinforcements that can accept a secure attachment. A broad, flat center without useful support is a poor candidate for rough slide-hammer work. The force can spread through the panel instead of moving the intended low area.
Large dents are usually rough-shaped first. After the main depression is raised, the surface may still need metal finishing, filler, sanding, or refinishing. A slide hammer is a shaping tool, not a guarantee of a finished paintless repair.
Inspect the Dent, Panel, and Paint Before Pulling
Start by identifying the dent’s deepest area, its outer edge, any sharp creases, and nearby ribs or body lines. Check whether you can reach the reverse side and whether the panel has moved around a reinforcement. A dent crossing a stiffening rib can deform the rib boundary, making the repair harder than the original depression.
Inspect the proposed attachment area for corrosion, thinning, previous repairs, and loose or weakened metal. Hidden corrosion can make a stud or other attachment unreliable even when the visible paint looks intact. A failed point can tear away more material and leave a larger coating repair.
Paint condition controls the risk. Old or brittle paint can crack, flake, or detach along existing microcracks under moderate pulling force, sometimes away from the deepest part of the dent. Cold metal and aged coatings deserve particular caution because the surface may fail before the panel moves in a useful way.
Identify the panel material before choosing rough pulling. Aluminum and high-strength steel carry greater risks of cracking, permanent stretching, or an oil-canning edge when pulled aggressively. If the material, reinforcement, or previous repair is uncertain, a controlled body-repair method is safer than escalating slide-hammer force.
Prepare the Work Area, Tools, and Attachment Method
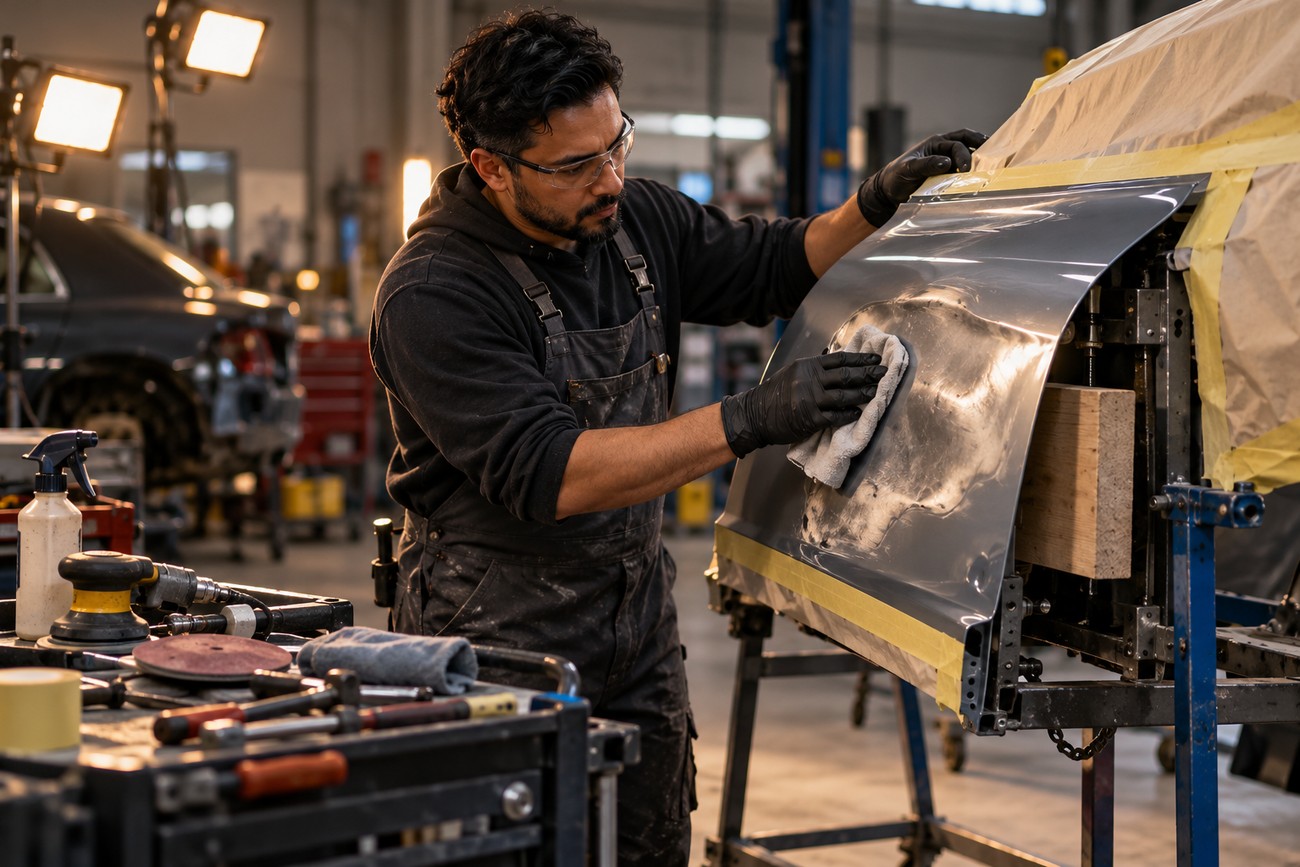
Clean the working area so the attachment method can grip sound material. Remove loose dirt, wax, and flaking coating where appropriate, then mask nearby paint and trim against tool contact and falling debris. Use stable lighting that lets you see both the dent and the surrounding reflection.
Support the panel from the reverse side whenever access allows. A rigid backing arrangement limits movement of the surrounding panel and helps direct the pull toward the damaged area. Without that support, the panel may flex, shift, or develop a new low spot beside the original one.
Welded studs generally hold more securely under pulling load. They also require grinding after removal and restoration of primer, paint, seam edges, and corrosion protection. Heat and welding can disturb nearby coating, so the attachment area must be treated as part of the repair rather than discarded after the dent moves.
Adhesive tabs provide a cleaner attachment method, though they depend strongly on a clean surface, suitable temperature, and correct curvature. Contamination, a cold panel, or strong curvature can cause the tab to release early. Neither method is universally superior; the panel condition and attachment location determine the sensible choice.
Plan the Pull Pattern Instead of Chasing the Deepest Point
Map the dent under oblique light before attaching anything. Change the viewing angle and watch the reflection lines across the panel; they reveal low spots, ridges, waves, and a deformation halo that casual inspection can miss. Mark the areas that need movement and the areas that already sit close to the intended contour.
Choose attachment points according to the dent’s shape, edges, and panel stiffness. Starting at the deepest center can pull the panel in the wrong direction or leave a raised ring around the attachment. On thin panels, progressively lifting low areas is generally more controllable than applying maximum force to the deepest point first.
Reflection lines show whether the low perimeter is beginning to rise evenly. Repeated short pulls around that perimeter often make the final center movement more predictable than committing immediately to one heavy pull.
Use short, controlled impulses with pauses for inspection. Keep the slide hammer aligned with the attachment so the force follows the intended axis. Reposition as the shape changes, especially near a rib, edge, or crease where a small change in direction can fold the boundary instead of restoring it.
How to Pull a Large Dent With a Slide Hammer

Begin with the panel clean, masked, and supported. Confirm that the selected stud, hook, or adhesive tab is attached to sound material and that the slide hammer is aligned with the planned direction. Keep nearby people clear of the tool and attachment area, and use suitable eye protection during pulling and cleanup.
- Apply a small impulse rather than a long series of heavy blows.
- Release the tool and inspect the panel, attachment, and surrounding reflection.
- Check that the attachment remains secure before applying another impulse.
- Reposition the attachment as the broad contour changes.
- Stop after several pulls for a full inspection under oblique light.
The first objective is to restore the broad shape. Move the low area gradually and watch for a ridge forming around it. If the surrounding panel begins to rise faster than the dent, stop and change the attachment position or provide better reverse-side support.
Keep the hammer’s movement controlled and aligned. A sideways load can twist a stud, peel an adhesive tab, or direct force into an inner reinforcement. Check the attachment before each additional pull, particularly after the panel has moved and the load path has changed.
As the dent becomes shallower, reduce the amount of movement expected from each impulse. A panel that appears nearly flat can still contain stretched metal, a shallow halo, or a returning low spot. Finish the broad correction first, then switch to metal finishing or another suitable method for the remaining surface defects.
Common Failures: Waves, Torn Points, and Damaged Paint
A bump or wave around the dent usually means the panel was pulled beyond the intended contour. Continuing to pull rarely removes that wave. Stop, inspect the reflection, and use controlled metal finishing or carefully supported correction to bring the raised area back into shape.
A detached stud or glue tab may indicate weak metal, poor preparation, an unsuitable surface, or excessive impulse force. The attachment failure itself can enlarge the damaged area. Inspect the exposed metal before relocating the attachment, and do not attach to loose corrosion, overheated material, or a section already weakened by the first attempt.
Paint can crack, flake, or detach over an area larger than the original dent. This is common with old or brittle coatings, where pulling opens existing microcracks. More force will not restore damaged paint; the affected coating must be removed as needed, prepared correctly, and rebuilt with the appropriate protective layers.
An oil-canning panel moves inward and outward too easily because the metal has become unstable or stretched. A strong slide hammer can also damage an inner reinforcement if the attachment is placed poorly. Once the panel has been stretched beyond its stable shape, the low area may return after the repair, even if it looked correct immediately afterward.
The practical response to each failure is to stop and reassess the load path. Lighter equipment, better support, a different attachment location, backside access, or a bodywork method may solve the problem. Escalating force usually increases the damage rather than correcting its cause.
Finish the Repair and Restore Corrosion Protection

Extraction is only the shaping stage. Remove welded studs or adhesive residue carefully, then inspect the panel under angled light from several directions. A dent that looks gone from one position may still show low spots, ridges, or a deformation halo in the reflection.
Welded attachments generally require grinding and cleanup before the coating system is rebuilt. Keep the repair area smooth enough for proper finishing while avoiding unnecessary thinning of the panel. Adhesive residue also needs complete removal before primer or filler is applied.
Large or stretched dents often need filler, sanding, and refinishing after pulling. Metal finishing can reduce the amount of filler required, though it cannot reverse every stretched or unstable panel. The correct stopping point is a stable surface with a consistent contour, not simply a missing deepest low spot.
Restore any disturbed primer, paint, seam edge, and corrosion protection. Pay attention to attachment holes, exposed metal, panel edges, and areas affected by grinding or heat. Leaving those surfaces unprotected can allow corrosion to develop beneath a repair that initially appears successful.
When a Slide Hammer Is the Wrong Choice
Stop using a slide hammer when there is no sound attachment or stable panel support. A broad, flat dent without a useful anchor may need backside access, controlled bodywork, or a different repair system. Pulling harder cannot compensate for a poor load path.
Severely stretched metal is another clear warning. If the panel oil-cans, the low area returns, or the surrounding contour keeps rising, the metal may no longer hold its original shape. Further pulling can produce more instability and leave a surface that requires substantial correction.
Fragile paint can fail even when the pulling force appears moderate. Aluminum and high-strength steel also require a more cautious strategy because rough pulling carries greater risk of cracking, permanent stretching, or an oil-canning edge. A compatible adhesive method may reduce surface damage in some cases, though it still requires a clean, suitable attachment area.
A dent crossing a stiffening feature deserves special caution. The rib boundary may fold or move with the outer panel, creating a repair problem inside the original one. When material, reinforcement, or coating condition is uncertain, professional assessment is often safer than escalating the tool’s force.
Frequently asked questions
These questions address the decisions that usually determine whether a slide-hammer repair remains controlled or becomes a larger bodywork job.
What should I do if the welded stud or glue tab pulls off?
Stop pulling immediately and inspect the exposed metal, coating, and attachment area. Look for corrosion, thinning, overheating, tearing, or a panel section that has already become unstable. Do not simply weld or glue another point beside it without preparing sound material.
Relocate the attachment only after the surface is clean and structurally suitable. Address coating damage before continuing, and reduce the impulse force if the panel or attachment has already been stressed. A repeated failure is a reason to change the repair method or obtain professional help.
How can I tell whether the dent is coming back after repair?
Check the panel under changing reflections rather than relying on one view immediately after pulling. Oblique light can reveal a low spot, a returning halo, or a ridge that was hidden by direct light. Compare the reflection across the repaired area with the undamaged surrounding panel.
Also watch how the surface moves when it is inspected gently and safely. A stable panel should hold its contour; an oil-canning area or recurring depression indicates stretched or unstable metal. If the low spot returns after the panel has rested, pulling alone has not solved the underlying deformation.
How to pull a dent with a slide hammer?
Attach the tool to sound material, support the panel, and pull with short, controlled impulses along the attachment axis. Inspect the panel and attachment after each impulse, then reposition the pull as the contour changes. Use oblique light to control the surrounding waves and stop when the broad shape is restored.
Keep in mind that large-dent pulling is usually rough shaping. The finished surface may require metal finishing, filler, sanding, paint, and corrosion-protection work.
How to pop a big dent out?
A big dent should be raised progressively rather than popped out with one heavy movement. Choose an attachment according to the panel’s shape, provide rigid support, and lift the low areas in stages. A broad, flat dent, stretched panel, fragile coating, or dent near a reinforcement may require backside bodywork instead.
If the panel develops a bump, wave, oil-canning movement, or paint failure, stop increasing the force. Those signs indicate that the repair method or load path needs to change.







