
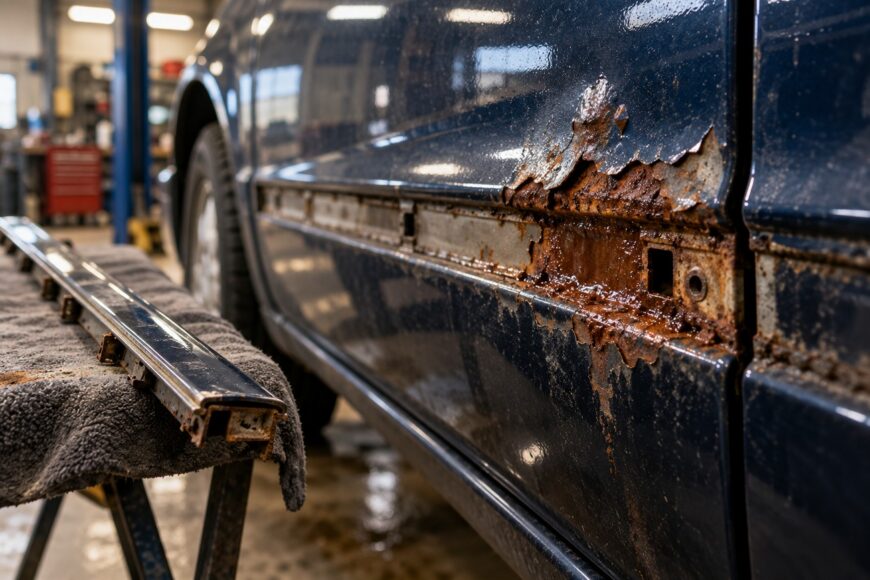
A small paint bubble beside a trim piece can look like a simple touch-up job. Lift the molding, though, and you may find wet dirt and corrosion extending along an edge that looked sound from outside. The visible bubble does not reliably show how much metal is affected beneath the trim.
Painting the blister may improve its appearance for a while, but it cannot address rust or trapped moisture you have not exposed. A durable repair begins with enough access to inspect the covered area. That inspection also tells you whether the metal can be cleaned and refinished or needs body-shop metalwork.
- Why Paint Bubbles Beside Trim Keep Coming Back
- Remove the Trim and Inspect the Full Rusted Area
- Surface Rust, Deep Pitting, or Holes: Which Repair Fits?
- Strip the Corrosion Without Damaging the Panel
- Prime, Refinish, and Protect the Hidden Side
- Reinstall the Trim Without Recreating the Moisture Trap
- Why Quick Touch-Ups Fail—and What to Check Before Calling It Done
- Frequently asked questions
- How much does it cost to fix rust bubbles under car trim?
- What if the trim clips break during removal?
- When can I wash or wax the repaired area?
Why Paint Bubbles Beside Trim Keep Coming Back
Bubbling beside trim is commonly subsurface corrosion beneath lifted paint. Water can carry dirt and salt into the narrow space under a molding, where it remains against an edge or seam. As the steel corrodes, the coating loses its bond and rises into a blister.
The first bubble may appear at a small break in the paint, while corrosion continues beneath paint that still looks intact. Its visible outline is therefore a poor guide to the full affected area. Removing the trim may reveal a short, cleanable patch or a much longer corroded edge; a blister alone does not mean the panel is perforated.
A surface touch-up leaves the covered seam and its moisture path unchanged. Paint applied over active corrosion can lift again, especially if damp debris or failed seam protection remains nearby. The repair has to reach sound metal and address the conditions that kept it wet.
Remove the Trim and Inspect the Full Rusted Area
Remove the trim, or open sufficient access to the covered seam, before assessing hidden corrosion. Check how the piece is held on so you can release clips or adhesive without levering against painted edges. Adjacent trim may also need to come off to expose the full seam and allow room for later paint blending.
Inspect the clips and mounting points as well as the metal. Look along the entire covered edge for wet debris, loose coating, failed adhesive or seam sealer, pitting, and holes. Damage at a folded edge can be more serious than a stain on a broad, flat section of panel.
Check the reverse side of a trim-covered edge where access permits. Damp debris or failed sealer there can change the size of the repair even when the outer paint shows only one bubble.
Clean away the deposits and dry the area thoroughly before deciding where the repair ends. As the rust is exposed, watch for metal that has become thin or perforated, particularly around a seam or clip hole. If access still prevents a reliable inspection, avoid sizing the job from the exterior bubble.
Surface Rust, Deep Pitting, or Holes: Which Repair Fits?
Judge the repair from the metal exposed after cleaning and rust removal, rather than from the paint blister. The condition at an edge or seam matters as much as the area you can see on the panel face.
| Condition after trim removal | What inspection reveals | Likely repair route | When to seek a body-shop assessment |
|---|---|---|---|
| Localized, cleanable corrosion | Rust can be removed, leaving stable, clean bare steel with sound metal remaining. | Prepare, prime, and refinish the area, then restore the applicable seam and hidden-side protection. | If access is limited or you cannot establish where sound metal begins. |
| Deep pitting or thinning metal | Pits remain deep after loose rust is removed, or the edge appears weakened. | Have the metal assessed before choosing a coating repair; metalwork may be needed. | When cleaning exposes thinning, especially at a seam, folded edge, or mounting point. |
| Perforated edge or seam metal | Holes or missing steel remain after corrosion is removed. | Welding or section replacement may be required before refinishing. | Seek an assessment rather than covering the hole with filler or paint. |
Strip the Corrosion Without Damaging the Panel
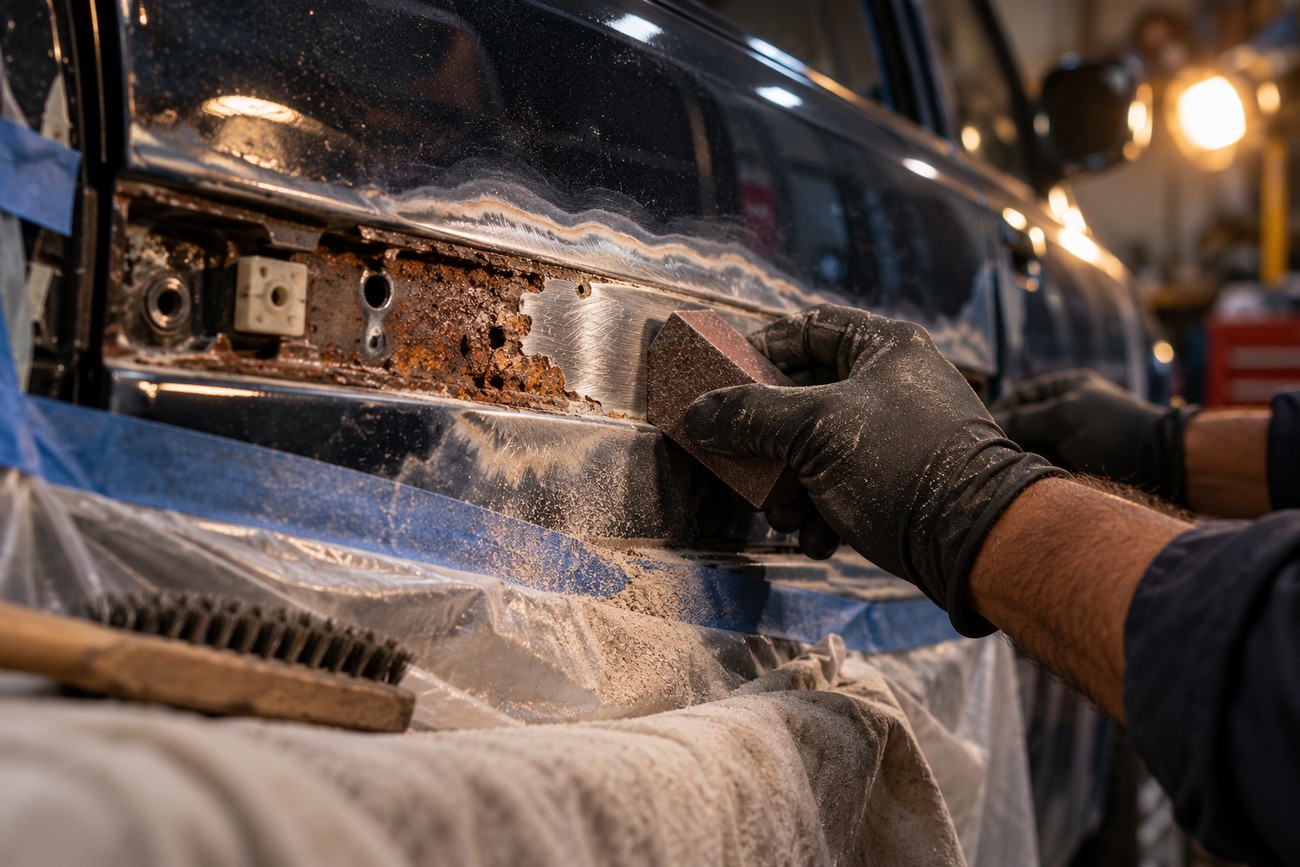
Protect the surrounding finish and any exposed components before working on the rusted area. Mechanical removal comes first: sanding, a suitable wire brush, or another controlled method lets you expose the metal progressively. Pause as the affected area grows so you can reassess whether the panel still has sound steel.
Small-spot guidance commonly mentions abrasives around P120, but the choice depends on the damage and the refinishing system. An aggressive abrasive can remove sound material unnecessarily and leave scratches that show through the finished paint. Refine the sanding marks as required by the products you plan to use.
For a localized coating repair, remove active and loose rust until the area reaches stable, clean bare steel. Shiny high points do not mean pits are free of dark scale or corrosion. If cleaning reveals thin or perforated metal, stop treating the job as a straightforward paint repair.
Rust converter is a secondary treatment if the selected product is compatible and needed; it does not replace mechanical removal of loose corrosion. Follow its instructions for preparation, application, and dwell time rather than assuming one waiting period suits every product. Remove or prepare any residue as the coating system requires before priming.
Prime, Refinish, and Protect the Hidden Side
Once the metal is clean, dry, and prepared to the coating manufacturer’s requirements, apply a compatible epoxy or anti-corrosion primer. Primer protects prepared bare steel and provides part of the foundation for refinishing. It cannot make contaminated metal or remaining rust into a sound substrate.
Any filler and surfacer work must be compatible with that primer and used in the order specified by the chosen system. Shape and refine the repair before applying color and clearcoat so sanding marks and a hard paint transition do not remain visible beside the trim. Adequate access matters here: the molding may hide part of the repair, but it will not hide every flaw at its edge.
Restore seam sealing where the original seal was damaged or removed, following the product system’s guidance on when it goes over primer and when it can be coated. Seam sealer closes a joint; it does not replace primer on bare metal. Likewise, an exterior finish cannot protect the inside of a cavity it never reaches.
If corrosion reached a panel edge, inspect and protect its reverse side and other accessible hidden surfaces. Use suitable cavity protection or underbody protection where applicable, keeping those functions distinct from the visible paint finish. Coating compatibility, cure, and handling times depend on the products used, so follow their instructions before reassembly.
Reinstall the Trim Without Recreating the Moisture Trap
Before the trim goes back, remove remaining dirt and salt from accessible concealed spaces. Flush only where the area can drain and be dried properly; otherwise, cleaning can leave more moisture behind. Dry the seam, clip openings, and cavities thoroughly before applying protective coating.
Replace failed adhesive or seam sealer where it contributed to water entry, using materials suited to the repair. Apply the specified hidden-area protection before closing off access. Keep drainage paths open rather than sealing water into a space that was designed to let it escape.
Refit sound clips carefully so the trim sits securely without scraping fresh paint. Replace damaged retainers with the correct parts rather than forcing the molding into place. A tidy exterior finish can still bubble again if the trim traps water, dirt, or salt against an unprotected edge.
Why Quick Touch-Ups Fail—and What to Check Before Calling It Done
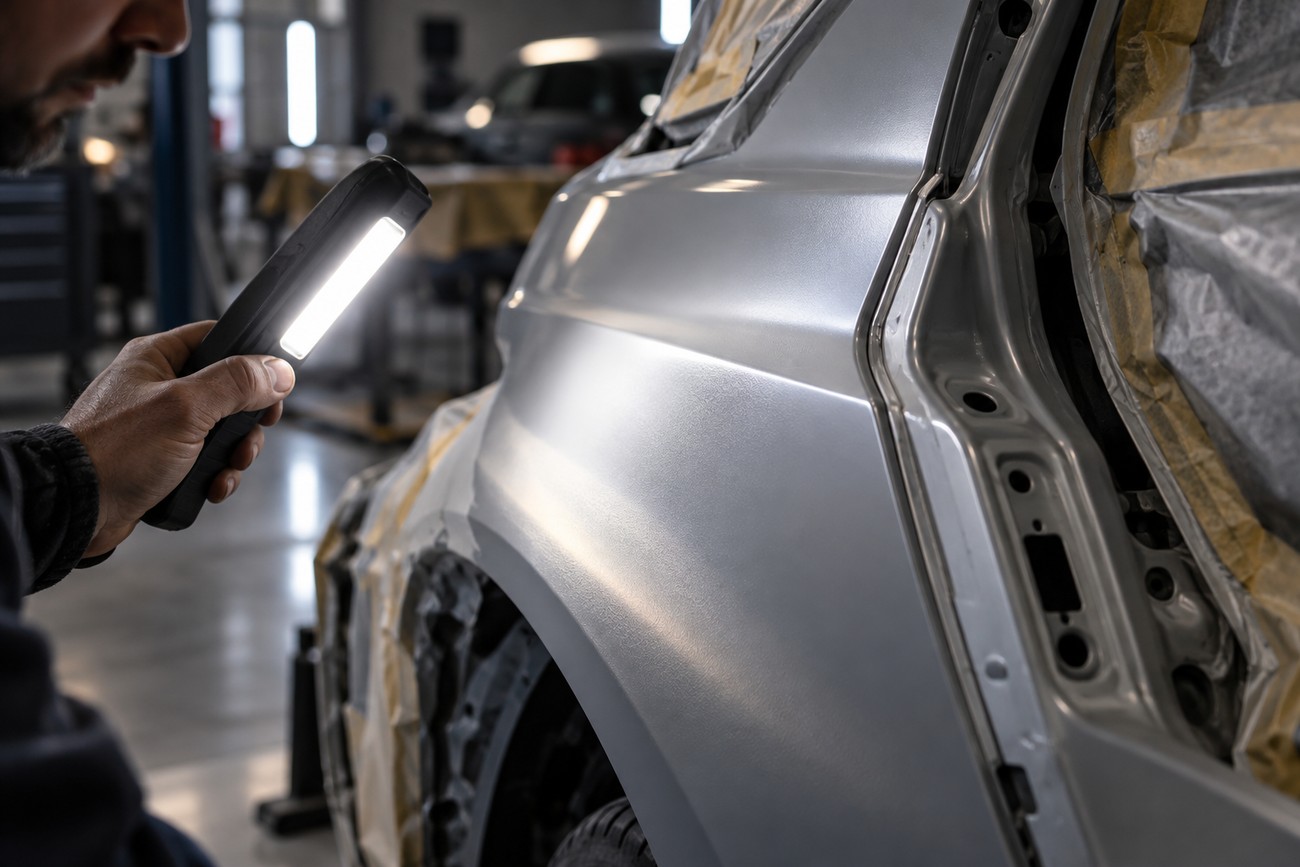
A surface-only touch-up can disguise a bubble, but it cannot establish whether corrosion continues under the trim. Paint over loose rust has an unstable base, and coating damp or contaminated metal invites poor adhesion. Missing seam protection can then let moisture reach the repaired area again.
Appearance is a separate test from corrosion control. Coarse sanding scratches, uneven surfacer, or an abrupt paint transition may remain visible after the trim is installed. Check the finish in good light before reassembly, while defects are still accessible.
Inspect the completed edge for continuous coating and restored seam protection. Confirm that the trim fits without chafing the paint, drainage paths remain open, and applicable hidden-side protection is in place. These checks improve the repair’s chances; they do not guarantee that rust elsewhere in the panel cannot appear later.
Frequently asked questions
These decisions depend on what removal and inspection reveal. A quote, replacement part choice, or aftercare instruction should match the actual repair rather than the size of the original bubble.
How much does it cost to fix rust bubbles under car trim?
There is no reliable universal price because the scope can change once the trim is removed. Access, the condition of the metal, the amount of paint blending, and any welding or section replacement all affect the work required. Have the covered area inspected before relying on an estimate for a cosmetic touch-up.
What if the trim clips break during removal?
Source the correct replacement clips or retainers for the trim before refitting it. Makeshift fasteners can loosen the molding, damage fresh paint, or hold it in a position that traps water. Check the mounting points for corrosion or damage before installing the new parts.
When can I wash or wax the repaired area?
Follow the repairer’s aftercare directions or the manufacturers’ instructions for the paint, adhesive, and sealer used. Their cure and handling requirements can differ, so a universal waiting period would be misleading. Ask which products need protection from washing pressure or wax while they finish curing.







