A sharp tick or tapping noise on a cold start is one of the most recognizable signs of an exhaust manifold leak. You may also notice an exhaust odor under the hood or inside the cabin, or see a check-engine light even though the vehicle still drives normally. As the manifold warms and the metal expands, the sound may become quieter, making the problem seem to disappear.
Diagnosis is complicated because the noise can resemble valvetrain, injector, or accessory-drive sounds, while a basic OBD-II scan may show no dedicated leak code. A small opening can still allow carbon monoxide to reach the cabin and hot exhaust gas to damage nearby components. Confirm the leak’s location before replacing a gasket or tightening fasteners.
- Symptoms That Point to an Exhaust Manifold Leak
- How to Diagnose the Leak Without Guessing
- What Can Be Mistaken for an Exhaust Manifold Leak?
- Why an OBD-II Scan May Not Set a Leak Code
- Why Exhaust Manifold Repairs Fail the Second Time
- The Risks of Driving With a Small Manifold Leak
- Frequently asked questions
- How can I check for an exhaust manifold leak without removing the manifold?
- Why can a smoke test miss an exhaust manifold leak?
- What should be checked after an exhaust manifold bolt or stud breaks?
Symptoms That Point to an Exhaust Manifold Leak
A cold-start tick is often most noticeable after the vehicle has been parked long enough for the exhaust components to cool completely. Thermal contraction can increase the gap at a gasket, flange, crack, or fastener, allowing exhaust pulses to escape with a regular tapping sound. As the manifold warms and expands, the gap may close enough for the noise to diminish.
Exhaust odor under the hood or inside the cabin is a serious warning. Carbon monoxide can enter through the HVAC air intake or openings in the vehicle body, and the absence of obvious drivability problems does not make that exposure safe. If the cabin smells of exhaust, stop using the vehicle until the source has been inspected and repaired.
Some leaks become louder during acceleration, uphill driving, or other conditions that raise exhaust pressure and move the engine on its mounts. Early in the failure, there may be no noticeable power loss because the opening is small. A soot trail around a flange, gasket, fastener, or crack is more useful than the sound alone, although soot may be difficult to see in a confined engine bay.
A check-engine light may appear if the leak affects oxygen-sensor feedback, contributes to lean readings, or is associated with misfires. It may also remain off. None of these symptoms is conclusive by itself, so consider the cold-start pattern, odor, soot location, scan data, and physical inspection together.
How to Diagnose the Leak Without Guessing

Start with a cold engine in a well-ventilated outdoor area, away from flammable materials. Listen during the first moments after startup, concentrating on the manifold, its mounting flange, and the area around the first oxygen sensor. Keep your hands away from the exhaust, avoid loose clothing around moving parts, and do not touch components as they heat up.
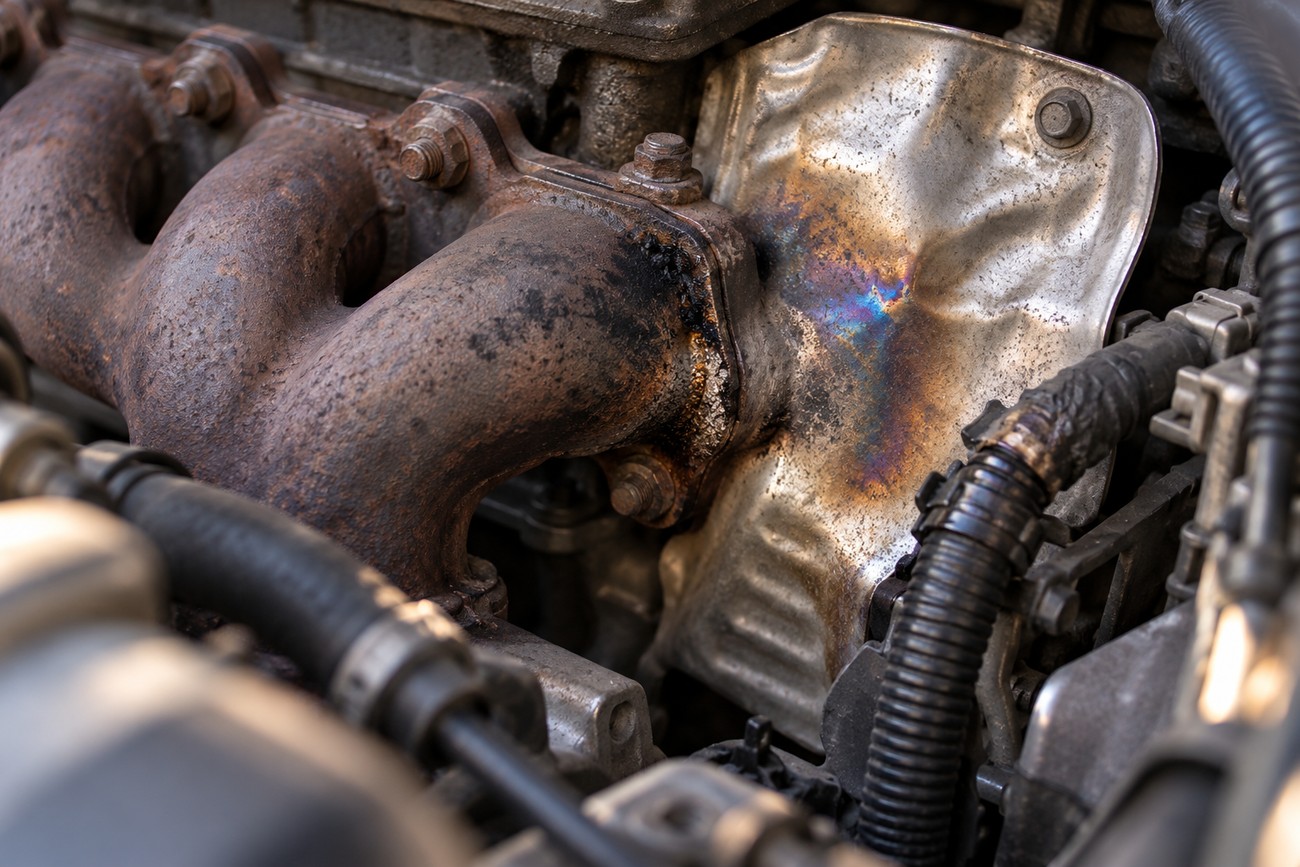
Inspect the manifold and surrounding hardware with a light. Look for black soot or a narrow trail around the gasket, flange, fastener, weld, or visible crack. Soot often shows the direction of escaping gas, but a clean-looking surface does not rule out a small leak, especially if gas is escaping toward the rear of the engine or behind a shield.
A controlled smoke test can help identify a path through a gasket or crack, provided the method and equipment are suitable for the exhaust system. Pressure-based testing may also reveal openings that are difficult to see. Interpret the result carefully because some leaks open only at a particular temperature, exhaust pressure, or amount of engine movement.
A mechanic’s stethoscope or a thermal camera can help localize the suspected area, but both are supporting tools. A stethoscope may pick up pulse noise through nearby metal, and a thermal camera may show temperature differences without proving their cause. Recheck the suspected point for soot and with controlled smoke or pressure testing.
Change the test conditions gradually: compare cold startup with warm idle, then observe the sound during carefully controlled speed changes. Avoid unnecessary exhaust exposure, and never run the engine in an enclosed garage. If the noise appears only under load, leave road testing to a technician who can manage the safety risks and conduct a controlled inspection.
What Can Be Mistaken for an Exhaust Manifold Leak?
Several mechanical noises can resemble an exhaust tick. Location, temperature dependence, soot patterns, and changes under load help separate them. The apparent source can also be misleading because exhaust noise travels through the manifold, cylinder head, shields, and connected pipes.
| Possible source | When it may appear | Most useful confirming clue | Inspection point |
|---|---|---|---|
| Exhaust manifold leak | Often loudest cold, or during acceleration and uphill driving | Ticking pulse, exhaust odor, or soot trail | Manifold, gasket, flange, fasteners, and cracks |
| Valvetrain noise | May follow engine speed and remain present as temperature changes | No exhaust soot at the suspected area | Valve cover and cylinder-head area |
| Injector noise | Regular clicking at idle and through the normal operating range | Sound is localized to an injector without exhaust odor | Injector body and fuel rail |
| Accessory-drive noise | Changes with belt speed or accessory operation | Sound follows the belt path rather than exhaust pulses | Belt, tensioner, pulleys, and accessories |
| Front-pipe or lower exhaust leak | May be louder under load and seem to come from the engine area | Soot or noise farther below the manifold | Front pipe, flex section, and lower exhaust joints |
A valvetrain or injector tick normally does not leave exhaust soot around a flange, while an accessory-drive noise follows the belt system and may change when accessories operate. These clues are useful, but sound can reflect from shields and brackets. Confirm the location rather than replacing parts based only on where the noise seems loudest.
A cracked front pipe, flex section, or lower exhaust joint can imitate a manifold problem. Exhaust odor under the hood may also result from a leak below the manifold that rises through the engine bay. Inspect the complete path from the cylinder head to the lower exhaust connections.
Compare the noise at cold start, warm idle, and under light load. A strong change between these conditions provides useful evidence about the leak’s location, especially when a gap closes as the metal expands or opens as exhaust pressure rises. The absence of noise at warm idle does not eliminate a leak elsewhere in the system.
Why an OBD-II Scan May Not Set a Leak Code
An exhaust manifold leak usually has no dedicated OBD-II fault code. The scan tool may report no fault even when the leak is audible and visible. This is why a clean scan cannot override a cold-start tick, exhaust odor, or soot around the manifold.
Outside air can enter the exhaust stream near an oxygen sensor and change the sensor’s apparent reading. The engine controller may interpret that signal as a lean condition, and the resulting corrections can contribute to lean codes or misfires. The exact effect depends on the leak’s position, size, and operating conditions.
A small leak may be too minor, too intermittent, or too far from a sensor to produce a code. Conversely, a stored lean or misfire code does not prove that the manifold is leaking, because fuel delivery, ignition, intake, and sensor faults can create similar data. Freeze-frame information and fuel-trim patterns can help, but they still require physical confirmation.
Use scan data as supporting evidence. Compare it with the cold-start sound, exhaust odor, soot pattern, and inspection results. A scan identifies how the control system is responding; it does not locate the opening in the exhaust by itself.
Why Exhaust Manifold Repairs Fail the Second Time
Exhaust manifolds operate under high thermal stress, with exhaust-gas temperatures reaching hundreds of °C under operating conditions. Repeated heating and cooling can warp the manifold, create cracks, and damage the gasket surface. A new gasket cannot reliably compensate for a cracked casting or a flange that is no longer flat.
Fasteners are part of the sealing system. Corroded or seized studs and bolts commonly break during removal on older assemblies, while damaged threads may prevent even clamping after reassembly. If a fastener cannot hold its share of the load, replacing the gasket alone may produce a short-lived repair.
Inspect the manifold for cracks, check the flange for distortion, and verify that the threads and mounting points can provide uniform clamping. The correct fastener type, torque, and tightening sequence matter. Tightening by feel can leave one area loose or distort the flange, creating another leak.
Simple retightening may help only where the fasteners have genuinely lost tension and the mating surfaces remain sound. It is often temporary or ineffective when the flange is warped, the manifold is cracked, or a fastener is damaged. Exhaust sealant has the same practical limit: it cannot restore a broken stud, stripped thread, distorted surface, or cracked manifold.
Plan for the possibility of broken hardware before starting removal. Penetrant, suitable tools, and controlled removal can reduce damage, but seized fasteners may still require extraction or thread repair. Decide the repair scope after inspecting the hardware and sealing surfaces, rather than assuming the gasket is the only failed part.
The Risks of Driving With a Small Manifold Leak
A vehicle can drive normally with a small manifold leak, but normal performance does not make the condition harmless. Exhaust odor under the hood or in the cabin indicates a possible route for carbon monoxide to enter through the air intake or body openings. Treat a strong cabin odor as a prompt safety concern, and do not use the vehicle until the source is checked.
Hot exhaust gas and soot can affect nearby wiring, hoses, and heat shields. Damage may develop gradually, especially where a leak directs heat at one fixed area. A shield that becomes loose can also change the airflow and allow more heat to reach components that were designed to remain cooler.
Prolonged operation can distort oxygen-sensor feedback and contribute to abnormal operation of the sensors and catalytic converter. A small leak may not cause immediate component failure, but continued exposure can complicate diagnosis and emissions-system performance.
Arrange an inspection promptly if the leak is worsening, the cabin smells of exhaust, visible heat damage is present, or the noise appears during operation. Stop driving and seek assistance if fumes enter the cabin or the engine develops significant misfires or other unsafe symptoms.
Frequently asked questions
How can I check for an exhaust manifold leak without removing the manifold?
Begin with a cold-start inspection. Listen near the manifold and flange, look for soot around the gasket, fasteners, and visible cracks, and compare the noise at cold start with warm idle. Check for exhaust odor without placing your face near the engine bay, and keep the vehicle outdoors with good ventilation.
If the location remains uncertain, use controlled smoke or pressure-based testing with the engine off and handle the exhaust system according to the equipment instructions. Do not touch the manifold or nearby hardware while hot. An inspection without removal can identify many leaks, but a hidden crack or load-dependent opening may still require further testing or removal.
Why can a smoke test miss an exhaust manifold leak?
A smoke test can miss a leak if the metal is cold or the applied pressure does not reproduce the condition that opens the gap. Some openings close as the manifold expands, while others appear only at a particular exhaust pressure, temperature, engine speed, or amount of engine movement.
A negative stationary test therefore does not conclusively rule out a leak. Compare smoke results with cold-start listening, soot inspection, and behavior under carefully controlled operating conditions. If the symptom appears only under load, the test must account for that condition without exposing people to exhaust fumes or hot components.
What should be checked after an exhaust manifold bolt or stud breaks?
Inspect the remaining fasteners, mounting threads, flange flatness, and the manifold itself before installing a gasket. A broken fastener may be the visible result of corrosion, uneven clamping, a warped flange, or a cracked manifold. Replacing only the gasket can leave the original sealing failure in place.
Confirm that the replacement hardware can provide even clamping and that any damaged thread or broken stud has been properly repaired. Check the tightening sequence and specified torque during reassembly. If the flange is distorted or the manifold is cracked, the repair may require machining, replacement, or additional hardware work.