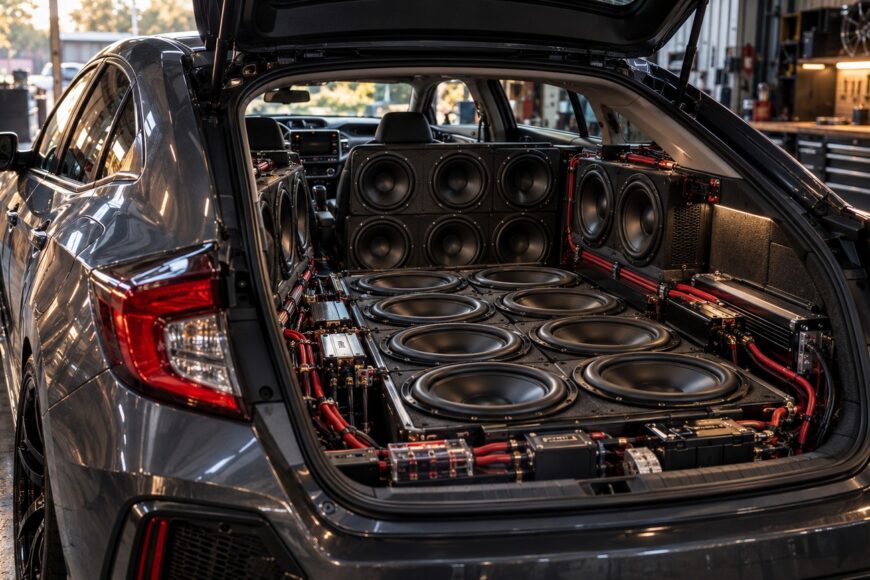
A Honda Civic fitted with 20 subwoofers would make a dramatic show build, with a visual impact that few conventional systems can match. The appeal is easy to understand: a wall of drivers suggests immense low-frequency output and turns the audio installation into part of the car’s identity.
The drivers are only one part of the project. The design also needs usable enclosure volume, electrical capacity, signal processing, secure mounting, vibration control, and a realistic plan for the space the Civic will lose. Before buying equipment, decide whether the vehicle can support the intended layout and whether the finished car still needs to carry people or cargo.
- Can 20 subwoofers actually fit in a Honda Civic?
- Design the enclosure before choosing the drivers
- Check electrical capacity, impedance, and signal first
- Build and mount it without compromising the car
- Tune for bass in the seats, not noise in the trunk
- The hidden trade-offs of a 20-subwoofer build
- When fewer subwoofers are the better build
- Frequently asked questions
- How many subwoofers do you need in a car?
- How many speakers does a Honda Civic have?
- How can you check whether your Civic’s charging system can support the build?
Can 20 subwoofers actually fit in a Honda Civic?
Twenty subwoofers may physically fit in a Civic, depending on the driver size and body style. Making those drivers work as one coherent system is a separate engineering problem. Available space and factory equipment vary by model year, body style, and trim; verify the particular vehicle before drawing the enclosure.
A 20-subwoofer Civic is a custom fabrication project, not a bolt-on installation. The enclosure may occupy the trunk, require folding or replacing the rear seats, extend into the cabin, or use a raised floor and other fabricated structures. Each approach changes access, visibility, passenger accommodation, and the path through which bass reaches the listening seats.
Twenty subwoofers are likely to consume substantial usable cargo or passenger space; the amount depends on the design. Driver baskets, magnets, enclosure walls, bracing, amplifiers, distribution hardware, and service clearances all take room. Counting only the visible cones gives an unrealistic picture of the finished installation.
Start with a physical survey of the particular Civic. Record the available areas, seat movement, hatch or trunk opening, spare-tire access, and clearance around factory wiring and safety systems. A cardboard layout or temporary mock-up can expose an impossible loading path before fabrication begins.
Design the enclosure before choosing the drivers
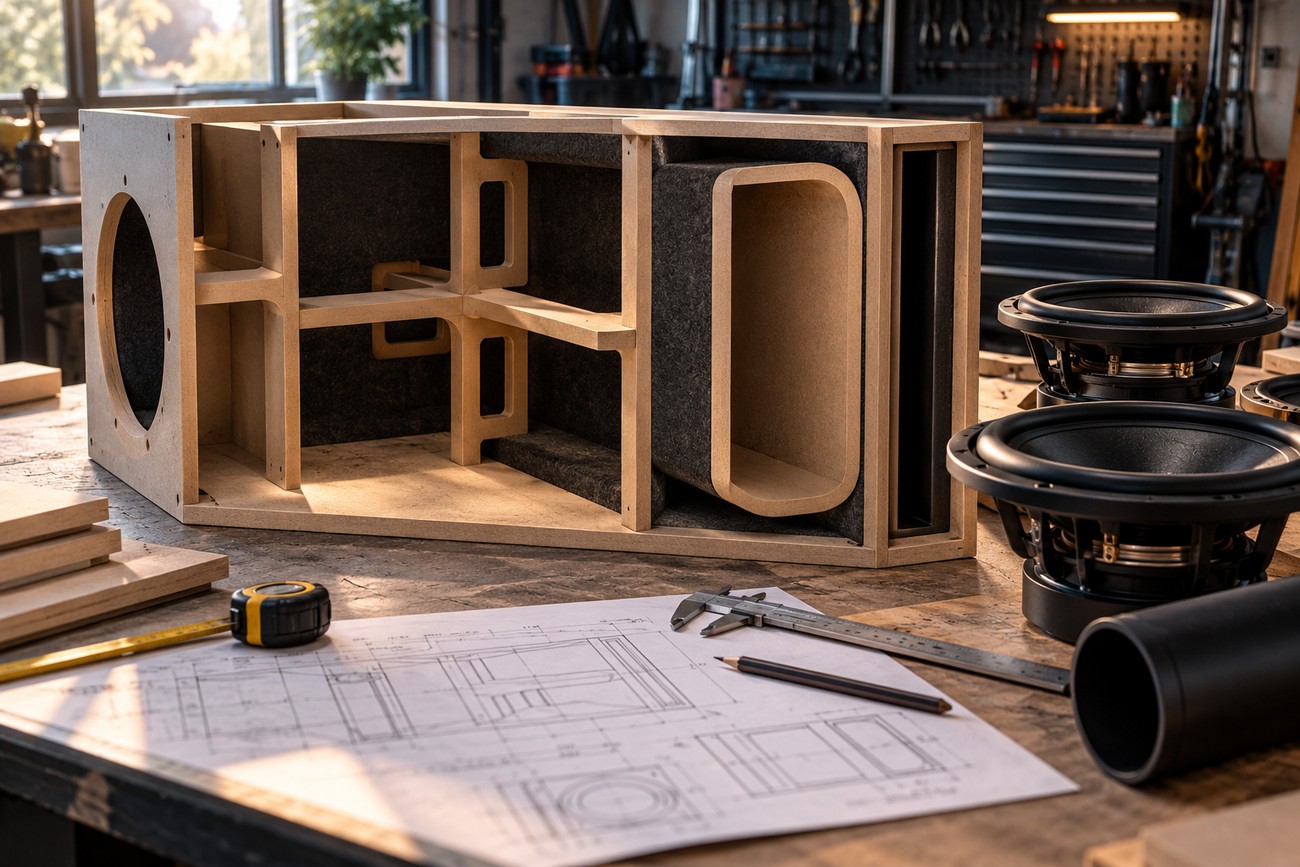
The enclosure should determine the driver selection, rather than the other way around. Each subwoofer has specified enclosure requirements, displacement, impedance options, and limits on excursion. Multiply those requirements across all 20 drivers, then account for the space taken by internal walls, bracing, ports, and the enclosure itself.
Usable acoustic volume, enclosure design, placement, and phase alignment matter more than driver count alone. A sealed, vented, bandpass, or other arrangement will have different construction and tuning requirements. The design must also provide sealed joints, suitable openings, access for installation, and enough structural support to prevent the panels from flexing.
Visible driver cutouts can make a layout look complete while leaving too little internal volume after driver displacement and bracing are included. The enclosure also needs a deliberate path for bass into the cabin; a large output source trapped behind poorly positioned panels can sound weaker at the seats than its appearance suggests.
Plan the relationship between the enclosure and the listening seats before cutting material. Bass in the trunk does not automatically translate into balanced bass in the cabin. Openings, seatbacks, parcel shelves, and cabin geometry can alter the response, while poor placement and phase alignment can create weak areas despite strong output near the enclosure.
Leave room for inspection and repair. Subwoofers eventually need access, and amplifiers, fuses, terminals, and signal interfaces need service clearance. A design that fills every available cavity may look impressive on installation day and become difficult to diagnose after a loose terminal, failed driver, or enclosure leak appears.
Check electrical capacity, impedance, and signal first
Begin by listing the selected drivers’ RMS ratings and voice-coil configurations. RMS is the sustained rated-power basis for matching equipment; peak or PMPO figures are not interchangeable with RMS. The total system plan must account for how many amplifier channels are used, how the drivers are grouped, and which loads those channels can safely support.
Four ohms is a common car-audio reference load, not a universal required load. Series and parallel wiring can produce different final impedances, and the selected amplifier must be rated for the resulting load. Verify every voice-coil option, wiring combination, and amplifier specification before connecting the system.
A factory Civic head unit is not a direct power source for a 20-subwoofer system. If the factory unit remains in place, it may feed an external amplifier through a suitable high-level interface or another compatible signal path. The interface must preserve the needed signal behavior and work with the vehicle’s factory audio architecture.
Charging capacity, wiring, and circuit protection must be evaluated and specified for the actual equipment and vehicle; no universal upgrade or cable size applies. The assessment should include the planned amplifiers, existing vehicle loads, battery and alternator condition, distribution points, grounds, and protection near power sources. High-power work deserves qualified electrical help, especially when the installation requires structural or factory-system changes.
Do not buy equipment from headline power figures alone. A system with impressive peak claims can perform poorly if its sustained ratings, impedance, signal level, and electrical support do not match. A complete power plan should exist before the enclosure and amplifier layout are finalized.
Build and mount it without compromising the car
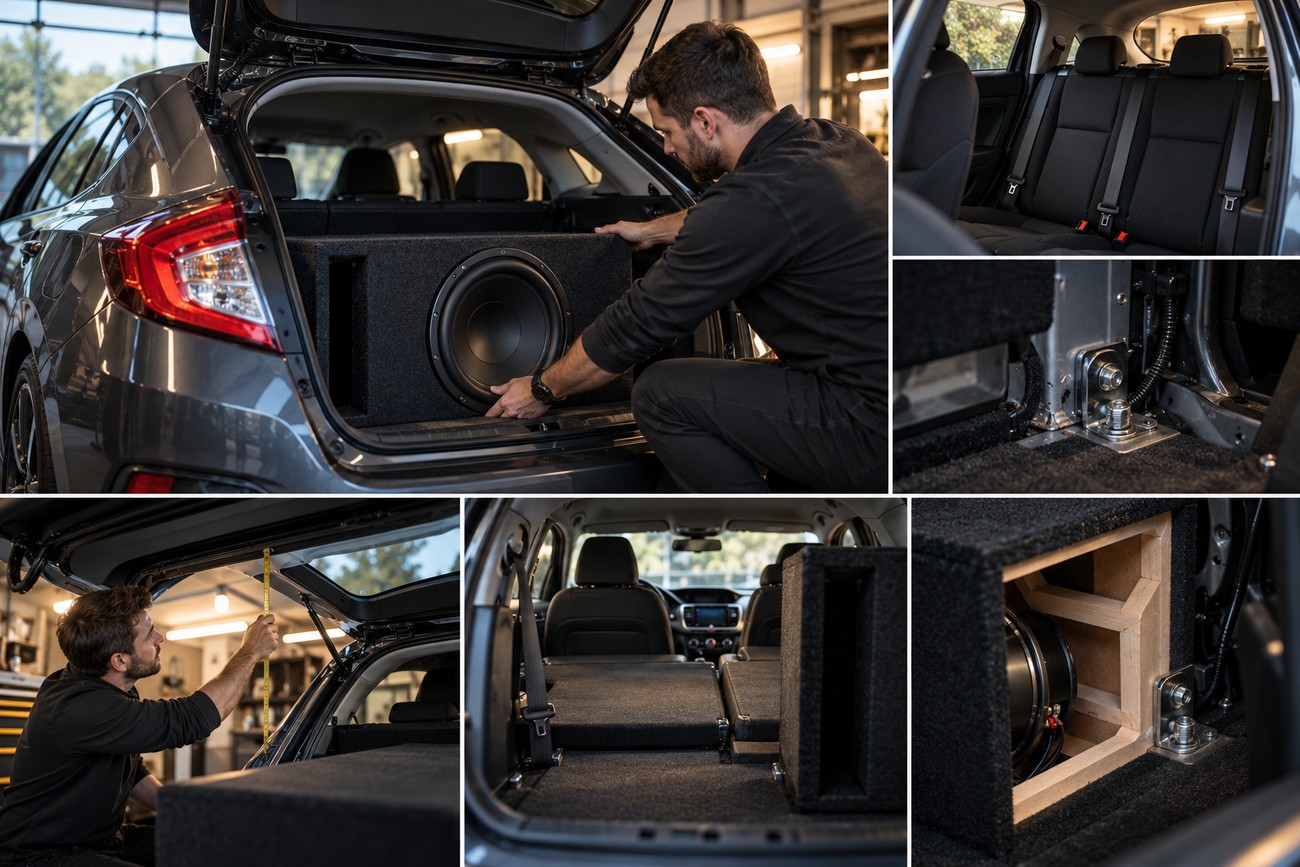
Verify the layout in the actual Civic before permanent fabrication. Test the enclosure’s footprint, driver orientation, hatch or trunk access, seat operation, and visibility. Check that the planned structure does not interfere with seat belts, airbags, emergency access, factory harnesses, ventilation, or other safety-critical vehicle systems.
Fabricate the enclosure with adequate bracing and attach it securely to suitable vehicle structure. A large assembly can shift during hard braking or a collision if it is treated like loose cargo. The attachment method must suit the particular body, preserve corrosion protection where possible, and avoid drilling or fastening through concealed wiring, fuel-system components, or other vulnerable areas.
Route power and signal wiring separately where practical, protect cables from sharp edges and abrasion, and use circuit protection appropriate to the actual electrical design. Keep terminals and distribution hardware covered against accidental contact. The vehicle-specific layout determines the correct routing, protection, and connection method.
Test each part before final trim goes in. Confirm driver polarity, amplifier operation, signal integrity, enclosure sealing, cooling, and access to fuses and service points. Temporary testing can reveal a dead driver, reversed connection, air leak, or unwanted noise while the system is still easy to reach.
Secure mounting and vibration control are essential to the result. Door panels, trim, hatch structures, and enclosure panels may rattle when exposed to strong low-frequency output. Damping can reduce rattles, but it cannot correct an unsuitable enclosure or compensate for inadequate structural support. Structural alterations and high-power electrical work should be reviewed by qualified fabrication and electrical professionals.
Tune for bass in the seats, not noise in the trunk
Begin tuning with conservative amplifier settings. Check wiring polarity, crossover behavior, gain structure, enclosure leaks, and the response at the driver’s seat and other listening positions. Increase output only after the system behaves correctly at moderate levels.
Placement and phase relationships can create cancellations or weak spots inside the cabin. Several drivers may reinforce one another in one area and partially cancel in another. A strong result near the trunk does not prove that the front seats receive the intended low-frequency output.
Listen for useful bass separately from rattling panels, buzzing trim, and mechanical noise. Secure mounting, sealed joints, and controlled damping help identify what the subwoofers are actually producing. If the enclosure volume, alignment, or placement is fundamentally unsuitable, additional damping will not rescue the design.
Make changes one at a time and document the settings. A small wiring or polarity error can make a large array sound unexpectedly weak, while excessive gain can add distortion without producing cleaner bass. The goal is controlled output at the listening seats, within the limits of the enclosure, amplifiers, and electrical system.
The hidden trade-offs of a 20-subwoofer build
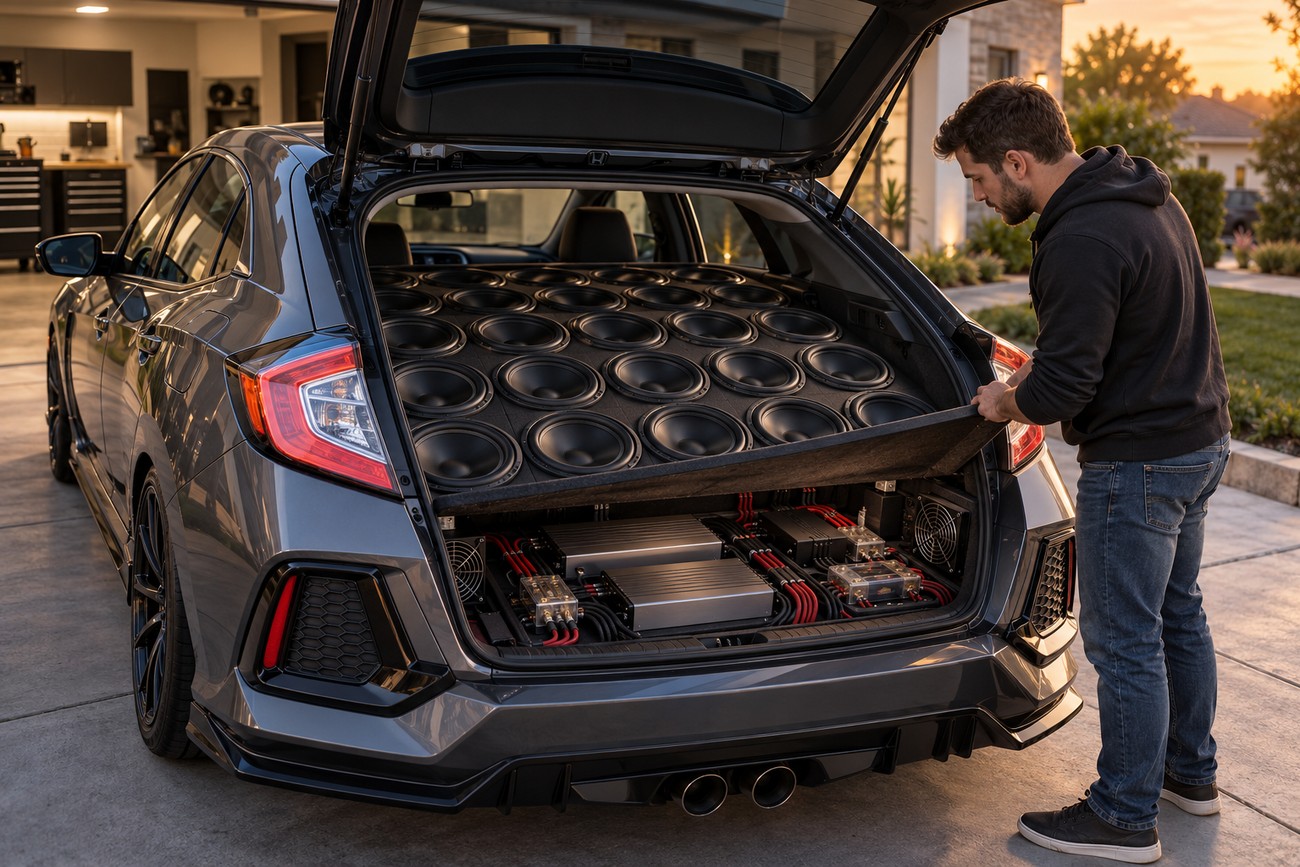
The main sacrifice is usable space. The enclosure may prevent normal use of the trunk, hatch area, rear seats, or spare-tire compartment. A raised or false floor can hide amplifiers and improve the appearance, yet it still consumes volume and may make service more involved.
The infrastructure grows with the system. Amplifiers, distribution hardware, signal interfaces, circuit protection, charging-system work, ventilation, and heavy wiring all require planned locations. Sellers may focus on the driver count while leaving these supporting requirements for the installer to solve.
Visibility and daily practicality also change. A large enclosure can obstruct rear vision, limit loading access, and make it harder to reach factory equipment. Added structure can affect how the vehicle is used even when the installation looks clean from outside.
Everyday rattles are another trade-off. Strong low-frequency energy can expose weak trim clips, loose panels, and inadequately supported enclosure sections. Damping and secure fastening can control some of these sounds, but they add fabrication time and cannot remove the need for a correct acoustic design.
When fewer subwoofers are the better build
The right driver count depends on the goal, available space, and acceptable compromise. A show build may prioritize visual impact and a large custom enclosure. A sound-pressure project may require a carefully engineered combination of drivers, enclosure, amplification, and electrical support. Daily listening places more value on usable cargo space, reliable operation, and balanced bass at the seats.
A smaller system with a properly designed enclosure and correctly matched amplification can serve daily listening more effectively than a larger array assembled around a driver count. It may preserve seating and cargo access while reducing wiring complexity, service difficulty, and opportunities for phase problems.
More drivers do not automatically produce stronger or better bass. Enclosure design and usable acoustic volume matter more than driver count alone, and poor placement or phase alignment can leave bass weak at the listening seats. For overall sound quality, careful installation of the front speakers can contribute more to an enjoyable system than adding poorly integrated rear drivers.
Choose 20 subwoofers only when the vehicle, fabrication plan, electrical system, and intended use all support that decision. If the project is meant to remain a practical Civic, reducing the array may deliver a more coherent result with fewer compromises.
Frequently asked questions
Driver count depends on the listening goal and the space available. A Civic’s factory speaker count varies by model year, body style, and trim. Charging capacity must be assessed against the equipment planned for the particular vehicle.
How many subwoofers do you need in a car?
There is no universal number. Decide from the listening goal, available enclosure and vehicle space, required output, electrical capacity, and how much cargo or passenger use you are willing to give up. For daily listening, compare a smaller, properly enclosed and powered system with the space and service demands of a 20-subwoofer build before choosing the driver count.
How many speakers does a Honda Civic have?
The factory speaker count depends on the Civic’s model year, body style, and trim. Check the owner’s documentation, factory audio equipment list, vehicle-specific service information, or physically inspect the doors, dash, rear deck, and any factory amplifier locations. Factory speaker count describes the original audio system and does not indicate how many subwoofers can be installed.
How can you check whether your Civic’s charging system can support the build?
Ask a qualified installer to inventory the vehicle’s existing electrical loads and the proposed amplifiers, signal equipment, wiring, and protection. The charging system should then be checked under load in the actual vehicle, with the battery and alternator condition considered before upgrades are purchased. The final wiring and protection plan must be specified for that equipment and Civic rather than copied from a generic diagram.