Removing a Civic’s interior is appealing because the results are immediately visible: seats, carpet, trim, insulation, and rear fittings disappear, leaving a simpler shell with less mass and fewer parts to distract you at the track. The car can feel more responsive, easier to inspect, and more purposeful.
The trade-off arrives just as quickly. A stripped Civic becomes louder, hotter, and less usable on the street, while the cage, racing seat, harnesses, fire protection, cooling equipment, and structural hardware return some of the removed weight. The useful target is a car that delivers repeatable laps and meets the applicable regulations, rather than an impressive empty-shell number.
- What a stripped Civic actually gains—and gives up
- Choose the target before removing the interior
- Build the safety cell as one system
- Fit the cockpit around the driver, not the shell
- Make the Civic survive a full track session
- Manage balance, heat, and the hidden compromises
- Use a build order that protects lap time
- Frequently asked questions
- How much does a stripped Honda Civic weigh?
- Which Civic should you stay away from for a stripped track build?
What a stripped Civic actually gains—and gives up
Removing interior components can sharpen the car’s response by reducing mass and simplifying the cockpit. It also makes the floor, wiring, mounting points, and corrosion easier to access during inspection. Those benefits depend on what is removed, what remains, and how the replacement equipment is installed.
There is no universal finished weight for a stripped Honda Civic. Generation, trim, retained systems, cage design, seat, harnesses, fire protection, cooling equipment, and other hardware all change the final figure. The mass removed from the interior is therefore only one part of the finished track car.
Noise and heat are the compromises drivers notice first. Removing carpet, sound deadening, and trim exposes more metal and allows engine, transmission, tire, and exhaust noise into the cabin. The firewall and transmission tunnel can also transmit substantially more heat, making a short session tiring and communication inside the car difficult.
The project usually expands beyond removing the rear seats. Exposed wiring, connectors, sharp edges, loose panels, and old fasteners need deliberate treatment. Once a cage and racing seat are added, the car can become impractical or extremely uncomfortable for street use, especially when entry, visibility, ventilation, and weather protection are considered.
Interior removal is also an inspection opportunity: with the carpet gone, check seams, floor repairs, corrosion, and wiring routes before covering the area with cage plates or new hardware.
Choose the target before removing the interior
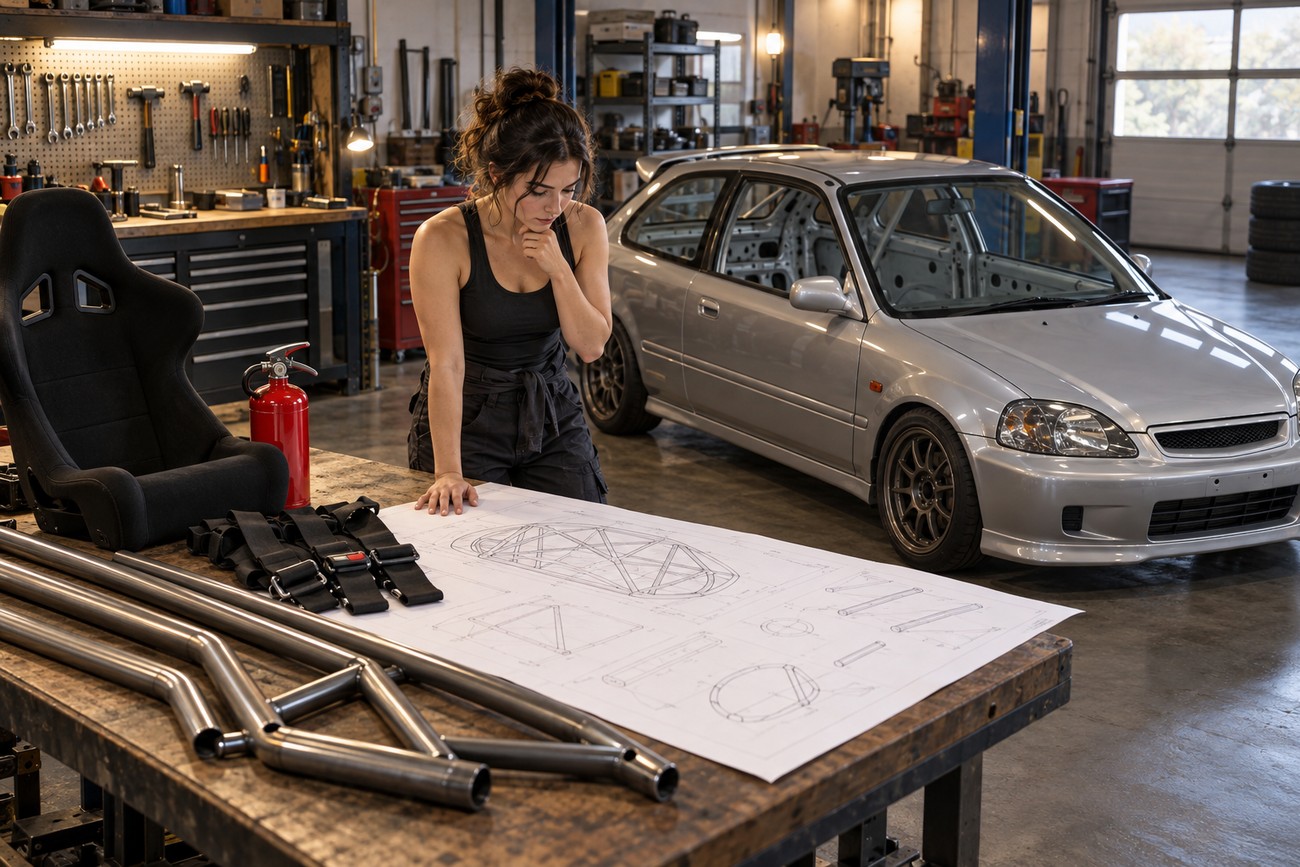
Define the series, class, circuit type, and street-use goal before buying a cage, seat, harnesses, or fire system. A car built for occasional track days may follow the organizer’s minimum requirements, while a car intended for a sanctioned class may need specific cage dimensions, materials, seat references, harness standards, and fire equipment.
The applicable series, class, sanctioning organization, or event organizer has final authority over equipment approval. FIA-oriented equipment does not automatically guarantee acceptance at every amateur track. Confirm the current rules directly with the organization that will inspect the car, preferably before any tube is ordered or factory structure is cut.
Removing ABS, air conditioning, airbags, or other factory systems is not automatically a free performance gain. ABS affects braking control, air conditioning affects driver comfort and demisting, and deleting airbags or factory restraints removes part of the manufacturer’s passive-safety system. Each change also affects wiring, warning systems, inspection requirements, and the car’s street usability.
Weigh the Civic before work begins, recording the fuel level and any major removable equipment. Weigh it again after the cage, seat, harnesses, fire protection, cooling hardware, and retained street equipment are installed. That documented comparison is more useful than a seller’s advertised weight reduction because it describes the actual car you will drive.
- Record the baseline weight and configuration.
- Check class eligibility and inspection requirements.
- List every system you intend to retain or delete.
- Confirm cage, seat, harness, helmet, FHR, and fire-system requirements.
- Plan the finished car before cutting the shell.
Build the safety cell as one system
A cage, seat, harnesses, helmet, FHR, padding, and mounting structure must be treated as one compatible safety system. Rigidly mounting the body or adding more tubing does not by itself create a safe cockpit. The driver’s position, available head clearance, belt geometry, material specification, weld quality, and rule compliance all matter together.
Under the cited SCCA requirements, the main hoop is continuous across the full cockpit width, has no kinks or flattening, and extends at least 2 inches above the helmet. Measure that clearance with the driver sitting in the final seat, wearing the actual helmet and FHR. Roof height alone is an unreliable reference.
The cited SCCA tube options are DOM or seamless SAE 1020/1025 steel, 4130, T45, or Docol R8. Alloy and non-alloy tubing must not be mixed. Tube choice, wall specification, mounting plates, gussets, weld access, and the rest of the design must follow the applicable rules rather than a generic internet cage pattern.
FIA 8853-2016 covers racing multi-point harnesses. Harness anchor points must not be attached to the seat or its brackets, and their geometry, angles, structure, and protection from abrasion must be checked against the applicable regulations. For the cited FIA-oriented application, compatible seat references include 8855-1999, 8855-2021, and 8862-2009, while harnesses must meet at least 8853/98 or 8853-2016.
Mock up the seat, helmet, and FHR before final cage welding. A tube that clears the roof can still sit dangerously close to the driver’s head or force poor belt geometry.
More cage material is not automatically safer. A poorly positioned tube can create a head-impact hazard, and excessive structure can obstruct access or complicate inspection. Correct geometry, sound welds, adequate clearances, compliant padding, and a complete restraint system determine the result.
Fit the cockpit around the driver, not the shell

Set the driving position before finalizing the cage and harness mounts. A low racing seat can lower the driver’s seating position and may slightly lower the car’s center of gravity, yet it may also reduce visibility, make entry and exit difficult, and place the helmet too close to the roof or cage. The driver must be able to see corner entry points, mirrors, flags, and traffic without lifting the shoulders away from the restraint system.
Use the actual seat, helmet, and FHR during the fitting process. Recheck the main-hoop height against the helmeted driver, then check the shoulder- and lap-belt paths at the final seating angle. A position that feels acceptable without the FHR can become cramped once the device is fitted, particularly in a narrow Civic cockpit.
Lap belts must pass across the pelvis rather than the abdomen. They must remain clear of sharp edges, exposed brackets, and surfaces that can cause abrasion. Harness anchor points must be separate from the seat and its brackets, with the structure and belt angles verified for the intended restraint system.
Stripping the cabin exposes body seams, wiring, electrical connectors, and unfinished panel edges. Secure connectors so they cannot contact belts or moving parts, protect wiring from heat and chafing, and cover cage areas near the head with padding approved for the intended use. Removing trim does not remove the need for a controlled, finished cockpit.
Make the Civic survive a full track session
Engine output is rarely the first limit on a track-prepared Civic. Brake fluid, pads, tires, oil temperature, coolant temperature, and brake temperature should be evaluated before adding power. A car that produces more power while losing pedal consistency or tire grip becomes harder to drive and less useful over a full session.
Brake and tire overheating can appear sooner than expected, especially on heavier or more powerful Civic versions. Check pedal feel from the beginning to the end of a session, inspect pad condition, and look for changes in tire behavior as heat builds. Brake fluid that works on the street may not provide adequate margin for repeated high-temperature stops.
Measure brake, oil, and coolant temperatures after a session whenever possible. A track-ready label does not reveal how a particular Civic behaves on a particular circuit, in a particular ambient temperature, with a particular tire and driver. Temperature records help separate a cooling problem from a tire-pressure problem or a driving-style issue.
Improve airflow only after identifying the actual limitation. Brake-cooling duct layouts depend on the chassis, wheel, brake package, and available airflow. Routes discussed by owners, including solutions that involve cutting body panels, are chassis-specific and are not universal instructions. The stripped interior can also increase heat exposure through the firewall and transmission tunnel, so thermal protection may be required.
Manage balance, heat, and the hidden compromises
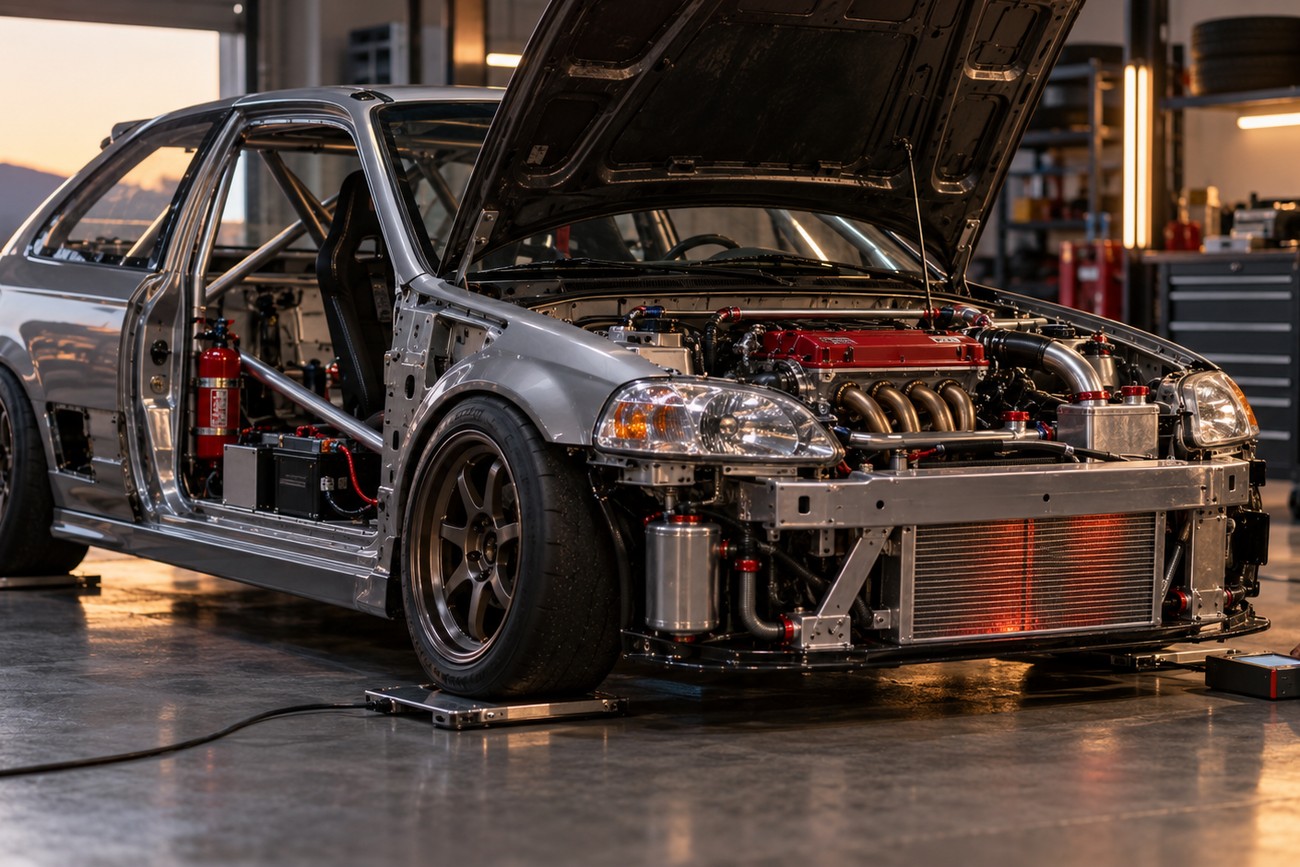
Removing the interior changes where the remaining mass sits. Battery position, spare-wheel removal, extinguisher mounting, cage plates, cooling equipment, and other relocated hardware can alter the Civic’s weight distribution. Check the result rather than assuming that every removed component improves handling in the same way.
Mount heavy items securely and keep their position consistent between events. A battery or extinguisher that shifts during a session creates a safety problem, while a relocation that changes corner weights can alter turn-in, traction, and braking balance. The finished car should be evaluated as a complete package, with its normal fuel level and track equipment.
Carpet and sound insulation also hide water paths, leaks, corrosion, and unfamiliar noises. After removal, inspect floor seams, bulkheads, drain areas, and previous repairs. Protect any exposed metal appropriately, and make sure water cannot collect around electrical connectors or cage mounting plates.
Additional heat shielding may be needed around the firewall, transmission tunnel, exhaust path, and nearby wiring. Heat management protects the driver as well as the electronics and fluids. Deleting factory airbags and belts removes a designed passive-safety system, so the replacement helmet, FHR, seat, harnesses, cage, padding, and mounting structure must work together.
Use a build order that protects lap time
A disciplined build order prevents expensive rework. Start with the shell, wiring, corrosion, crash damage, and existing repairs. Confirm the rules before purchasing the cage, harnesses, seat, or other safety hardware, then measure the actual driver in the equipment that will be used on track.
- Inspect the shell, floor, seams, wiring, and previous repairs.
- Confirm the series, class, organizer, and inspection requirements.
- Record baseline weight and the systems that will remain.
- Mock up the driver, seat, helmet, FHR, steering wheel, and pedals.
- Install the compliant cage, restraint system, padding, and fire protection.
- Validate brakes, tires, cooling, heat shielding, and fluid protection.
- Recheck fasteners, belt paths, wiring, clearances, and post-build weight.
Run the car in stages rather than treating the first completed assembly as proven. After each session, record brake feel, tire behavior, oil temperature, coolant temperature, brake temperature, and driver fatigue. A driver who is overheated, struggling to see, or fighting an awkward belt position cannot use the car’s mechanical grip consistently.
Inspect the car again after the first shakedown and after any contact with a curb or another car. Look for belt abrasion, loose wiring, fluid leaks, cracked mounts, tire rub, heat damage, and changes in brake pedal travel. These checks often reveal problems that were invisible while the car was stationary in the workshop.
A genuinely consistent track Civic is defined by usable brakes, stable temperatures, predictable tires, correct driver fit, and repeatable inspection results. An empty interior is only a starting condition. The finished car must include the safety and cooling mass it needs, and it must remain acceptable to the organizer whose rules govern the event.
Frequently asked questions
Weight, donor selection, and street use depend on the actual car and the rules that apply to it. The following answers focus on methods that remain useful across Civic generations and build styles.
How much does a stripped Honda Civic weigh?
There is no single reliable weight for a stripped Honda Civic. Generation, trim, fuel level, removed equipment, retained systems, cage, seat, harnesses, fire protection, cooling hardware, and structural changes all affect the finished figure.
Weigh the car before dismantling it, recording its configuration and fuel level. Weigh it again after the complete track package is installed, including the safety equipment and normal track fluids. A pre-build and post-build weigh-in describes the actual project far better than an advertised interior weight saving.
Which Civic should you stay away from for a stripped track build?
Avoid a donor with serious corrosion, unrepaired crash damage, compromised floor structure, or wiring that has been repeatedly modified without documentation. Also be cautious with a car for which replacement body, brake, suspension, or safety-system parts are difficult to source.
Class eligibility can matter more than the Civic generation. Before committing, inspect the shell, confirm parts support, check the organizer’s rules, and price the repairs needed to make the car reliable. A sound, eligible donor is usually a better foundation than a theoretically lighter model with structural or electrical problems.