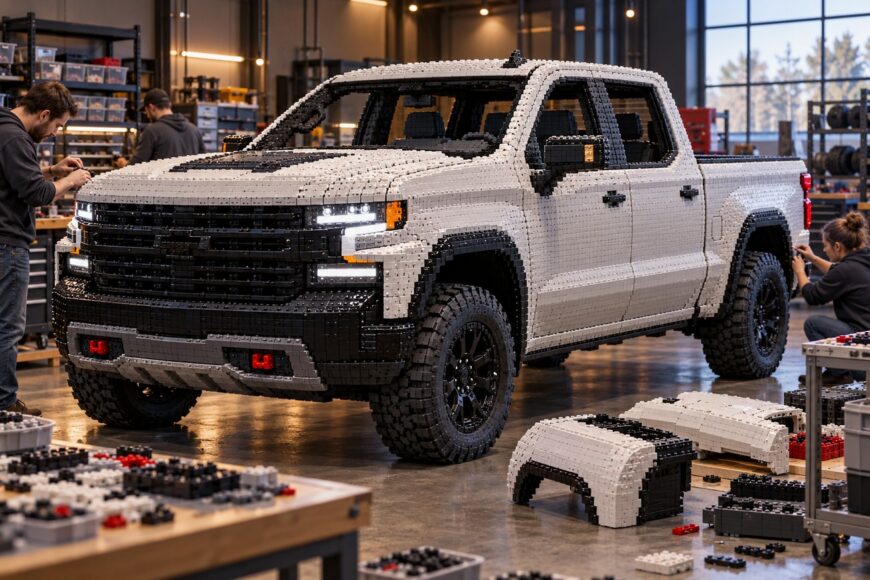
A full-size pickup silhouette can be built from LEGO pieces, but its familiar shape can hide an unfamiliar structural problem. The connections that hold a small model together face different loads when a hood, cab, and bed span several feet. The life-size Chevrolet Silverado replica built at the LEGO Model Shop shows how convincing the exterior can be—and why appearance alone tells a builder little about support, handling, or durability.
The published figures describe a substantial exhibit: hundreds of thousands of pieces, a team of builders, and a mass measured in thousands of pounds. They do not provide a construction manual. Anyone planning a comparable display would need to solve the geometry, panel support, parts supply, lighting, and transport questions for their own design before committing to the finished surfaces.
- The Silverado LEGO Built—and What the Numbers Mean
- Start With the Truck’s Geometry, Not Its First Brick
- The Structural Problem Behind the Body Panels
- Managing 334,544 Pieces Without Losing the Build
- Finishing Details and Working Lights
- Moving and Displaying a One-and-a-Half-Ton Replica
- Frequently Asked Questions
- What is the largest LEGO truck ever made?
- What should a builder test before scaling up a LEGO truck design?
- How can an exhibit team keep track of repairs after opening?
The Silverado LEGO Built—and What the Numbers Mean
The reference vehicle was a 2019 Chevrolet Silverado 1500 LT Trail Boss. The reported replica measured 20 ft × 8 ft × 6 ft, giving it the footprint and height of a full-size pickup display. Those exterior dimensions establish its visual scale; they do not describe the construction beneath its bodywork.
Published build figures list 334,544 pieces, 18 builders, and more than 2,000 person-hours at the LEGO Model Shop in Enfield, Connecticut. The piece count belongs to a one-off exhibit, not a retail LEGO set or public parts list. Likewise, the labor figure measures combined work rather than the number of hours that elapsed between starting and finishing the build.
The published weight is 3,307 lb (approximately 1,500 kg). An informal estimate of approximately 385 kg, calculated from assumed weights for individual pieces, has circulated in contrast. That calculation cannot establish this exhibit’s mass: the full mix of parts and the presence, design, and materials of any internal structure are not established by the published specifications.
For a prospective builder, these numbers are useful as a measure of project scale, not as a recipe. A different parts mix, support scheme, or method of dividing the body into modules could change the resulting inventory and handling requirements. Planning has to begin with the intended exhibit and venue.
Start With the Truck’s Geometry, Not Its First Brick
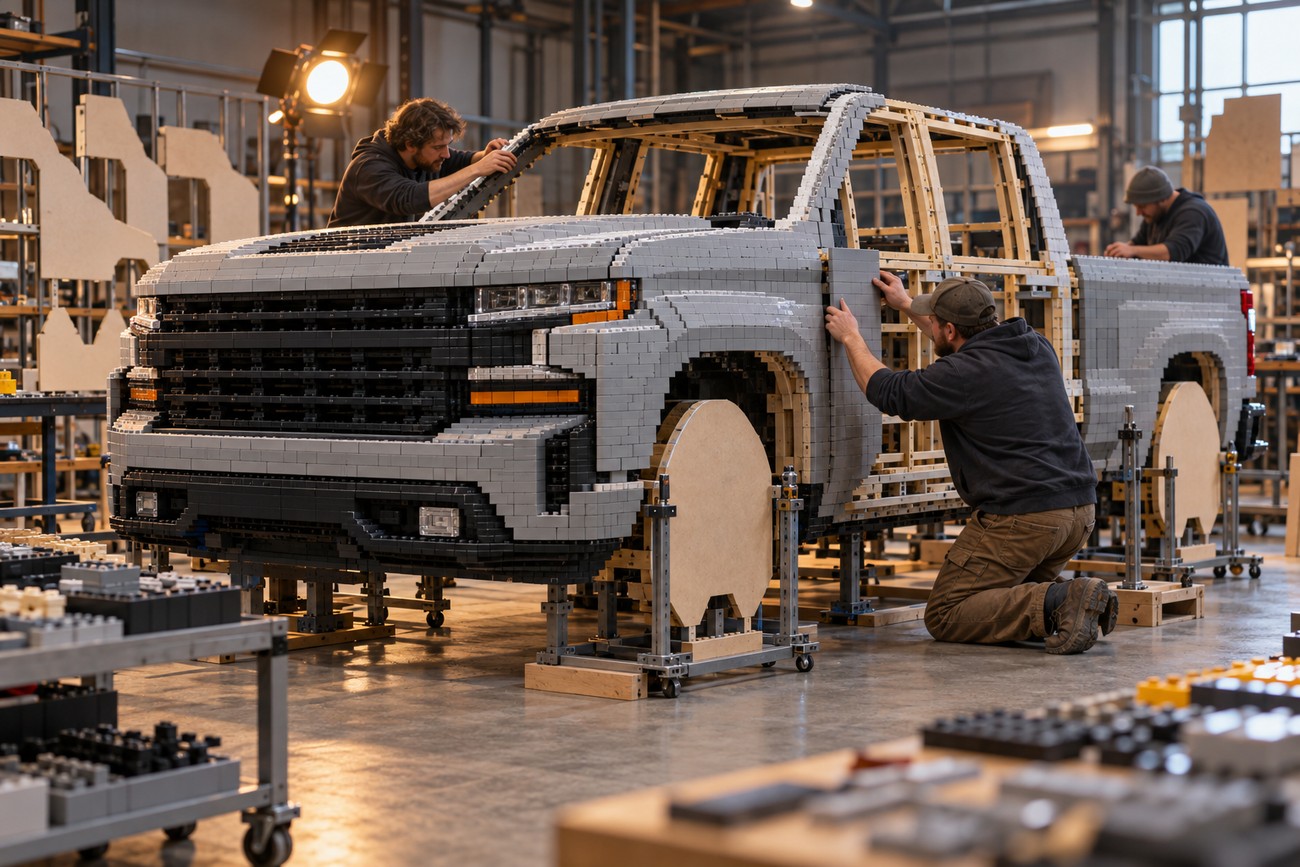
A builder aiming to reproduce the 2019 Chevrolet Silverado 1500 LT Trail Boss should first translate its major proportions onto a consistent LEGO grid. Fix reference points for the wheel centers, cab corners, bed edges, hood line, and grille before designing decorative layers. Otherwise, small changes made to individual panels can accumulate until the cab and bed no longer align.
Cross-sections help turn that outline into a buildable volume. At intervals along the truck, they can define the intended width, height, and surface angle, while temporary supports hold unfinished areas in position. These are planning methods for a large model, not a documented account of how the published exhibit was assembled.
The reported 20 ft × 8 ft × 6 ft dimensions leave plenty of room for visible errors. Wheels, wheel arches, the grille, and lights carry much of the vehicle’s identity, yet their curves and transitions must still fit a grid of discrete elements. Mocking up these features early helps identify where wedges, plates, and layered offsets will need adjustment.
Exterior accuracy also has a clear limit as evidence. A body that matches the pickup’s outline does not establish accurate internal components or load-bearing capacity. A convincing wheel arch, for example, says nothing about whether the surrounding panel can support weight or survive a move.
The Structural Problem Behind the Body Panels
Broad, relatively flat LEGO surfaces can sag across long spans or begin to separate along their seams. A full-size side panel needs support at planned intervals, particularly around openings and changes in direction. Building upward without those support points and temporary bracing risks locking an alignment error into a large area of finished bodywork.
Seam layout matters as much as the face of the panel. Long, continuous joints create a line where sections may part under handling loads; alternating seam directions and tying layers together can reduce that vulnerability. The connection strategy should be settled before a builder commits to repeating the same surface pattern across the truck.
A representative panel mock-up should be held at its intended span and checked for sag and seam separation before its visible finish is finalized. A joint that looks aligned on a workbench may behave differently once supported only at the points available in the full build.
The exhibit’s published weight of 3,307 lb (approximately 1,500 kg) makes load paths a serious design concern, yet its specifications do not establish the presence, design, or materials of any concealed reinforcement. A builder cannot infer a particular frame from photographs or assume ordinary LEGO connections will carry every load. Supports, attachment points, and safe handling loads would need independent design and assessment.
Full-size appearance does not make the replica a passenger-carrying truck. Its working headlights are a display feature; no published evidence here establishes a drivetrain, steering, brakes, or roadworthiness. Matching a vehicle’s outside dimensions offers no assurance that its structure can take passengers, towing forces, or road impacts.
Managing 334,544 Pieces Without Losing the Build
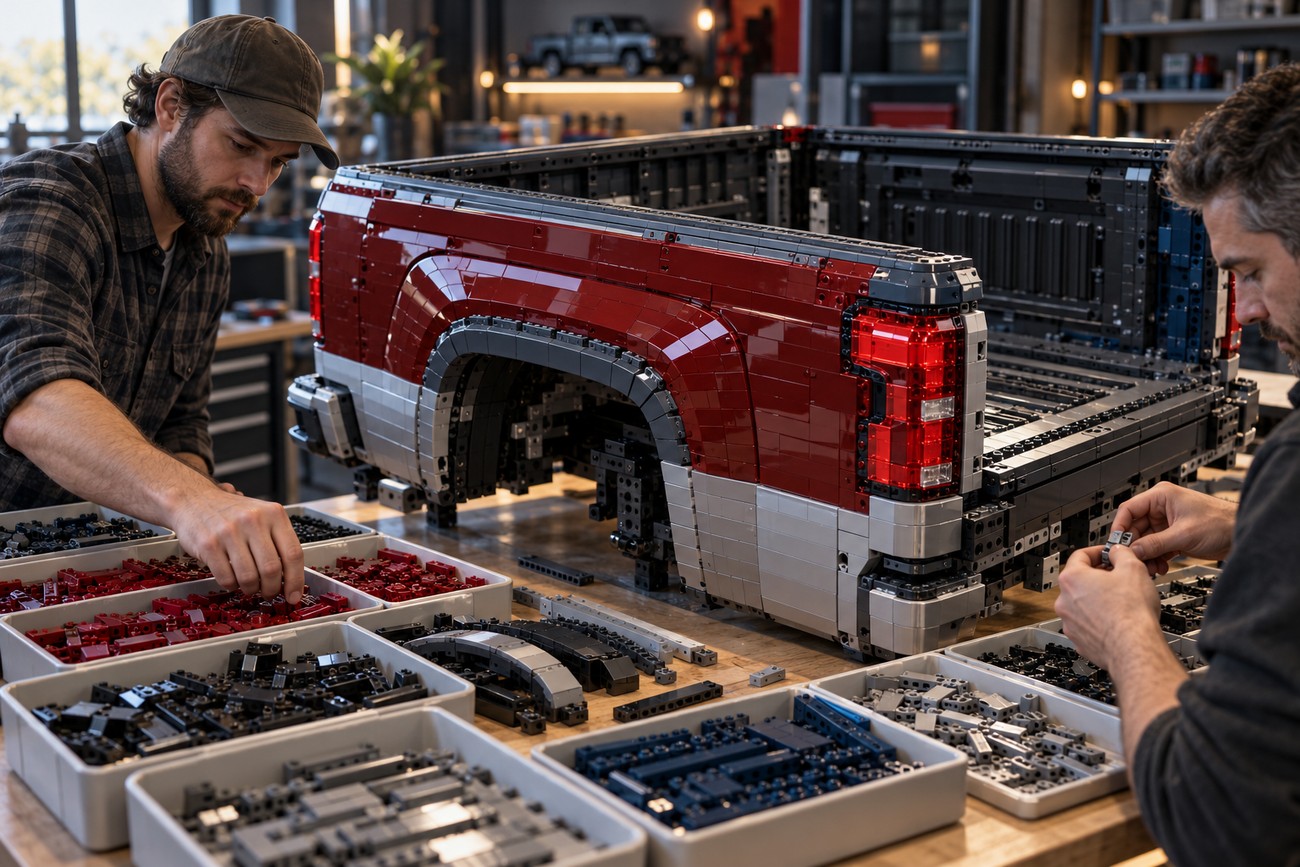
A visual design becomes manageable only when it can be translated into an inventory by element and color. That inventory should distinguish structural pieces from visible finishes and allow for damaged parts and later repairs. An approximate total is a poor purchasing guide when a missing shape or color can halt work on an otherwise well-stocked panel.
At the scale of the published build—334,544 pieces assembled by 18 builders—sorting and retrieval become production tasks. Parts need locations that remain intelligible when work shifts between people or modules. Keeping visibly similar elements separate also helps prevent a small substitution from disrupting the fit of repeated sections.
Rare colors and large visible elements deserve particular attention in a repair allowance. A common hidden piece may be easy to replace, while a prominent panel cannot always accept a different color or shape without changing the truck’s appearance. Recording where those harder-to-source elements are used makes future repairs more predictable.
The more than 2,000 person-hours reported for the LEGO Model Shop build in Enfield, Connecticut should not be read as an assembly schedule for another team. Calendar time also depends on design revisions, parts availability, sorting, and access to the workspace. The published count describes a one-off exhibit, not a retail LEGO set with instructions and a ready-made parts list.
Finishing Details and Working Lights
The details that make a block-built body read as a 2019 Chevrolet Silverado 1500 LT Trail Boss are concentrated around its face and profile. Grille proportions, light positions, wheel arches, and the transition from hood to cab do more recognition work than a broad central panel. They also demand careful fitting because small offsets are conspicuous beside long, straight edges.
Mirrors and bumpers complete the silhouette, but their projecting positions make them vulnerable to contact. Where practical, a display design should allow these pieces to be inspected and repaired without dismantling a large body section. Surface layers can conceal attachment points while still leaving a planned route for maintenance.
The published replica has working headlights as a display feature. That detail does not establish a complete vehicle electrical system, a drivetrain, steering, brakes, or roadworthiness. Light behind a model headlamp is useful for presentation, but it should not be mistaken for evidence of vehicle function.
For a new lighted exhibit, wiring would need protection from pinching and contact during assembly and movement. Access to connections and light units should be planned before the surrounding bodywork closes over them. The published specifications do not identify the original model’s circuit or power source, so those choices remain a separate design task.
Moving and Displaying a One-and-a-Half-Ton Replica
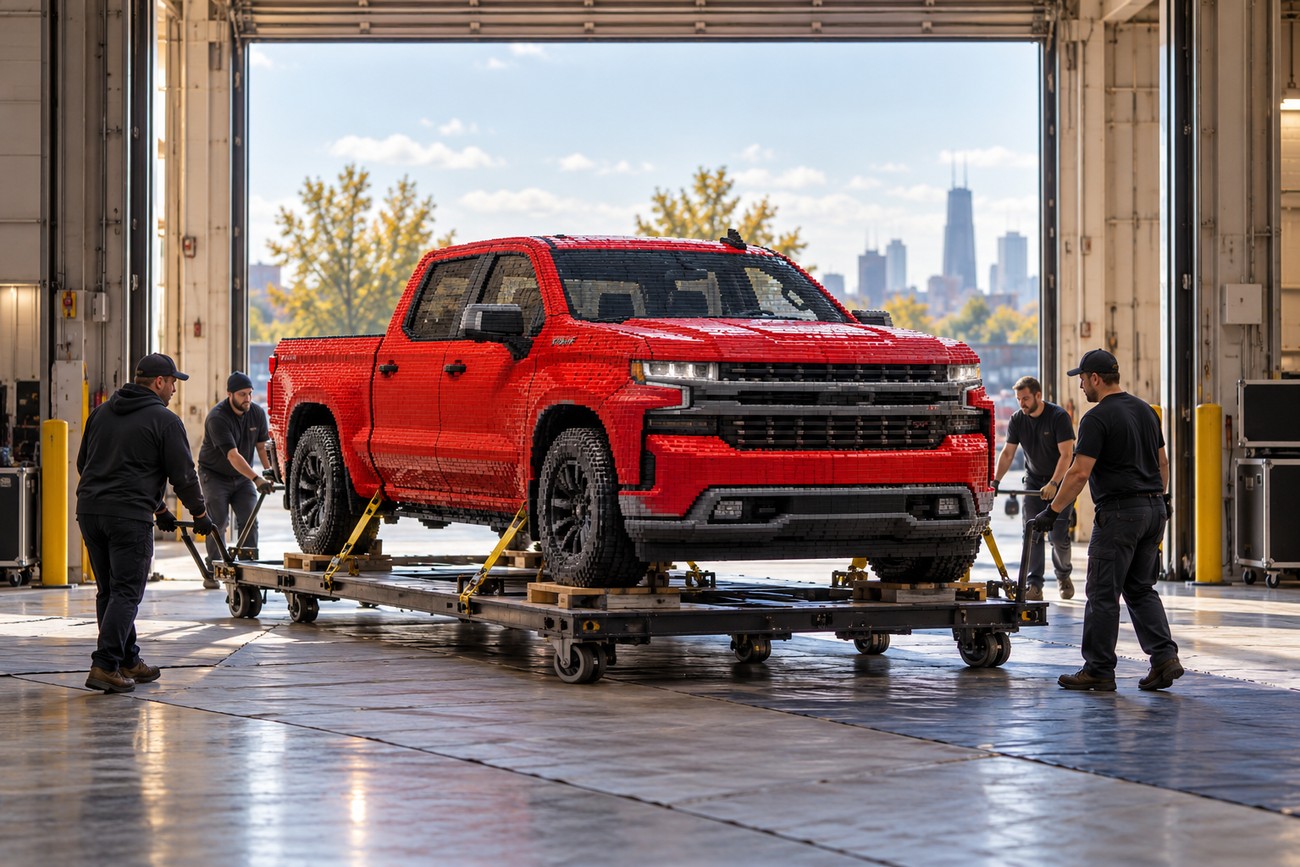
Transport should shape the build before its outer dimensions are fixed. At 20 ft × 8 ft × 6 ft and 3,307 lb (approximately 1,500 kg), the published replica illustrates why a route must be checked from the workspace to the display position. Door and loading openings, overhead clearance, turning space, and the capacity of each floor along that route all matter.
Total weight alone is insufficient for a floor assessment. Loads may be concentrated beneath contact points, temporary supports, or handling equipment, with consequences for both the structure and the floor finish. The presence, design, and materials of any concealed reinforcement in the original exhibit are not established by its published specifications; another team would need to determine safe lift and support points for its own build.
Projecting mirrors, bumpers, and trim can be damaged even when the main body clears an opening. A handling plan should account for the full swept path around corners and identify components that need protection or removal. Checking only the truck’s nominal width can leave too little clearance where a projection passes a doorframe.
Once installed, the model still needs controlled visitor access. A barrier can reduce accidental contact with fragile projections, while an inspection route lets staff reach damaged areas without moving the exhibit. The display plan should also leave space for repairs and for an unobstructed evacuation route.
Heat and sustained sunlight introduce slower risks, including plastic deformation and color change. Placement away from strong heat and direct sun, followed by regular checks of loaded panels and exposed details, can help preserve the display. Those conditions are easier to manage when they are considered with the venue layout rather than after the truck is in place.
Frequently Asked Questions
The Silverado’s published specifications answer questions about this particular exhibit. Broader record claims and practical decisions for a new build require their own checks.
What is the largest LEGO truck ever made?
The Silverado replica’s published dimensions, piece count, and weight do not by themselves establish an all-category world record. A defensible “largest” claim would need a defined truck category, a specified measure of size, and a verified comparison with other eligible builds. Without those conditions, it is more accurate to describe this as a full-size, one-off Silverado exhibit.
What should a builder test before scaling up a LEGO truck design?
Build a small prototype of a representative wheel arch or panel joint at the intended thickness and support spacing. Check its alignment, then hold it at the span planned for the finished body and look for sag or seam movement. Revise the connection before repeating that detail across multiple panels; an error that is easy to correct in one prototype becomes costly when it is built into the whole truck.
How can an exhibit team keep track of repairs after opening?
Use a location-based damage log with photographs, dates, and element identifiers for each repair. Mark the affected area on a simple body map so the team can tell whether the same joint keeps failing or a visitor damaged an isolated projection. Repeated failures point toward a support or connection problem worth investigating, rather than another like-for-like replacement.